"My build size is too large..." "Memory management is so complicated..." "I want to deliver downloadable content..."—the troubles of a project with a growing pile of assets almost always boil down to these three.
Addressables is Unity's official asset management system. Built on top of AssetBundles, it automates dependency management, memory management, and switching between load sources. This article covers everything from getting set up, to writing loads and unloads, to detecting memory leaks, to wiring it into an actual boss fight.
Tested with: Unity 2022.3 LTS / Unity 6

What You'll Learn
- How Addressables differs from AssetBundles — it's an automation layer for the tedious parts
- The two ways to make an asset Addressable (Inspector / AssetReference)
- Different ways to load assets (callbacks, async/await, labels, InstantiateAsync)
- Unloading and detecting memory leaks (Release, Event Viewer)
- Choosing the right Play Mode and best practices
Prerequisite: If you're wondering why direct references or Resources aren't good enough in the first place, see the Moving On from Resources guide, which covers the fundamentals of asset management.
How It Differs from AssetBundles
AssetBundles are a low-level mechanism for compressing assets to reduce build size and for delivering downloadable content. However, using AssetBundles directly requires a lot of implementation work: managing dependencies, managing memory, switching between load sources, and more.
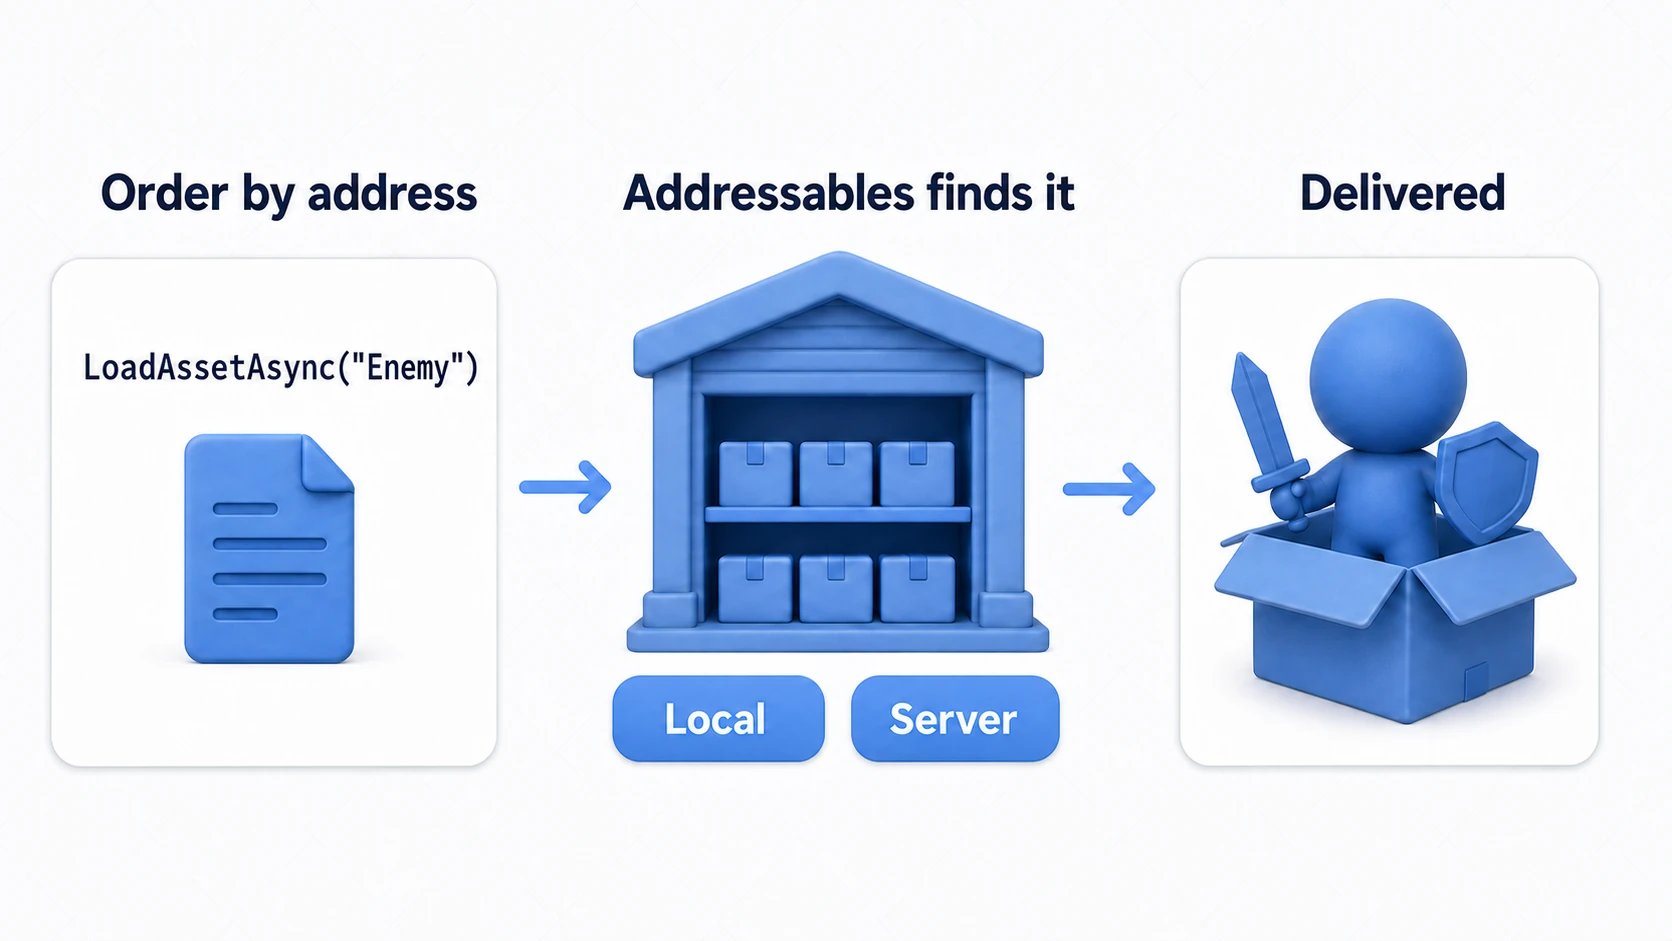
Addressables uses AssetBundles internally, but automates all of this complex management. As a developer, you simply assign an "address" to an asset and load it by that address.
Installation
Addressables can be installed from the Package Manager.
- From the Unity Editor menu, select "Window" → "Package Manager"
- In the dropdown menu at the top left, select "Unity Registry"
- Find "Addressables" in the list and click it
- Click the "Install" button at the bottom right
Once installation is complete, an "Addressable" checkbox will appear in the Inspector for your assets.
Making Assets Addressable
Method 1: Enable Addressable in the Inspector
The easiest way is to check the "Addressable" checkbox in the asset's Inspector.
- Select the asset in the Project window
- Check the "Addressable" checkbox in the Inspector
- Set the address name (defaults to the asset's path)
Method 2: Assign to an AssetReference Field
You can also make an asset Addressable by adding an AssetReference field to a MonoBehaviour or ScriptableObject and assigning the asset in the Inspector.
using UnityEngine;
using UnityEngine.AddressableAssets;

public class Example : MonoBehaviour
{
    public AssetReference assetReference;
}
Loading Assets
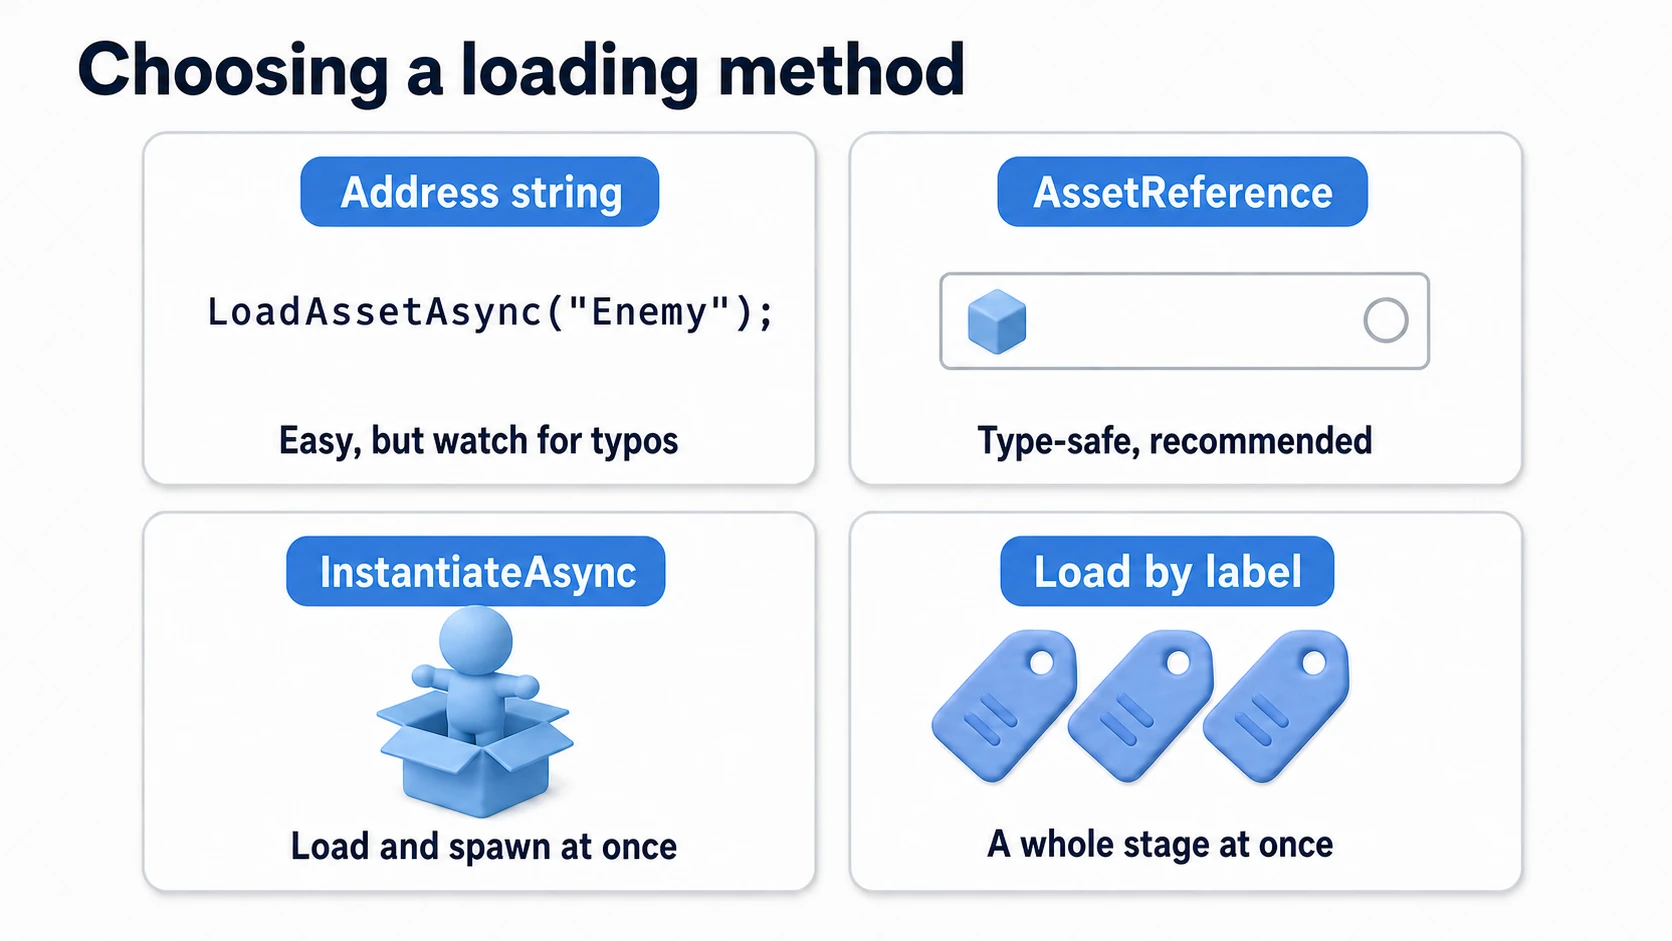
There are several ways to write a load. Let's start with the big picture—remember "type-safe AssetReference by default, labels for loading in bulk" and the individual methods below won't trip you up.
Method 1: Load by Address String (Completed Callback)
using UnityEngine;
using UnityEngine.AddressableAssets;
using UnityEngine.ResourceManagement.AsyncOperations;

public class LoadByAddress : MonoBehaviour
{
    private AsyncOperationHandle<GameObject> handle;

    void Start()
    {
        handle = Addressables.LoadAssetAsync<GameObject>("Enemy");
        handle.Completed += OnLoadCompleted;
    }

    void OnLoadCompleted(AsyncOperationHandle<GameObject> h)
    {
        if (h.Status == AsyncOperationStatus.Succeeded)
        {
            GameObject prefab = h.Result;
            Instantiate(prefab);
        }
        else
        {
            Debug.LogError($"Failed to load asset: {h.OperationException}");
        }
    }

    void OnDestroy()
    {
        // Always return the handle you borrowed (forgetting = memory leak)
        if (handle.IsValid())
            Addressables.Release(handle);
    }
}
Important: When you
Instantiatefrom a prefab borrowed viaLoadAssetAsync, the instance's contents (meshes, textures) are kept alive by the handle. CallingReleasewhile instances are still alive risks yanking the assets out from under a live enemy and breaking its visuals. The iron rule: release only after all instances have been destroyed. If you want creation and release managed one-to-one automatically, theInstantiateAsync+ReleaseInstancepair below is the safe option.
Method 1.5: Load with async/await (Recommended)
using UnityEngine;
using UnityEngine.AddressableAssets;
using UnityEngine.ResourceManagement.AsyncOperations;

public class LoadByAddressAsync : MonoBehaviour
{
    private AsyncOperationHandle<GameObject> handle;

    async void Start()
    {
        try
        {
            handle = Addressables.LoadAssetAsync<GameObject>("Enemy");
            GameObject prefab = await handle.Task;
            Instantiate(prefab);
        }
        catch (System.Exception e)
        {
            Debug.LogError($"Failed to load asset: {e.Message}");
        }
    }

    void OnDestroy()
    {
        if (handle.IsValid())
            Addressables.Release(handle);
    }
}
Why async/await: It avoids callback hell and lets you write error handling intuitively with try-catch.
Caution:
async voidis a fire-and-forget pattern, so exceptions do not propagate to the caller. For serious projects, consider using UniTask or Unity 6's Awaitable.
Method 2: Load via AssetReference
using UnityEngine;
using UnityEngine.AddressableAssets;
using UnityEngine.ResourceManagement.AsyncOperations;

public class LoadByReference : MonoBehaviour
{
    public AssetReference assetReference;

    void Start()
    {
        assetReference.LoadAssetAsync<GameObject>().Completed += OnLoadCompleted;
    }

    void OnLoadCompleted(AsyncOperationHandle<GameObject> handle)
    {
        if (handle.Status == AsyncOperationStatus.Succeeded)
        {
            GameObject prefab = handle.Result;
            Instantiate(prefab);
        }
    }

    void OnDestroy()
    {
        assetReference.ReleaseAsset();
    }
}
Method 2.5: Load and Spawn in One Step with InstantiateAsync
With InstantiateAsync, you can load and instantiate an asset in a single step.
using UnityEngine;
using UnityEngine.AddressableAssets;
using UnityEngine.ResourceManagement.AsyncOperations;

public class InstantiateExample : MonoBehaviour
{
    public AssetReference assetReference;
    private AsyncOperationHandle<GameObject> handle;
    private GameObject spawnedObject;

    void Start()
    {
        handle = assetReference.InstantiateAsync(transform.position, Quaternion.identity);
        handle.Completed += OnInstantiateCompleted;
    }

    void OnInstantiateCompleted(AsyncOperationHandle<GameObject> op)
    {
        if (op.Status == AsyncOperationStatus.Succeeded)
        {
            spawnedObject = op.Result;
            Debug.Log($"Instantiated: {spawnedObject.name}");
        }
    }

    void OnDestroy()
    {
        // Objects created with InstantiateAsync are unloaded with ReleaseInstance
        // This also destroys the spawned GameObject
        if (handle.IsValid())
            Addressables.ReleaseInstance(handle);
    }
}
Lifecycle caution: Calling
ReleaseInstanceautomatically destroys the spawned GameObject as well. Even if you manuallyDestroythe object, make sure to release the handle withReleaseInstance.
Method 3: Load by Label
You can also assign the same label to multiple assets and load them all at once by that label.
using UnityEngine;
using UnityEngine.AddressableAssets;
using UnityEngine.ResourceManagement.AsyncOperations;
using System.Collections.Generic;

public class LoadByLabel : MonoBehaviour
{
    private List<GameObject> loadedPrefabs = new List<GameObject>();
    private AsyncOperationHandle<IList<GameObject>> handle;

    void Start()
    {
        handle = Addressables.LoadAssetsAsync<GameObject>(
            "enemies",
            prefab => {
                // Called each time an individual asset is loaded
                loadedPrefabs.Add(prefab);
                Debug.Log($"Loaded: {prefab.name}");
            }
        );
        handle.Completed += OnAllLoaded;
    }

    void OnAllLoaded(AsyncOperationHandle<IList<GameObject>> op)
    {
        if (op.Status == AsyncOperationStatus.Succeeded)
        {
            Debug.Log($"All {op.Result.Count} assets loaded.");
        }
    }

    void OnDestroy()
    {
        Addressables.Release(handle);
    }
}
Label naming convention: Lowercase kebab-case or snake_case is recommended for label names (e.g.
stage-1-assets,enemy_prefabs). Avoid uppercase letters and spaces.
Unloading Assets
Assets loaded through Addressables must always be unloaded. If you don't, you'll get memory leaks.
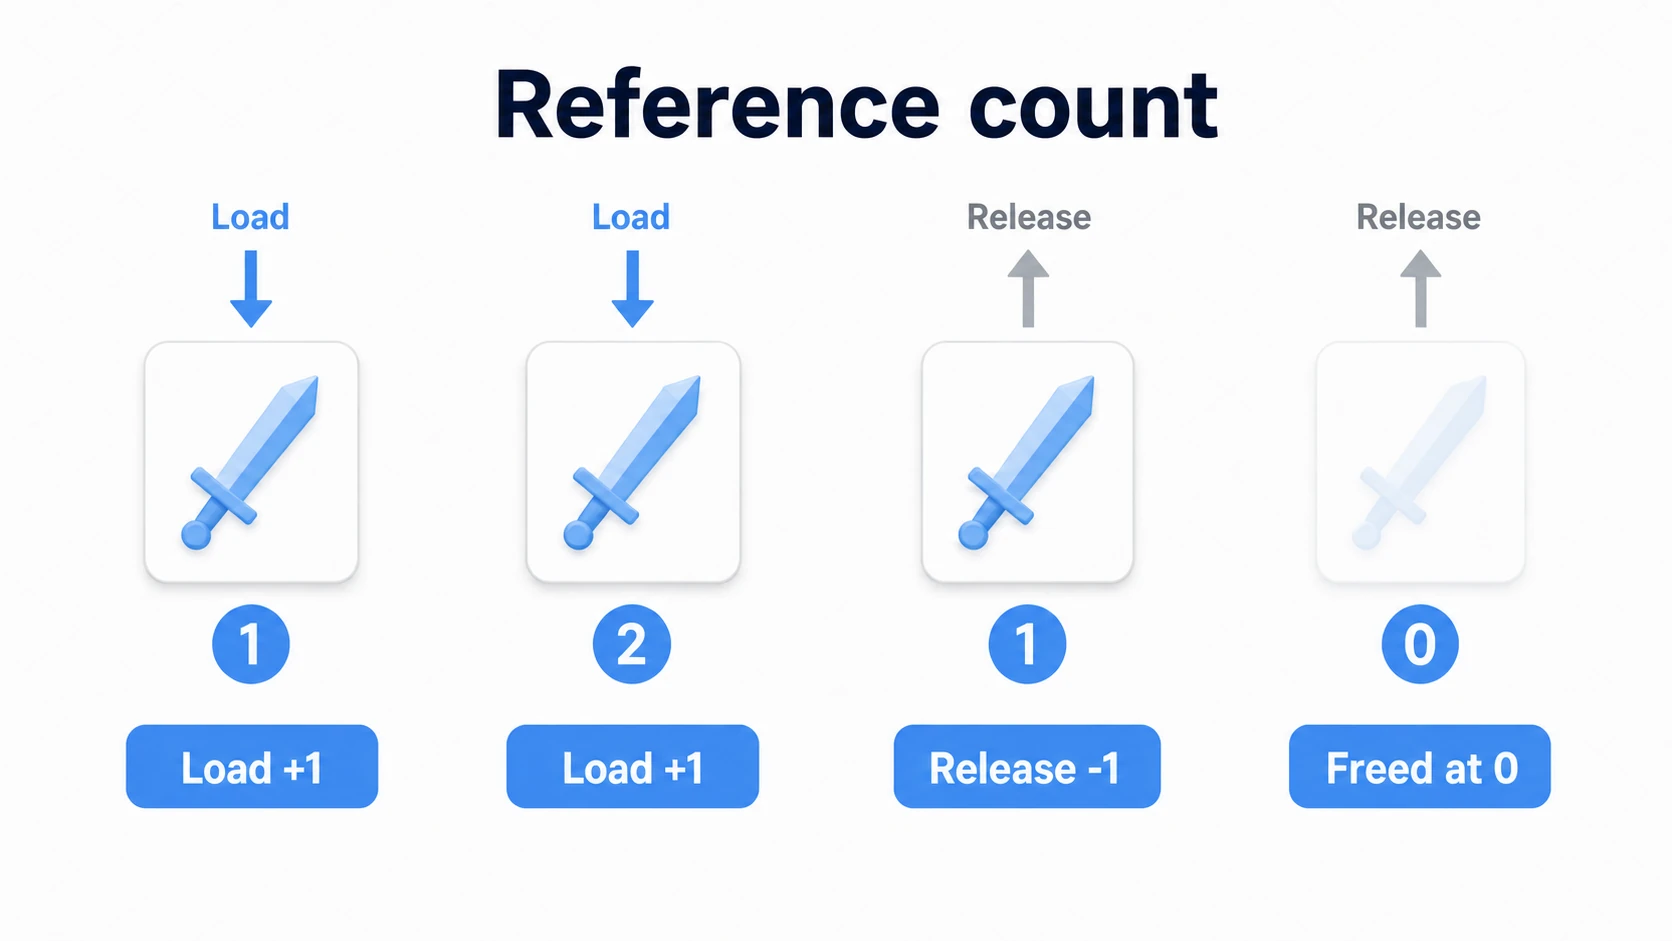
Under the hood, a reference count is at work. A load adds +1, a release subtracts -1, and the moment it hits 0 the asset can be dropped from memory—it's like a library's lending card.
// When loaded by address string
Addressables.Release(handle);

// When loaded via AssetReference
assetReference.ReleaseAsset();
Choosing a Play Mode
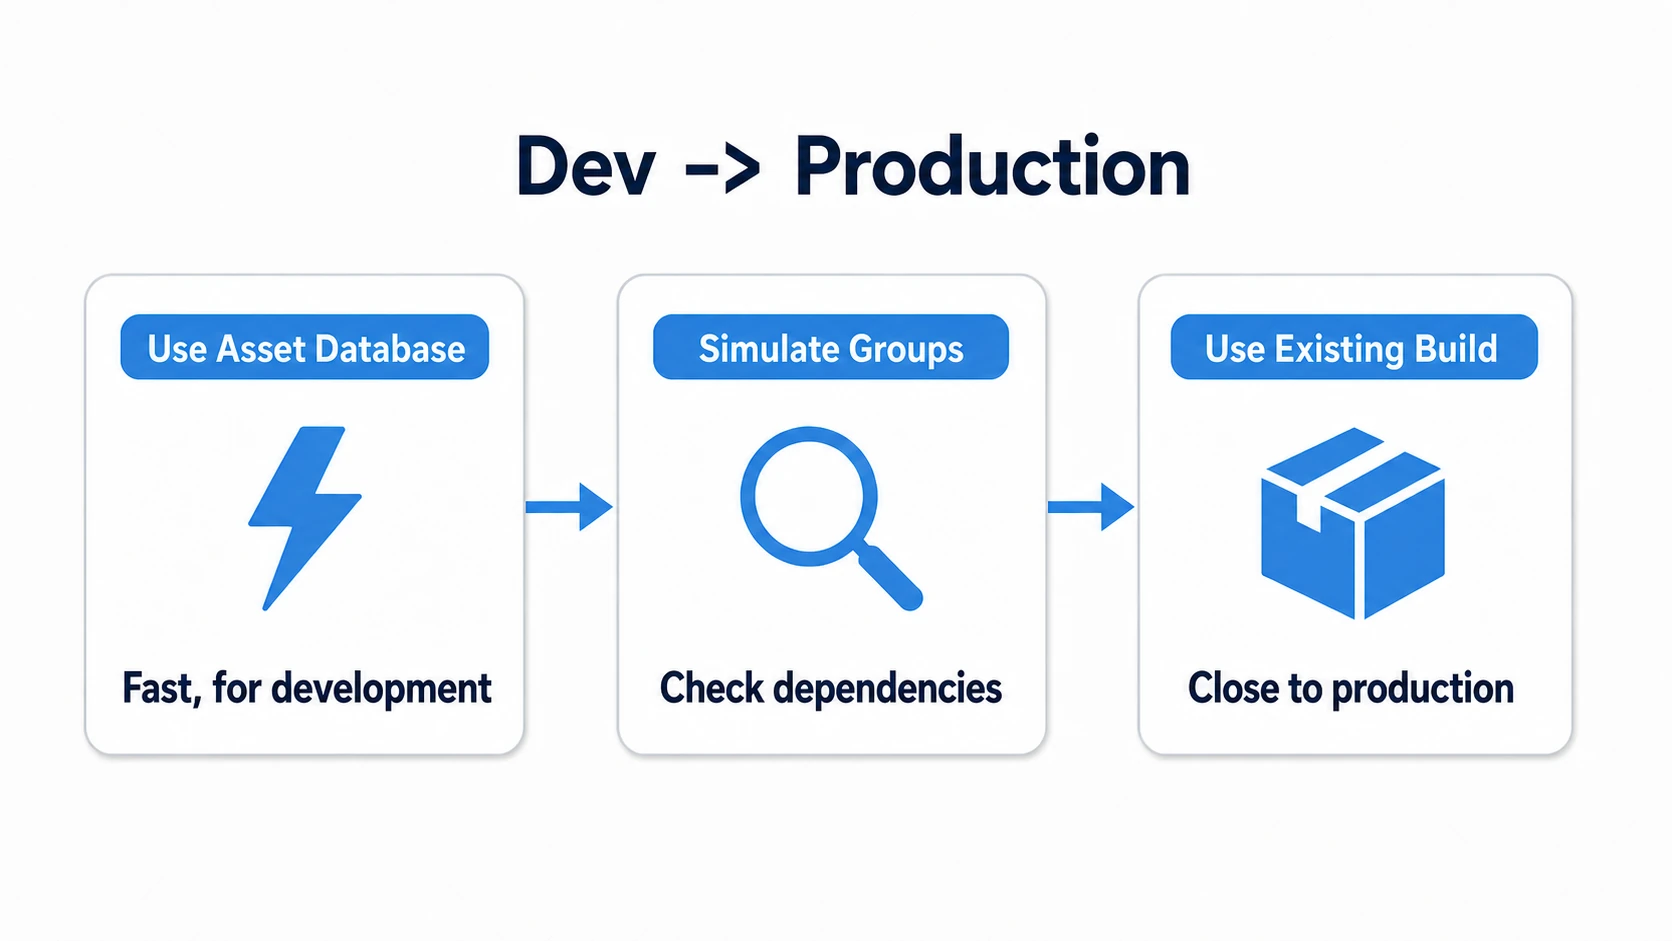
Addressables offers three Play Modes.
| Play Mode | Description | Use Case |
|---|---|---|
| Use Asset Database (fastest) | Loads directly from the AssetDatabase | Fast iteration during development |
| Simulate Groups (advanced) | Simulates AssetBundles | Checking dependencies and memory management |
| Use Existing Build | Uses actual AssetBundles | Production-like verification |
Practical: Loading a Boss Just Before the Fight
A heavyweight boss in an action RPG, a giant raid monster, a high-resolution event CG in a visual novel—assets that are usually unneeded but absolutely required in one specific moment are exactly where Addressables shines. Let's build the classic "boss room door."
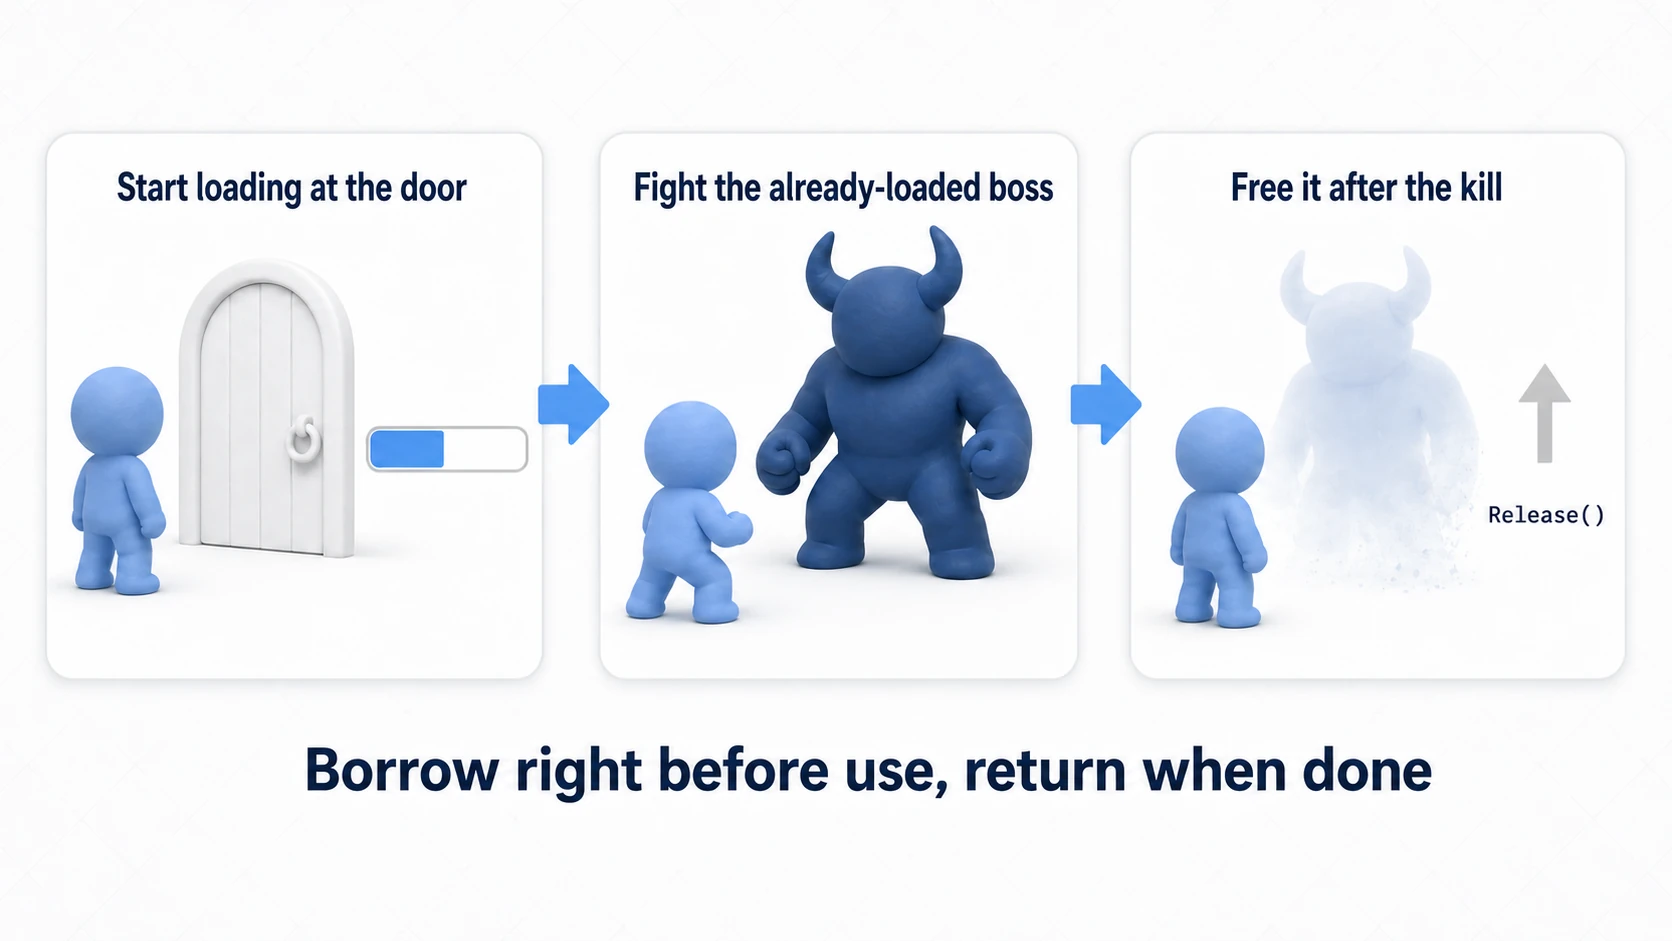
The flow is "start loading in front of the door → ready by the time it opens → free after the kill."
using UnityEngine;
using UnityEngine.AddressableAssets;
using UnityEngine.ResourceManagement.AsyncOperations;

public class BossGate : MonoBehaviour
{
    [SerializeField] private AssetReference bossPrefab;   // the boss's Addressable prefab
    [SerializeField] private Transform bossSpawnPoint;

    private AsyncOperationHandle<GameObject> handle;
    private GameObject bossInstance;

    // When the player enters the door area, start loading ahead of time
    private void OnTriggerEnter(Collider other)
    {
        if (!other.CompareTag("Player")) return;
        if (handle.IsValid()) return;                       // don't double-load on re-entry
        handle = bossPrefab.LoadAssetAsync<GameObject>();   // start loading in the background
    }

    // Call this when the door opens (waits if the load isn't done yet)
    public async void OpenGate()
    {
        GameObject prefab = await handle.Task;              // usually already complete
        bossInstance = Instantiate(prefab, bossSpawnPoint.position, Quaternion.identity);
    }

    // Call this when the boss is defeated
    public void OnBossDefeated()
    {
        Destroy(bossInstance);          // destroy the instance first—
        Addressables.Release(handle);   // —then return the reference count (this order matters)
    }
}
There are two key points.
- Pair "borrow at the entrance, return at the exit": if you start the load in
OnTriggerEnter, alwaysReleaseinOnBossDefeated(or this object'sOnDestroy). Writing the borrow and the return close together in the code is the single best habit for preventing leaks. And return only after destroying the instance—never pull the assets out from under a living boss. - Start the load "before anyone notices": kick it off somewhere dramatically natural, like the corridor just before the boss room, and the player never feels the load time. "Behind a cutscene" or "inside an elevator" are classic variations of the same idea.
If you want to load an entire scene dynamically, you can use sceneReference.LoadSceneAsync(LoadSceneMode.Additive) (see the scene management article).
Detecting Memory Leaks: Event Viewer
With Addressables, "always unload" is the golden rule — but you also need a way to verify that unloading is actually happening.
The Addressables Event Viewer lets you monitor loaded assets in real time.
Opening the Event Viewer
- Select
Window > Asset Management > Addressables > Event Viewer - Run the game in Play Mode
- Load/unload activity is displayed in real time
What to Check
- Are any assets still lingering after a scene transition?
- Is the same asset being loaded multiple times?
- Are reference counts decreasing correctly?
Note: To use the Event Viewer, you must enable "Send Profiler Events" in the Addressables settings.
Best Practices
- Group your assets - Keep related assets in the same group
- Use labels - Handy when you want to load multiple assets at once
- Use AssetReference - Type-safe, and lets you assign assets directly in the Inspector
- Always unload - Release assets in
OnDestroyorOnDisable - Switch Play Modes appropriately - Use Asset Database during development, Use Existing Build for final verification
- Verify with the Event Viewer - Regularly check for memory leaks
Summary
Addressables is Unity's official asset management system. Built on top of AssetBundles, it automates dependency management, memory management, and switching between load sources.
- Easily switch load sources - Toggle between development and release configurations with a simple settings change
- Automatic dependency resolution - Dependent AssetBundles are loaded automatically
- Reference-counted memory management - follow "return what you borrow with
Release" and the system tracks the exact right moment to free memory - Easy downloadable content delivery - Supports downloading from remote servers
Give Addressables a try and bring efficient asset management to your project.