You carefully placed your models and set up the lights, yet your game screen still looks somehow "flat." Other games in the store use similar assets but look like a movie — and the culprit behind that gap is, in most cases, post processing.
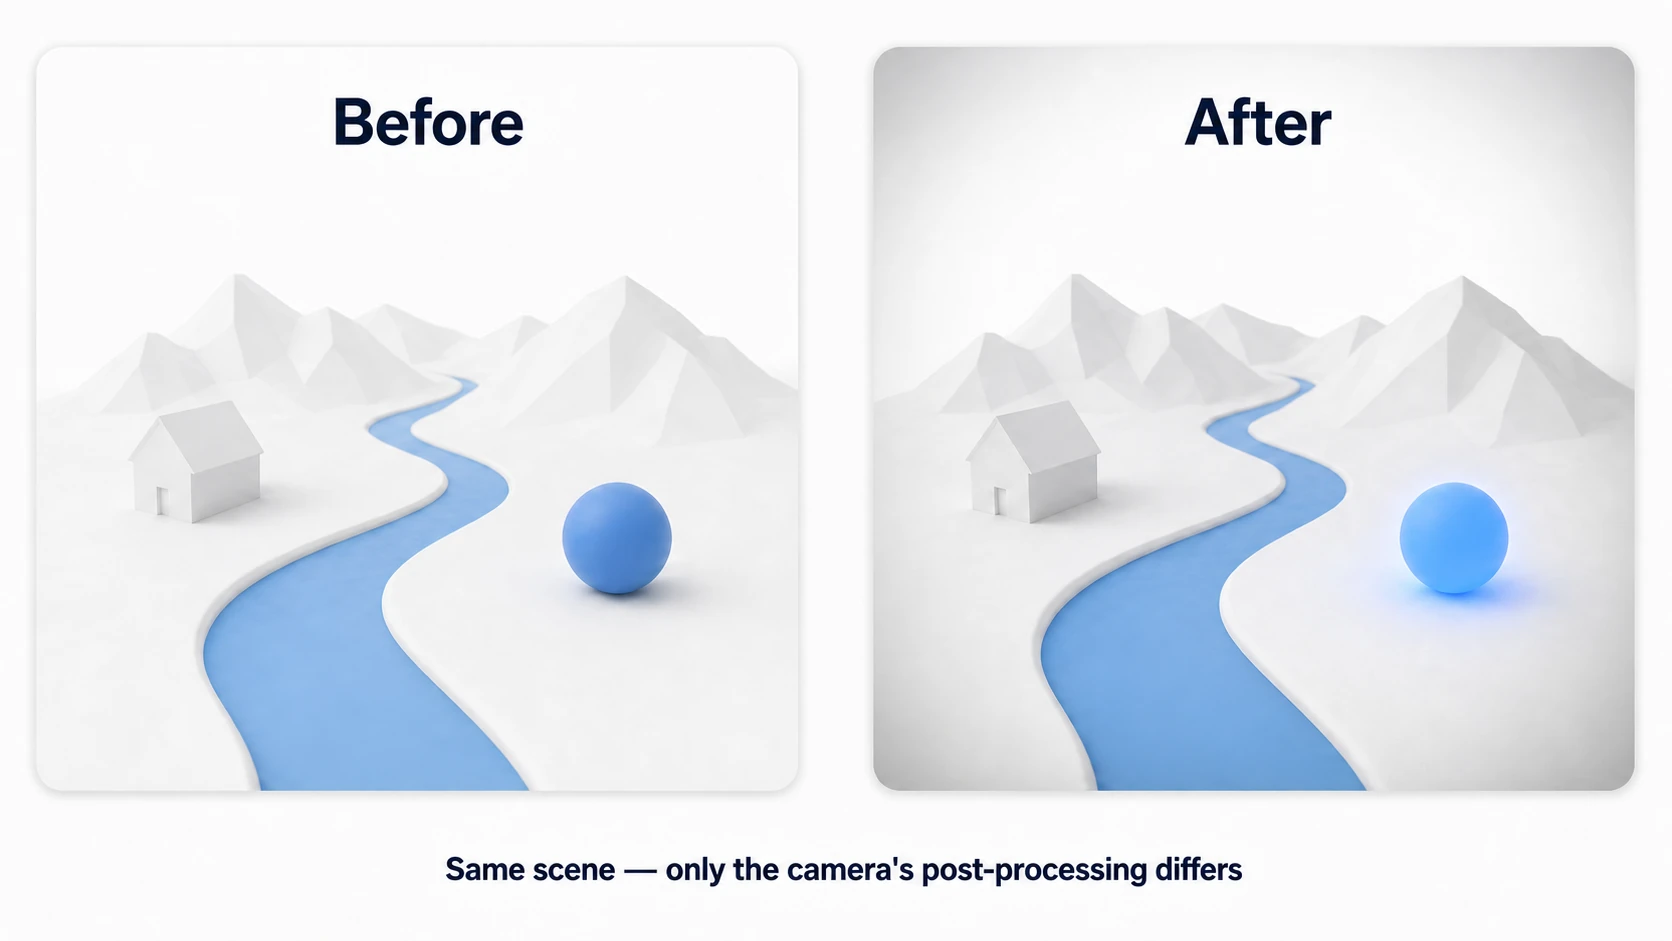
Post processing is a technique that applies effects (filters) after the camera's image has finished rendering. It works just like the filters in a photo app: simply layering Bloom, Color Grading, Depth of Field, and the like transforms the whole screen's impression without touching a single object in the scene.
What You'll Learn
- What key effects like Bloom, Color Grading, and Depth of Field do, with recommended settings
- Setup steps for both the Built-in RP and URP (and how their Volume workflows differ)
- How to change the mood per area with Local Volumes
- Performance and VR considerations, plus recommended presets
- Practical: building an "the air changes when you enter the cave" effect
Tested with: Unity 2022.3 LTS / Unity 6 Scope: Built-in Render Pipeline and URP (HDRP is not covered in this article)
The effect is obvious at a glance. Without touching the scene at all, just the camera's post-processing makes this much difference.
Two Implementation Approaches
Unity's post processing setup differs depending on which render pipeline you use.
Post Processing Stack v2 (Built-in RP)
- Installed from the Package Manager
- Add a Post-Process Layer component to the camera
- Managed through Post-Process Volume components
- Create a profile and add effects to it
Volume Override (URP/HDRP)
- Available in URP out of the box
- Uses the Volume component
- Add effects to a Volume Profile
- A more integrated workflow
Key Effects
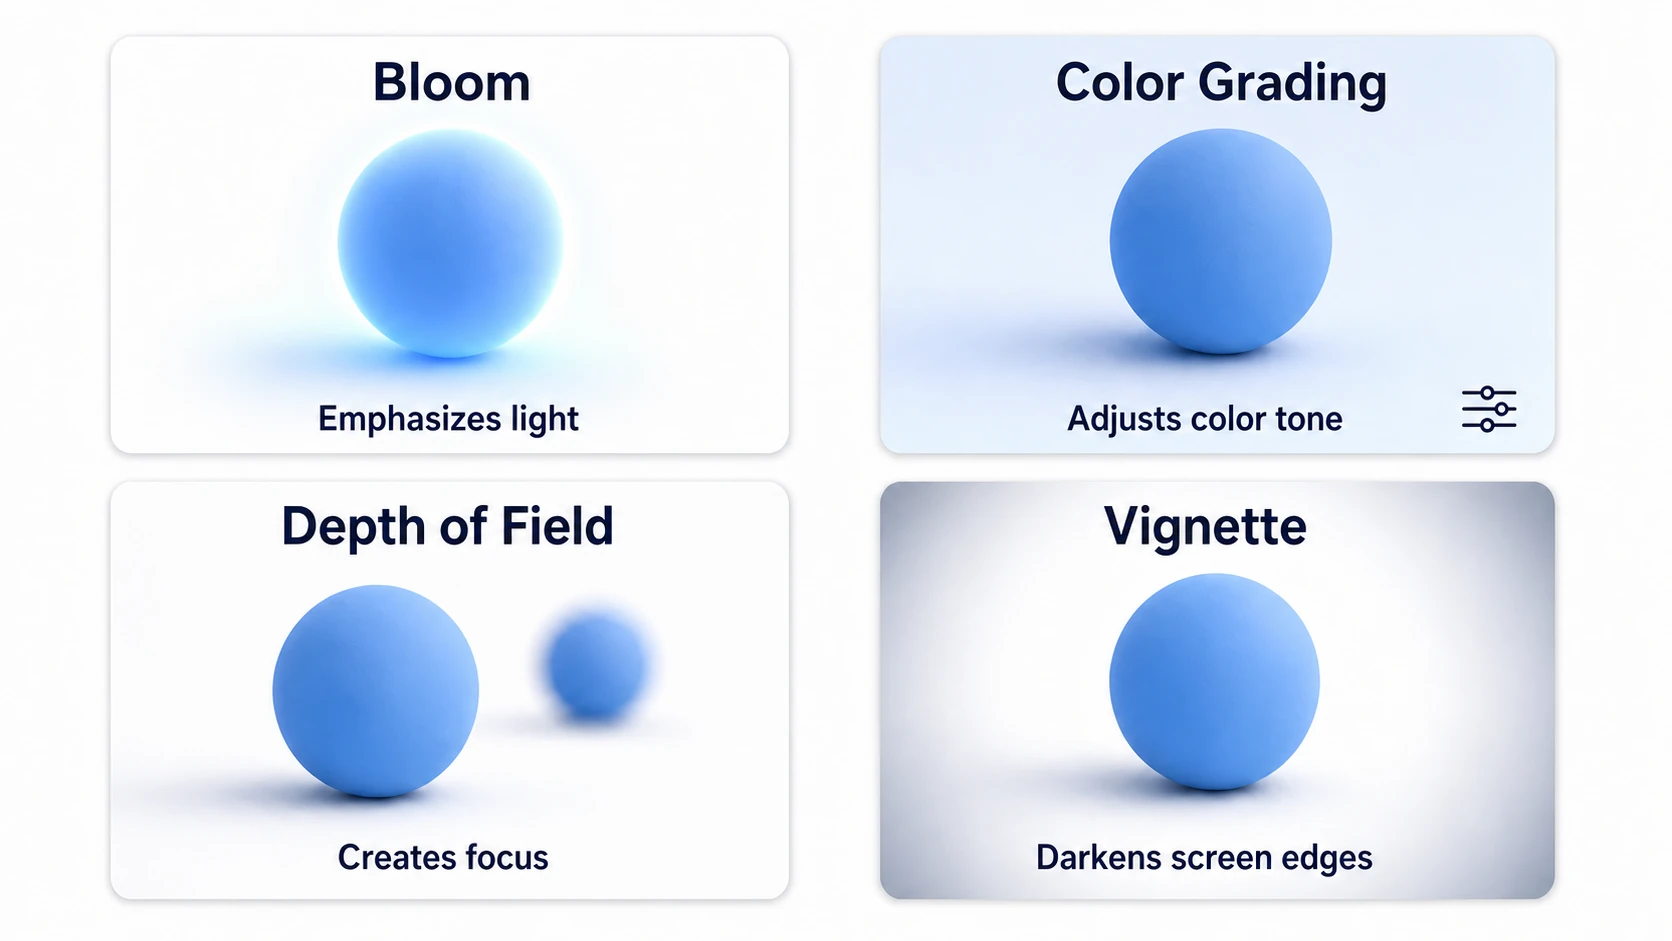
First, let's get to know the "cast." These four are the ones you'll use most.
Bloom
The most commonly used effect. It emphasizes bright light and creates a glowing look.
Post Processing Stack v2 (Built-in RP)
| Parameter | Description |
|---|---|
| Intensity | Strength of the glow |
| Threshold | Brightness threshold above which the effect applies |
| Diffusion | How far the light spreads (1-10) |
| Color | Tint of the bloom |
| Fast Mode | Lower quality but faster |
URP Volume
| Parameter | Description |
|---|---|
| Intensity | Strength of the glow |
| Threshold | Brightness threshold above which the effect applies |
| Scatter | How far the light spreads (0-1) |
| Tint | Tint of the bloom |
| High Quality Filtering | Higher-quality filtering |
Note: Parameter names differ between Post Processing Stack v2 and URP. "Diffusion" and "Scatter", and "Color" and "Tint", are equivalent features.
Recommended Bloom Settings
| Use Case | Intensity | Threshold | Scatter (URP) / Diffusion (v2) |
|---|---|---|---|
| Subtle glow | 0.2-0.5 | 0.9-1.0 | 0.5-0.6 / 5-6 |
| Standard look | 0.5-1.0 | 0.8-0.9 | 0.6-0.7 / 6-7 |
| Emphasized glow | 1.0-2.0 | 0.5-0.8 | 0.7-0.8 / 7-8 |
| Extreme stylization | 2.0+ | 0.5 or below | 0.8-1.0 / 8-10 |
Making Bloom Cheaper in URP
To reduce Bloom's cost for mobile:
- Downscale: When enabled, processes at a lower resolution (off by default)
- Max Iterations: Lower values reduce the cost (default 6; 3-4 recommended for mobile)
- High Quality Filtering: Turn it off to save performance
Color Grading
A color correction feature that adjusts the overall color tone of the screen. It's one of the most important effects for creating a cinematic mood.
Key Parameters
| Parameter | Description | Example Settings |
|---|---|---|
| Tonemapping | HDR-to-LDR conversion method | ACES recommended (film industry standard) |
| Post Exposure | Overall brightness | Adjust within -1 to 1 |
| Contrast | Contrast | 10-30 for a punchier image |
| Saturation | Color saturation | -20 for a serious tone, +20 for vivid colors |
| Temperature | Color temperature | Negative for cool tones, positive for warm tones |
Lift / Gamma / Gain
- Lift: Color adjustment for shadows (tint of dark areas)
- Gamma: Color adjustment for midtones (overall mood)
- Gain: Color adjustment for highlights (tint of bright areas)
Tonemapping recommendation: ACES is the standard tonemapping used in the film industry and produces a natural, cinematic look. It's especially effective with HDR content.
Ambient Occlusion (AO)
Adds shadows to corners and crevices of objects, which helps create a more realistic sense of space. It's expensive, though, so it's mainly suited to desktop/console.
Depth of Field
Simulates camera focus. By focusing on a specific distance and blurring everything else, you can achieve a cinematic look.
Mode Selection in URP
| Mode | Quality | Cost | Use Case |
|---|---|---|---|
| Gaussian | Standard | Light | Mobile, performance-focused |
| Bokeh | High quality | Heavy | PC/console, cinematic visuals |
Bokeh mode: Produces high-quality bokeh that simulates the aperture shape of a camera lens, but its cost makes it a poor fit for mobile.
Vignette
Darkens the edges of the screen. Useful for a retro feel or for softly framing the image.
Other Effects
- Auto Exposure - Simulates the eye adapting to darkness and brightness
- Chromatic Aberration - Reproduces lens color fringing
- Grain - Adds noise for a film-like look
- Motion Blur - Blurs motion to convey a sense of speed
- Lens Distortion - Fisheye-like distortion
Setup in the Built-in RP
1. Install the Package
- Open Window > Package Manager
- Search for "Post Processing" and install it
2. Configure the Camera
- Select the Main Camera
- Add the "Post-Process Layer" component
- Set the Layer (e.g. Default)
3. Create a Volume
- Create an empty GameObject
- Add the "Post-Process Volume" component
- Enable Is Global
- Create a new Profile
4. Add Effects
- Click Add Effect... on the Profile
- Select the effect you want to use
- Adjust each effect's parameters
Setup in URP
1. Create a Global Volume
- Right-click in the Hierarchy
- Select Volume > Global Volume
- A GameObject is created
2. Set Up the Volume Profile
- Click "New" next to "Profile" on the Volume component
- A Volume Profile is created
3. Add Effects
- Click "Add Override"
- Select the effect you want to use
- Adjust each effect's parameters
4. Check the Camera
Make sure Post Processing is checked on the camera.
Changes in URP 14+ (Unity 2023.1+): In URP 14 and later, Post Processing is enabled on the camera by default. The settings UI also changed: you now toggle Post Processing on or off in the Render Type settings.
Per-Area Effects with Local Volumes
A Global Volume affects the entire scene, but a Local Volume lets you apply effects only within a specific area.
Setup
- Create an empty GameObject
- Add a Volume component
- Turn Is Global off
- Add a Collider (such as a Box Collider)
- Set the Volume Profile and Blend Distance
Use Cases
- Cave area: Darken the scene and strengthen the Vignette
- Magical forest: Boost Bloom for a fantastical feel
- Danger zone: Add a red tint with Color Grading
Blend Distance: Sets how many meters from the Volume's boundary the effect gradually fades in. A value around 2-5 is recommended to avoid abrupt transitions.
Recommended Combinations
Here are preset examples beginners can try right away. Even with the same scene, just swapping presets can change the impression so much you'd think it was a different game.
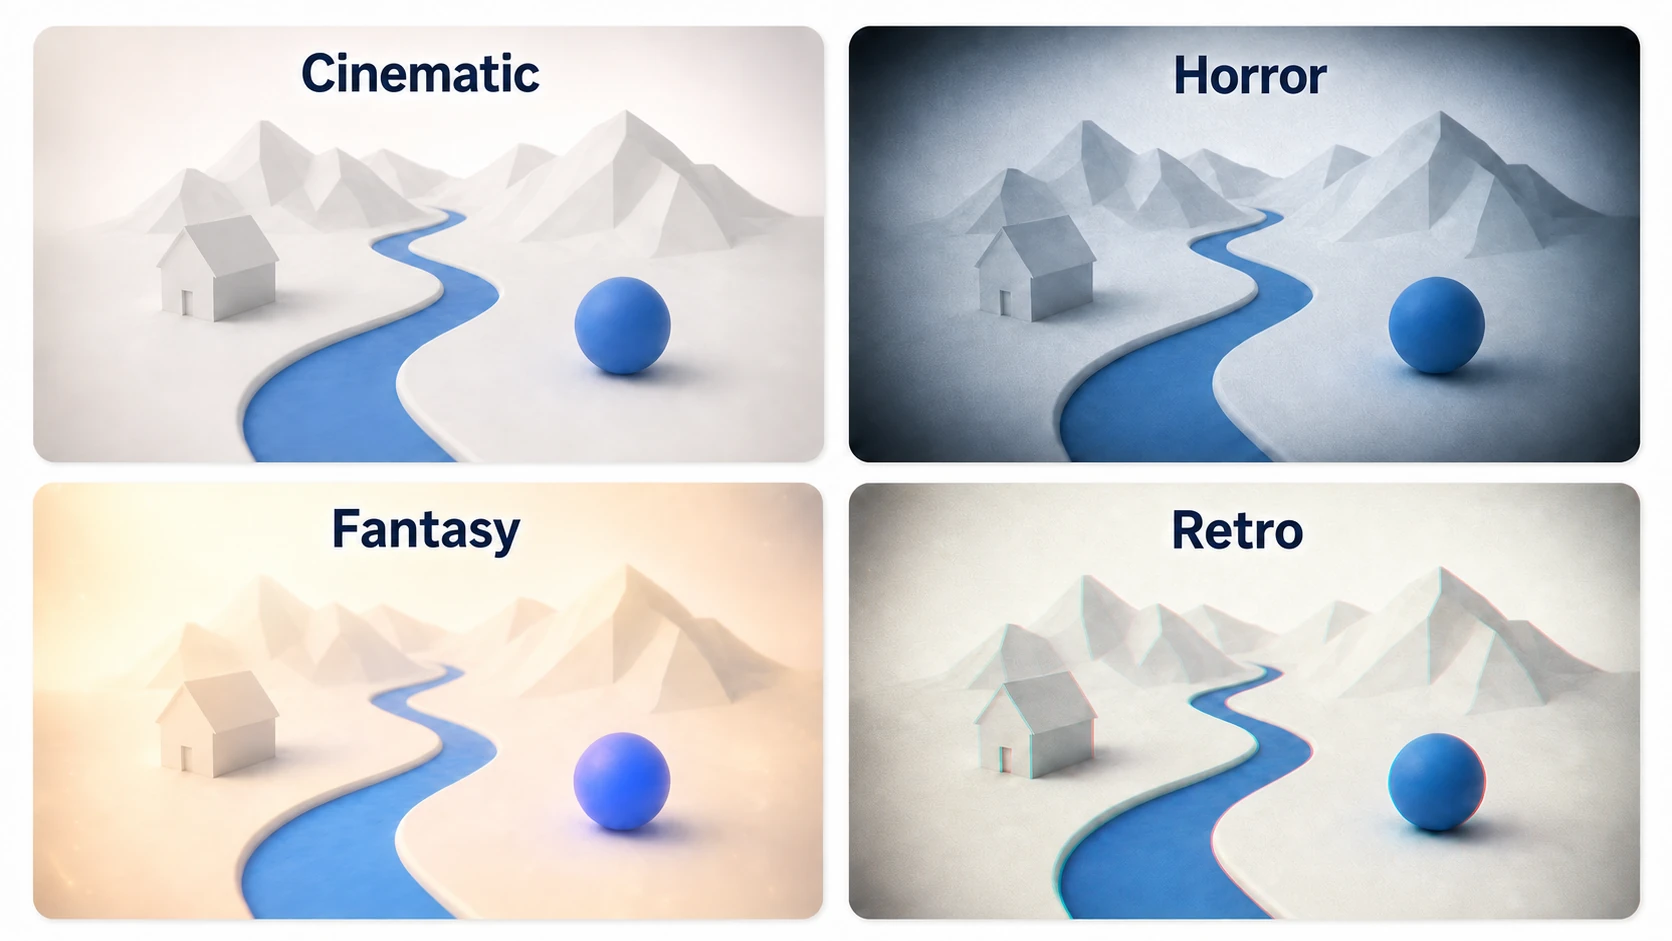
Cinematic
- Color Grading: Tonemapping=ACES, Contrast=20, Saturation=-10
- Vignette: Intensity=0.3
- Bloom: Intensity=0.3, Threshold=0.9
Horror
- Color Grading: Saturation=-30, Temperature=-10 (cool tone)
- Grain: Intensity=0.3
- Vignette: Intensity=0.5
Fantasy
- Bloom: Intensity=1.0, Threshold=0.7
- Color Grading: Saturation=20, Temperature=10 (warm tone)
Retro Game
- Color Grading: Contrast=40, Saturation=-20
- Chromatic Aberration: Intensity=0.2
- Grain: Intensity=0.4
Performance Impact
Expensive Effects
| Effect | Cost | Notes |
|---|---|---|
| Ambient Occlusion | Very high | Post processing effect |
| Motion Blur | High | Post processing effect |
| Screen Space Reflection | High | Rendering feature (implemented as a Renderer Feature in URP) |
| Depth of Field | Medium to high | Post processing effect |
Note: Strictly speaking, Screen Space Reflection is not post processing — it's implemented as part of the rendering pipeline. In URP it's added as a Renderer Feature.
Optimization Tips
- Enable only the properties you need - Turn off unused parameters
- Use Fast Mode - Available for Bloom and others
- Stick to lightweight effects on mobile - Choose cheap options like Vignette
- Lower the resolution - Take advantage of downsampling
- Keep effect combinations minimal - Use only what you need
VR Considerations
The following effects can cause VR motion sickness and are not recommended.
- Depth of Field - Mismatch between what the eye sees and where it actually focuses
- Motion Blur - Inconsistent with head movement
- Chromatic Aberration - Strong settings cause eye strain
- Lens Distortion - Inconsistent with actual vision
- Grain - Strong settings cause discomfort
- Vignette - Strong settings make the field of view feel restricted
Common Issues and Solutions
Issue 1: Effects Don't Show Up
- Check that Post Processing is enabled on the camera
- Check that the Volume is configured correctly
- Check that the Layer settings match (Built-in RP)
Issue 2: Performance Drops
- Disable unnecessary effects
- Enable Fast Mode
- Lower the resolution
- Use only lightweight effects on mobile
Issue 3: Blown-Out Highlights
- Lower the Bloom Intensity
- Adjust Post-exposure in Color Grading
- Review your HDR color settings
Issue 4: Too Dark / Too Bright
- Adjust with Color Grading
- Use Auto Exposure
- Review your lighting setup
Practical: The Air Changes When You Enter the Cave
The moment you step into a cave in a 3D adventure, the moment you enter the mansion in a horror game, the moment you plunge into a tunnel in a racing game — that effect where the "air" of a place switches is where Local Volumes truly shine. Let's build it in URP, without writing a single line of script.
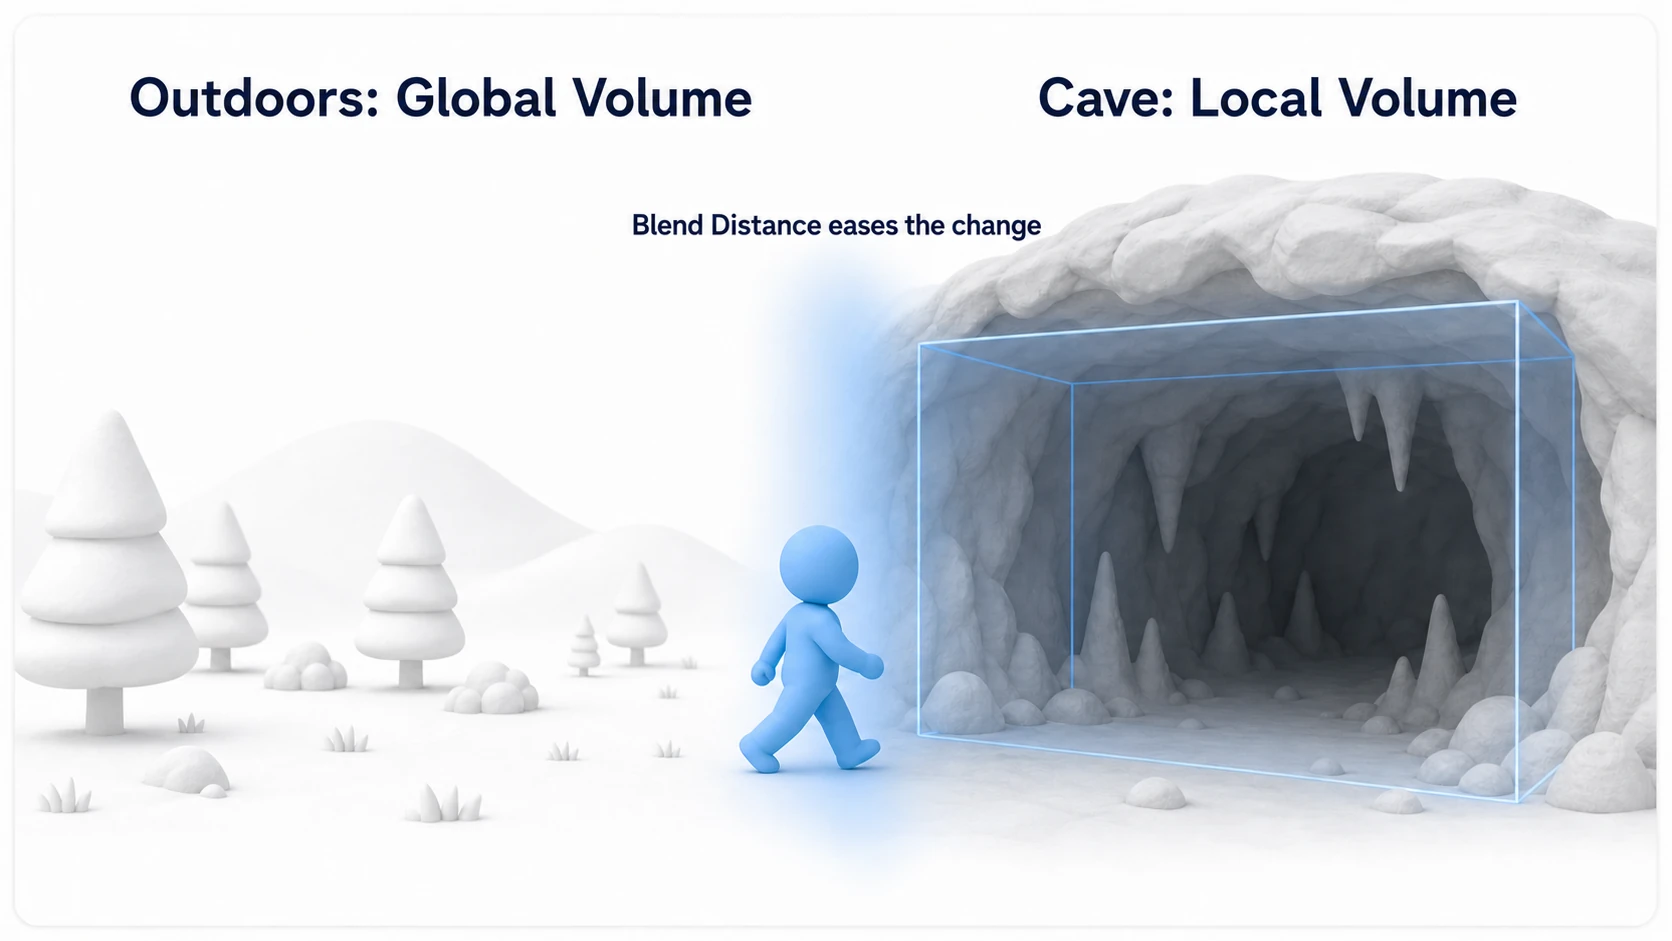
- Set up the baseline Global Volume: First, give the whole scene a "Cinematic" preset look (Tonemapping=ACES, Contrast=20, a touch of Bloom). This is the outdoor air.
- Place a Local Volume in the cave: Create an empty GameObject at the center of the cave, add a
Volumecomponent, and turn Is Global off. Add aBox Collider, turn Is Trigger on, and scale it to cover the whole cave space. - Create a profile for the cave: Add these Overrides to a new Profile — Vignette (Intensity 0.45 to narrow the view), Color Adjustments (Saturation -25, Temperature -15 for a cold feel), and Bloom (a modest Intensity of 0.2).
- Raise the Priority: Set the Local Volume's Priority to
1(leave Global at0). Now this one wins inside the area. - Blend it in "gradually" with Blend Distance: Set the Local Volume's Blend Distance to
3. Since it blends in starting 3 meters before the boundary, the air changes as you approach the cave.
Hit Play and walk your character into the cave. Instead of snapping over the instant you enter, the screen should "sink" into the gloom. That satisfying feel is the work of Blend Distance.
There are two key points: "build an area's air with Volume placement, not code" (level designers can tune it entirely in the editor, with no per-scene branching logic needed), and "set Priority and Blend Distance together." Forget Priority and it loses to Global and nothing happens; set Blend Distance to 0 and the screen snaps at the boundary, looking cheap. For creating mood from the lighting side, see Lighting Basics.
Summary
Post processing is a powerful technique for improving the visual quality of your entire screen.
- Bloom - Glowing light, the most commonly used effect
- Color Grading - Color correction for a cinematic mood
- Depth of Field - Focus effects that draw attention to your subject
- Vignette - Darkened screen edges for a retro feel
- Build each area's air with a Local Volume + Blend Distance, without writing code
Choose the implementation approach that matches your render pipeline, and use these effects wisely while keeping an eye on performance. When was the last time you ran your game screen through some "post-processing"? Dropping in a single Volume just might change how it looks today.
What to Read Next
- Understand the pipeline differences first → Getting Started with Render Pipelines
- Pair it with lighting → Unity Lighting Basics
- Worried about performance? → Getting Started with the Unity Profiler