Tested with: Unity 2022.3 LTS / Unity 6
"I can't tell where my empty GameObjects are..." "I want to see how far my trigger reaches..." "I want to tweak my AI's detection range while actually seeing it..."
That's where Gizmos come in. Gizmos are a tool that draws shapes in the Scene view to make debug information visible. Once detection ranges and paths you used to tune by squinting at numbers become visible shapes in the Scene view, your iteration speed goes way up.
What You'll Learn
- When to use
OnDrawGizmosvs.OnDrawGizmosSelected- How to decide between Gizmos,
Debug.Draw, and Handles- Five practical recipes: AI detection ranges, paths, trigger areas, and more
- How to build an "enemy AI debug view" that draws patrol routes, vision, and attack ranges in one screen
Basic Usage of Gizmos
There are two event functions that serve as your entry points for drawing. Choose based on whether you want the gizmo visible at all times or only when the object is selected.
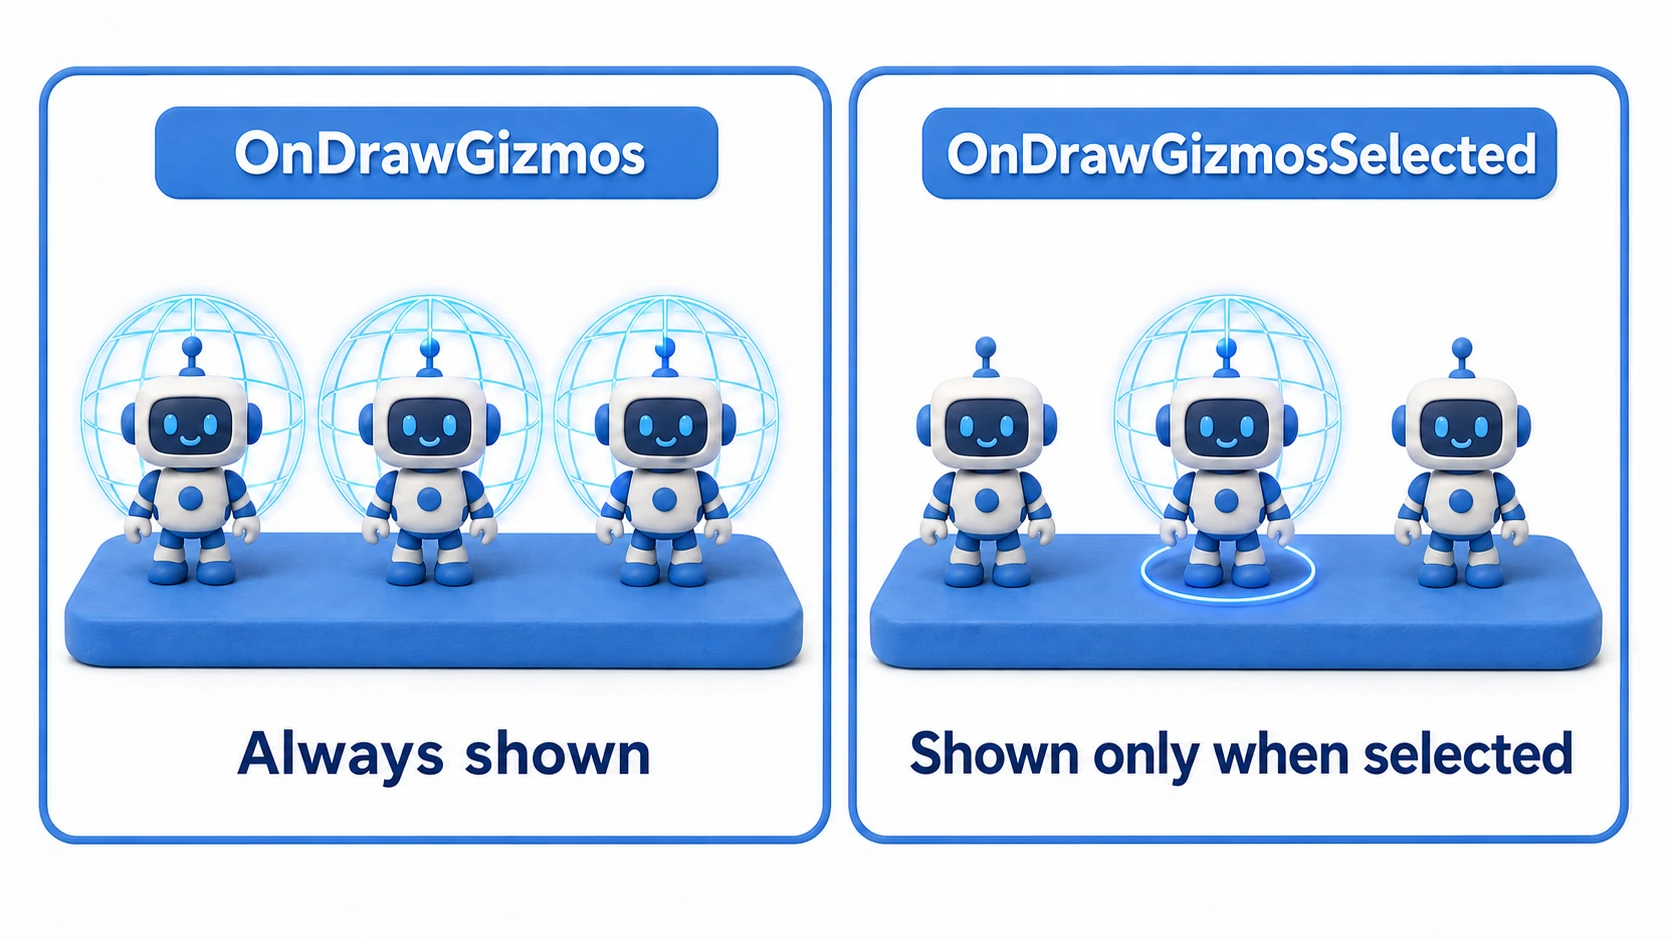
OnDrawGizmos: Always Draw Gizmos
using UnityEngine;

public class GizmosExample : MonoBehaviour
{
    void OnDrawGizmos()
    {
        // Draw a yellow sphere
        Gizmos.color = Color.yellow;
        Gizmos.DrawSphere(transform.position, 1.0f);
    }
}
OnDrawGizmosSelected: Draw Gizmos Only When Selected
void OnDrawGizmosSelected()
{
    // Draw a red sphere
    Gizmos.color = Color.red;
    Gizmos.DrawSphere(transform.position, 1.0f);
}
Combining Both
void OnDrawGizmos()
{
    // Green when not selected
    Gizmos.color = Color.green;
    Gizmos.DrawSphere(transform.position, 1.0f);
}

void OnDrawGizmosSelected()
{
    // Red when selected
    Gizmos.color = Color.red;
    Gizmos.DrawSphere(transform.position, 1.0f);
}
Which Tool Draws It? Gizmos vs. Debug.Draw vs. Handles
Gizmos aren't the only way to draw things in the Scene view. Sorting the three tools by "when and where they're visible" up front makes the method list that follows much easier to navigate.
| Gizmos | Debug.Draw | Handles | |
|---|---|---|---|
| Where you write it | OnDrawGizmos family | Regular code such as Update | Editor scripts |
| When it's visible | In edit mode and at runtime | Only while playing | In edit mode (editor extensions) |
| What it can do | Display shapes | Display lines and rays (with an optional duration) | Edit values by dragging |
Note: Both Gizmos and Debug.Draw appear in the Scene view. To see them in the Game view as well, turn on the "Gizmos" button in the top-right corner of the Game view. None of them appear in a built game.
Debug.Draw Example
void Update()
{
    // Draw a ray at runtime (red, visible for 1 second)
    Debug.DrawRay(transform.position, transform.forward * 10f, Color.red, 1f);

    // Draw a line between two points
    Debug.DrawLine(pointA, pointB, Color.green);
}
Rule of thumb: Things you want to see constantly from the placement and tuning stage — detection ranges, triggers — belong to
Gizmos. Things you only need to check at the moment they happen — like raycast trajectories — belong toDebug.Draw. Handles live in the world of editor extensions, so we only touch on them in the bonus section.
Main Methods of the Gizmos Class (Reference)
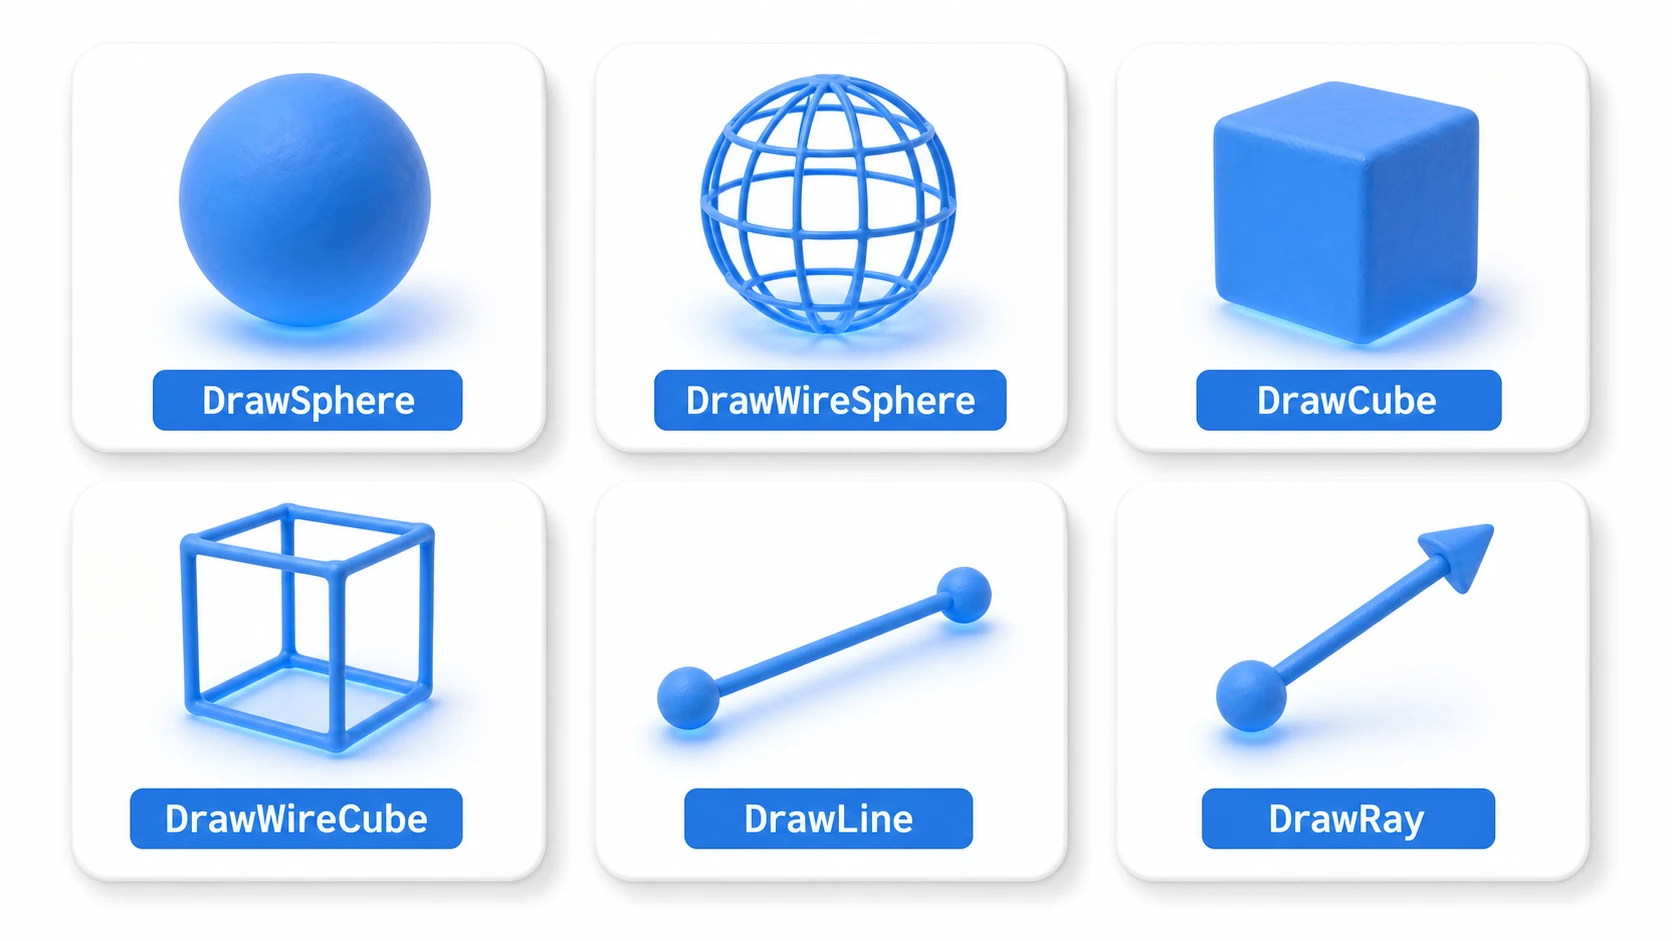
What follows is a list of drawing methods. You don't need to memorize them all — skim it to see what kinds of shapes are possible, and come back whenever you need one.
| Method | Description |
|---|---|
Gizmos.color | Set the drawing color |
Gizmos.DrawSphere | Draw a solid sphere |
Gizmos.DrawWireSphere | Draw a wireframe sphere |
Gizmos.DrawCube | Draw a solid cube |
Gizmos.DrawWireCube | Draw a wireframe cube |
Gizmos.DrawLine | Draw a line between two points |
Gizmos.DrawRay | Draw a ray |
Gizmos.DrawIcon | Draw an icon |
Gizmos.DrawMesh | Draw a mesh |
Gizmos.matrix | Set the transformation matrix |
Usage Examples
// Draw a sphere
Gizmos.color = Color.red;
Gizmos.DrawSphere(transform.position, 1.0f);

// Draw a wireframe cube
Gizmos.color = Color.yellow;
Gizmos.DrawWireCube(transform.position, new Vector3(2, 2, 2));

// Draw a line
Gizmos.color = Color.blue;
Gizmos.DrawLine(transform.position, transform.position + Vector3.forward * 5);

// Draw a ray
Gizmos.DrawRay(transform.position, transform.forward * 5);
Semi-Transparent Drawing
By using a Color with an alpha value, you can draw semi-transparent Gizmos.
// Semi-transparent red (alpha 0.3)
Gizmos.color = new Color(1f, 0f, 0f, 0.3f);
Gizmos.DrawSphere(transform.position, 2.0f);

// Draw the outline fully opaque
Gizmos.color = Color.red;
Gizmos.DrawWireSphere(transform.position, 2.0f);
Combining a fill with an outline makes the area much easier to read.
Practical Examples
Example 1: Visualizing an Empty GameObject
public class EmptyObjectGizmo : MonoBehaviour
{
    [SerializeField] private Color normalColor = Color.green;
    [SerializeField] private Color selectedColor = Color.red;
    [SerializeField] private float radius = 0.5f;

    void OnDrawGizmos()
    {
        Gizmos.color = normalColor;
        Gizmos.DrawSphere(transform.position, radius);
    }

    void OnDrawGizmosSelected()
    {
        Gizmos.color = selectedColor;
        Gizmos.DrawSphere(transform.position, radius);
    }
}
Example 2: Visualizing a Trigger Area
public class TriggerGizmo : MonoBehaviour
{
    [SerializeField] private BoxCollider boxCollider;

    void OnDrawGizmos()
    {
        if (boxCollider == null) return;

        Gizmos.color = Color.green;
        Gizmos.matrix = transform.localToWorldMatrix;
        Gizmos.DrawWireCube(boxCollider.center, boxCollider.size);
    }
}
Example 3: Visualizing an AI Detection Range
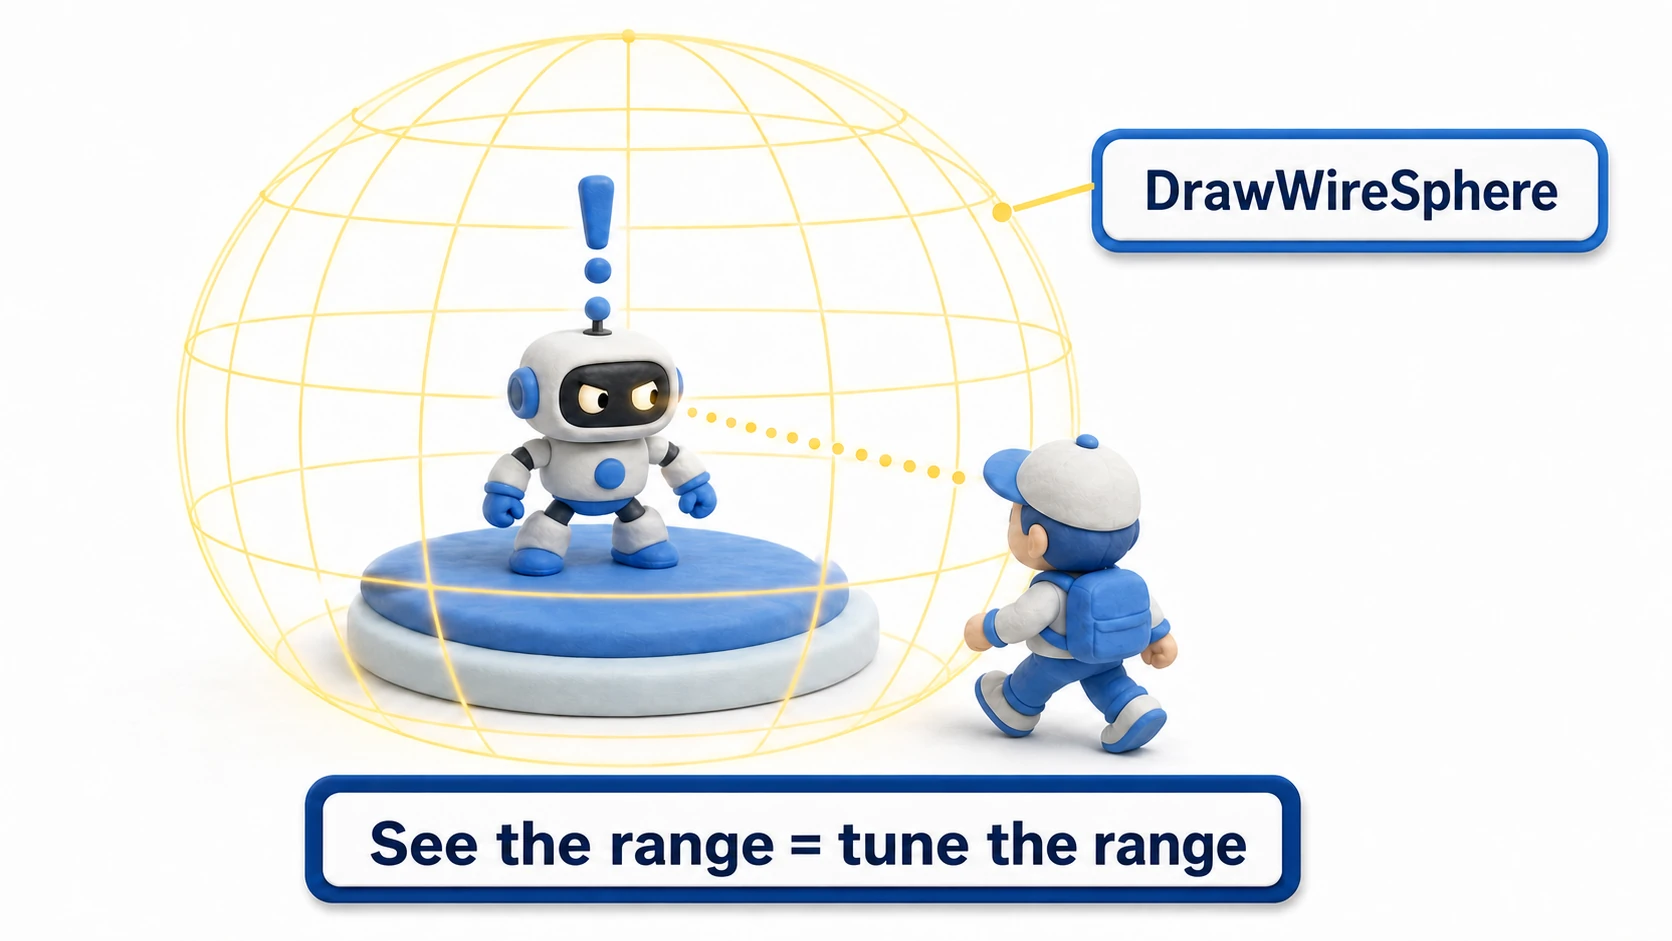
A "detection radius of 10" that's hard to grasp from numbers alone becomes a visible wire sphere in the Scene view. The big win is being able to tune the range on the spot while placing enemies.
public class AIDetectionGizmo : MonoBehaviour
{
    [SerializeField] private float detectionRange = 10.0f;

    void OnDrawGizmos()
    {
        Gizmos.color = Color.yellow;
        Gizmos.DrawWireSphere(transform.position, detectionRange);
    }

    void OnDrawGizmosSelected()
    {
        Gizmos.color = Color.red;
        Gizmos.DrawWireSphere(transform.position, detectionRange);
        // Show the forward direction as a line
        Gizmos.DrawRay(transform.position, transform.forward * detectionRange);
    }
}
Example 4: Visualizing a Path
public class PathGizmo : MonoBehaviour
{
    [SerializeField] private Transform[] waypoints;

    void OnDrawGizmos()
    {
        if (waypoints == null || waypoints.Length < 2) return;

        Gizmos.color = Color.cyan;

        // Show waypoints as spheres
        foreach (var waypoint in waypoints)
        {
            if (waypoint != null)
                Gizmos.DrawSphere(waypoint.position, 0.3f);
        }

        // Connect waypoints with lines
        for (int i = 0; i < waypoints.Length - 1; i++)
        {
            if (waypoints[i] != null && waypoints[i + 1] != null)
                Gizmos.DrawLine(waypoints[i].position, waypoints[i + 1].position);
        }
    }
}
Example 5: Debugging Raycasts
public class RaycastGizmo : MonoBehaviour
{
    [SerializeField] private float rayDistance = 10.0f;

    void OnDrawGizmos()
    {
        // Show the raycast direction as a line
        Gizmos.color = Color.red;
        Gizmos.DrawRay(transform.position, transform.forward * rayDistance);

        // Show a sphere at the hit position
        if (Physics.Raycast(transform.position, transform.forward, out RaycastHit hit, rayDistance))
        {
            Gizmos.color = Color.green;
            Gizmos.DrawSphere(hit.point, 0.2f);
        }
    }
}
Performance note: Running
Physics.RaycastinsideOnDrawGizmoscan slow down the editor if the script is attached to many objects. Keep it strictly for debugging, and preferOnDrawGizmosSelected(which only runs while selected) in production projects.
Showing and Hiding Gizmos
Click the "Gizmos" button in the top-right corner of the Scene view to open the Gizmos menu.
- Toggle Gizmos visibility per component
- Adjust Gizmos size with the "3D Icons" slider
- Gizmos can be shown in both the Scene view and the Game view
Showing Gizmos in the Game View
Turn on the "Gizmos" button in the top-right corner of the Game view, and Gizmos will also appear in the editor's Game view. This comes in handy while debugging.
About builds:
OnDrawGizmosis never called in a built game, but the method itself is still compiled into the build as IL (intermediate language). This is practically harmless, but if you want to strictly exclude it from the build, wrap it in#if UNITY_EDITOR.
#if UNITY_EDITOR
void OnDrawGizmos()
{
    Gizmos.color = Color.yellow;
    Gizmos.DrawSphere(transform.position, 1.0f);
}
#endif
Bottom line: Skipping
#if UNITY_EDITORis fine in most cases and has no performance impact. Use it only when you want to make the code's intent explicit or need strict control over build size.
Best Practices
- Use OnDrawGizmos and OnDrawGizmosSelected appropriately - Choose between always-visible and selected-only display
- Use distinct colors - For example, green for normal, red for selected, yellow for warnings
- Expose settings with SerializeField - Let colors and sizes be tweaked in the Inspector
- Don't forget null checks - Prevent errors when references are null
- Take advantage of Gizmos.matrix - Handle rotated and scaled objects correctly
[SerializeField] private BoxCollider boxCollider;
[SerializeField] private Color gizmoColor = Color.green;

void OnDrawGizmos()
{
    if (boxCollider == null) return;

    Gizmos.matrix = transform.localToWorldMatrix;
    Gizmos.color = gizmoColor;
    Gizmos.DrawWireCube(boxCollider.center, boxCollider.size);
}
Hands-On: Build an Enemy AI Debug View in One Screen
To wrap up, let's combine the drawing methods above into a single "AI debug view." The example is a patrolling enemy in a top-down action game, but the same idea works for a guard in a stealth game or a turret in a tower defense.
The key is to split "when to draw" by the nature of each piece of information.
- Always visible (
OnDrawGizmos): the patrol route — information you want to survey across the whole level, even with no enemy selected - Selected only (
OnDrawGizmosSelected): detection range, attack range, and vision cone — per-enemy details that would clutter the screen if every enemy drew them at once - Play mode only: a line to the current destination — runtime information about where the enemy is actually headed
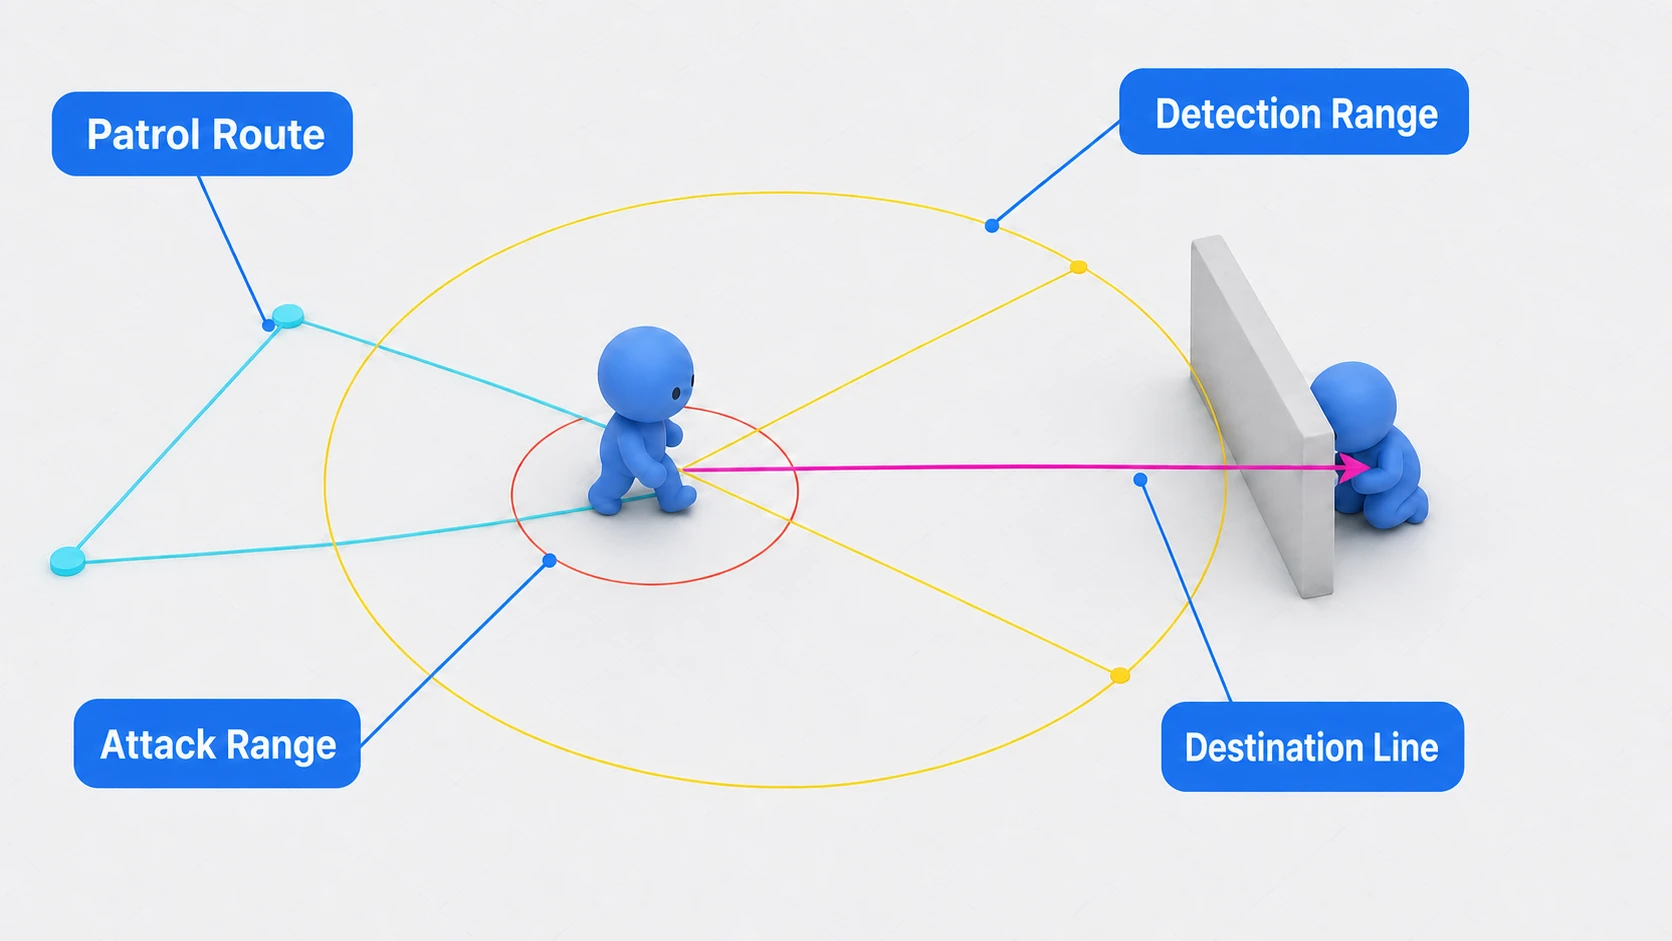
using UnityEngine;

public class EnemyPatrol : MonoBehaviour
{
    [Header("AI Settings")]
    [SerializeField] private Transform[] patrolPoints;
    [SerializeField] private Transform player;
    [SerializeField] private float detectionRange = 6f;
    [SerializeField] private float attackRange = 1.5f;
    [SerializeField] private float viewAngle = 90f;
    [SerializeField] private float moveSpeed = 3f;

    private int patrolIndex;
    private Vector3 currentDestination;

    void Update()
    {
        if (patrolPoints == null || patrolPoints.Length == 0) return;

        // Detection: distance only (deliberately ignores view angle and walls)
        bool playerFound = player != null &&
            Vector3.Distance(transform.position, player.position) <= detectionRange;

        currentDestination = playerFound
            ? player.position
            : patrolPoints[patrolIndex].position;

        // Move toward the destination; advance to the next patrol point on arrival
        transform.position = Vector3.MoveTowards(
            transform.position, currentDestination, moveSpeed * Time.deltaTime);

        if (!playerFound &&
            Vector3.Distance(transform.position, currentDestination) < 0.1f)
        {
            patrolIndex = (patrolIndex + 1) % patrolPoints.Length;
        }
    }

    // Always visible: patrol route, plus the destination while playing
    void OnDrawGizmos()
    {
        if (patrolPoints == null || patrolPoints.Length == 0) return;

        Gizmos.color = Color.cyan;
        for (int i = 0; i < patrolPoints.Length; i++)
        {
            if (patrolPoints[i] == null) continue;
            Gizmos.DrawSphere(patrolPoints[i].position, 0.3f);

            var next = patrolPoints[(i + 1) % patrolPoints.Length];
            if (next != null)
                Gizmos.DrawLine(patrolPoints[i].position, next.position);
        }

        // Play mode only: where is it headed right now? (this line is the star of bug hunting)
        if (Application.isPlaying)
        {
            Gizmos.color = Color.magenta;
            Gizmos.DrawLine(transform.position, currentDestination);
        }
    }

    // Selected only: this enemy's own ranges
    void OnDrawGizmosSelected()
    {
        // Detection range (yellow) and attack range (red)
        Gizmos.color = Color.yellow;
        Gizmos.DrawWireSphere(transform.position, detectionRange);
        Gizmos.color = Color.red;
        Gizmos.DrawWireSphere(transform.position, attackRange);

        // Draw the intended vision cone as two edge lines
        Gizmos.color = Color.yellow;
        Vector3 left = Quaternion.Euler(0, -viewAngle / 2f, 0) * transform.forward;
        Vector3 right = Quaternion.Euler(0, viewAngle / 2f, 0) * transform.forward;
        Gizmos.DrawRay(transform.position, left * detectionRange);
        Gizmos.DrawRay(transform.position, right * detectionRange);
    }
}
Place two to four empty GameObjects, register them in patrolPoints, and press Play. The enemy patrols along the cyan route and chases the player when they get close.
Symptom: The Enemy Runs at a Player Behind a Wall
Play with this AI for a while and you'll hit a moment where the player is hiding behind a wall, yet the enemy keeps running straight at it. Before staring at the code, look at the Scene view.
- The magenta destination line pierces the wall and pins the player → the enemy is chasing a player it "thinks" it can see
- Select the enemy, and it's chasing a player outside the yellow vision cone lines → the view angle isn't being used either
In other words, you can isolate the cause — "detection is distance-only and ignores both view angle and cover" — without reading a single line of code. That's Gizmos at their best. The fixes have their own articles: vision cones with occlusion checks in building enemy vision and detection, and wall checks in our Physics.Raycast guide.
As a last check, try switching off the "Gizmos" button in the top-right of the Scene view. The shapes vanish — and the enemy keeps moving as if nothing happened. Drawing is only "information for your eyes"; the decisions live in Update. With that separation in place, the shapes snap to every Inspector tweak, and even ten enemies leave the screen perfectly readable.
Bonus: Good to Know for Later
Once you're comfortable with Gizmos, these are the natural next steps.
-
The
Handlesclass, which lets you drag values: Gizmos are display-only, but with Handles you can build interactive controls — like dragging in the Scene view to expand a detection range. This lives in the world of custom editors placed in an Editor folder, so it pairs well with our intro to editor extensions.Feature Gizmos Handles Where it lives Regular scripts Editor folder Interaction Display only Values can be changed by dragging Purpose Debug display Custom editor tools -
Combine with raycast visualization: The raycast visualization in Example 5 ties directly into our Physics.Raycast article. For "my ray isn't hitting anything" bugs, visualizing first is the fastest path to a fix.
-
Know when to use logs instead: Spatial information like positions, ranges, and paths suits Gizmos, while temporal information like value changes and control flow suits
Debug.Log. We cover logging techniques in our intro to debugging.
Summary
Gizmos are a powerful tool for visualizing debug information in the Scene view.
- Visualize empty GameObjects - Makes their positions easy to spot
- Show trigger and collider areas - Makes checking hitboxes easy
- Show AI detection ranges - Tune parameters visually
- Show paths and waypoints - Makes verifying movement routes easy
- Debug raycasts - Visually confirm hit detection
Spatial information — positions, ranges, routes — is far easier to grasp drawn on screen than logged as numbers. Why not start by adding a single OnDrawGizmosSelected to the enemy or trigger you're building right now?