Overview
As game development progresses, you'll encounter needs like "I want to carry the player's HP and equipment to the next stage," "I want to preserve collected item information," or "I want to centrally manage game-wide settings." However, when switching scenes with change_scene_to_file(), all old scene information is discarded by default.
The most standard and powerful solution for persisting data across scenes is the Autoload feature. It's Godot's engine-level implementation of the "Singleton" pattern, widely known in software design, made easy to use.
This article covers basic setup, practical code examples, common mistakes and best practices, and comparisons with alternative data sharing methods.
What is Autoload (Singleton)?
Autoload refers to nodes or scripts that Godot automatically instantiates at game startup and keeps resident at the scene tree root. Once registered as Autoload, they persist in memory until the game ends, allowing direct access like global variables from any script in any scene.
This design pattern of "a single instance accessible from anywhere" is generally called a Singleton.
Primary Uses
Autoload is ideal for elements that need to be "shared and managed game-wide":
- Global State Management: Player score, money, lives, inventory—information related to game progression.
- Utility Functions: Sound manager, scene transition fade effects, HTTP request management—common functions you want to call from anywhere.
- System Management: Game-wide managers, event systems (signal buses)—core application functionality.
Basic Autoload Setup
Autoload configuration takes just a few steps in project settings.
1. Create a Global Script
First, create a script with the data or functionality you want to manage. Here's an example PlayerData.gd managing player data and game settings:
# PlayerData.gd
extends Node

# Basic player info
var player_name: String = "Hero"
var health: int = 100
var max_health: int = 100

# Game progress
var score: int = 0
var high_score: int = 0

# Dictionary tracking opened treasure chests
# Key: "SceneName_ChestID", Value: bool (true if opened)
var opened_chests: Dictionary = {}

func add_score(amount: int) -> void:
    score += amount
    if score > high_score:
        high_score = score

func take_damage(amount: int) -> void:
    health -= amount
    if health < 0:
        health = 0

func is_chest_opened(chest_id: String) -> bool:
    return opened_chests.has(chest_id)

func mark_chest_as_opened(chest_id: String) -> void:
    opened_chests[chest_id] = true
2. Register in Project Settings
- From the menu bar, select "Project" → "Project Settings".
- Select the "Autoload" tab at the top.
- Click the folder icon next to the "Path" field and select the
PlayerData.gdyou created. - The "Node Name" automatically becomes
PlayerData(same as the script name). This becomes the name for global access. - Press the "Add" button to register.
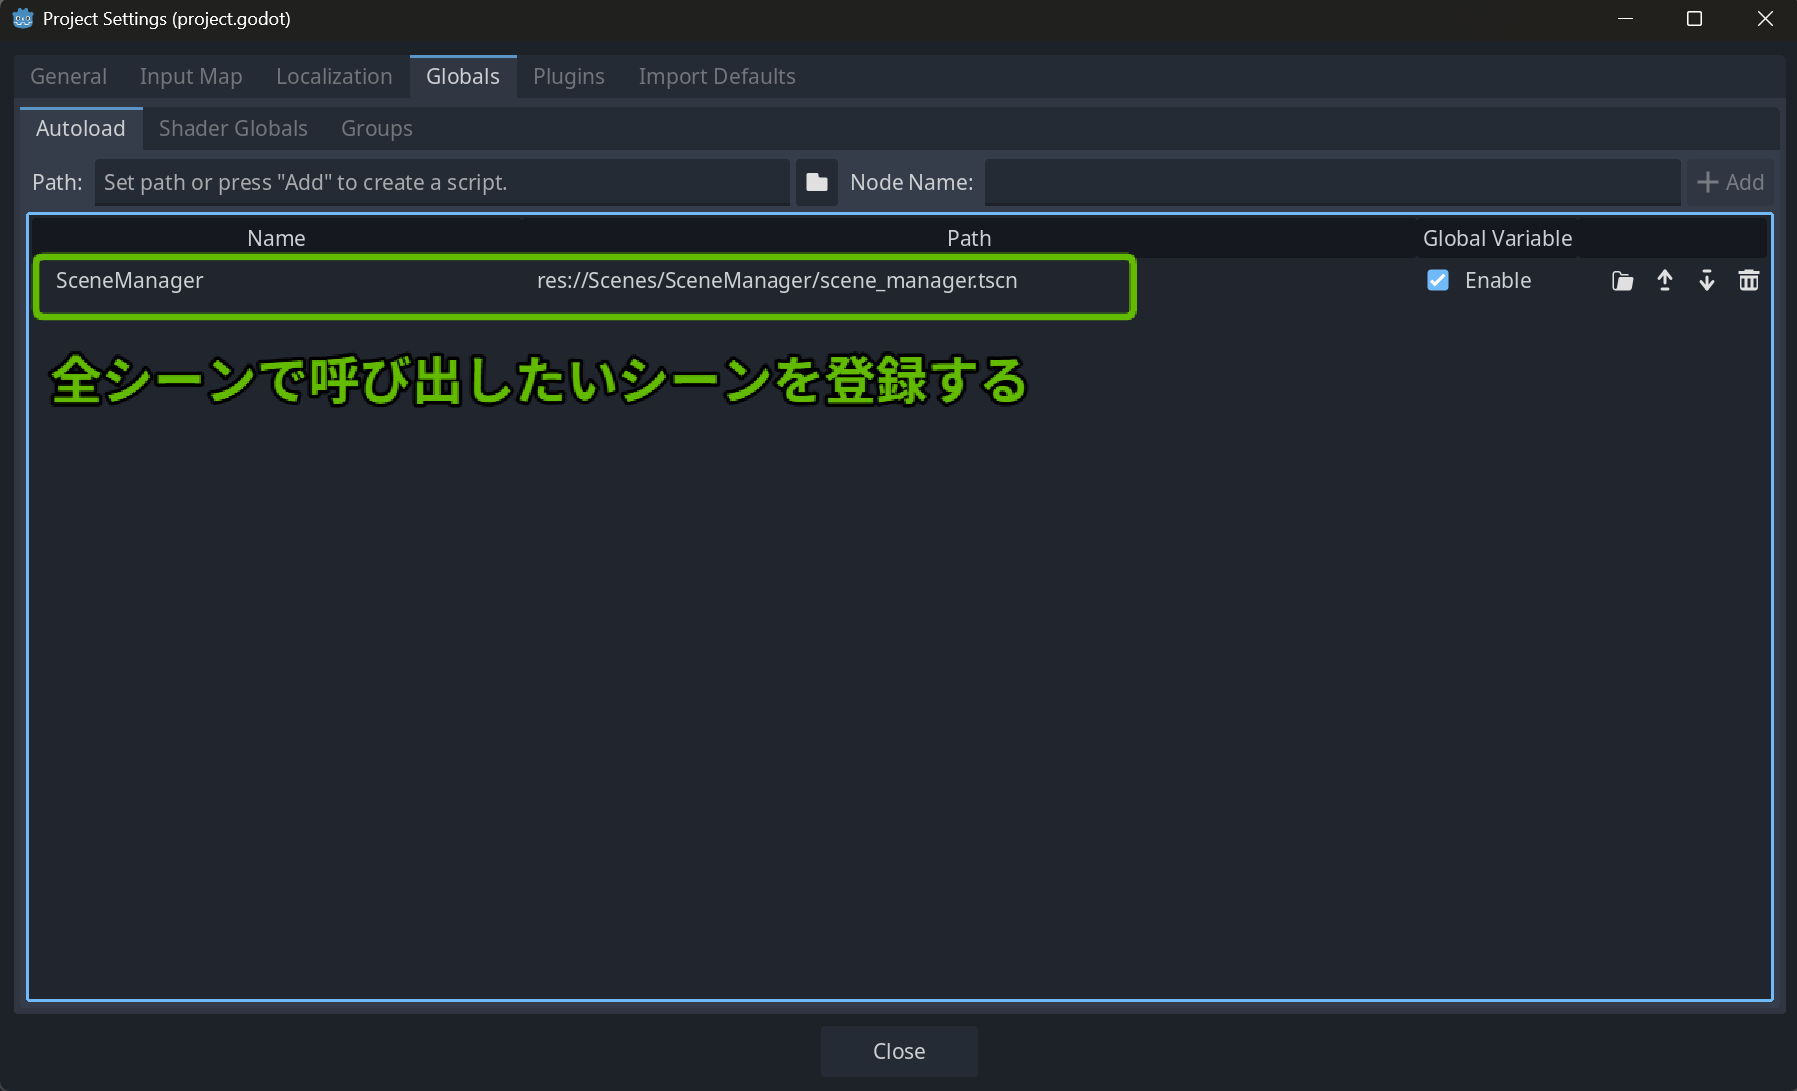
Setup is complete. When you run the game, Godot automatically instantiates PlayerData.gd and makes it accessible as PlayerData.
Accessing from Scripts
Nodes registered in Autoload function as global variables using their registered "Node Name." You can access them directly from any script without prior get_node() or @onready references.
Practical Code Examples
Adding Score When Defeating an Enemy
# Enemy.gd
func die():
    # Directly call PlayerData's function
    PlayerData.add_score(100)
    print("Current score: ", PlayerData.score)
    queue_free()
Opening a Treasure Chest
# TreasureChest.gd
@export var chest_id: String = "level1_gold_chest"

func _ready():
    # Check if already opened and update appearance
    if PlayerData.is_chest_opened(chest_id):
        $Sprite2D.frame = 1 # Show opened sprite
        is_open = true

func open():
    if is_open: return

    # Record in PlayerData as opened
    PlayerData.mark_chest_as_opened(chest_id)

    # Process contents...
    print("Opened treasure chest!")
Displaying High Score on UI
# GameOverScreen.gd
func _ready():
    # Directly reference PlayerData's variable
    $HighScoreLabel.text = "High Score: %d" % PlayerData.high_score
With PlayerData accessible from anywhere, cross-scene data passing becomes very simple.
Common Mistakes and Best Practices
While Autoload is convenient, misuse can complicate project structure and significantly reduce maintainability.
| Common Mistake | Best Practice | Explanation |
|---|---|---|
| Putting everything in Autoload | Register only truly global items | Keep global state minimal; data specific to certain scenes or features should be managed within them. |
| Directly manipulating other nodes from Autoload | Use signals for loose coupling | Instead of Autoload directly changing UI node text, define signals in Autoload and have UI connect to those signals to update itself. |
| Creating a giant God Class | Split Autoload by responsibility | Separate scripts by role: GameState, SoundManager, SceneTransition, SaveSystem, etc. |
| Allowing state changes from anywhere | Control access with setters/getters | Using properties (Godot 4.x), limit value changes to function calls for easier debugging. |
Best Practice Example: UI Updates Using Signals
Let's improve the earlier PlayerData.gd using signals:
# PlayerData.gd (improved version)
extends Node

# Signal emitted when score is updated
signal score_updated(new_score)

# Backing field (internal variable holding the actual value)
var _score: int = 0

# Property for external access
var score: int:
    get:
        return _score
    set(value):
        _score = value
        score_updated.emit(_score)  # Godot 4.x recommended signal emission

var high_score: int = 0

func add_score(amount: int) -> void:
    self.score += amount  # Use self.score to trigger the setter
    if _score > high_score:
        high_score = _score

# ... other functions remain the same ...
Note: Assigning directly to the same property name within a setter can cause infinite recursion. Therefore, use a backing field (internal variable holding the actual value) like
_score, and assign to the backing field within the setter for safety.
The UI script connects to this signal:
# ScoreLabel.gd
extends Label

func _ready():
    # Connect to PlayerData's signal
    PlayerData.score_updated.connect(self._on_score_updated)
    # Display initial score
    _on_score_updated(PlayerData.score)

func _on_score_updated(new_score: int):
    text = "Score: %d" % new_score
With this design, PlayerData doesn't need to know about ScoreLabel's existence. Even if UI composition changes, PlayerData's code needs no modification. This is the strength of loose coupling.
Comparison with Alternative Patterns
Autoload is convenient but not always the best choice. Understanding comparisons with other design patterns helps you choose appropriately for each situation.
| Pattern | Use Case | Advantages | Disadvantages |
|---|---|---|---|
| Autoload (Singleton) | Global state management, utility functions | Very easy access. Officially supported by Godot engine. | Dependencies easily become complex (tight coupling). Pollutes global space. |
| Parameter Passing During Scene Transition | Passing temporary info to next scene | Simple, doesn't create unnecessary global state. | Difficult to maintain data across multiple scenes. |
| Custom Resources (Resource) | Managing data sets for persistence | Easy file save/load. Inspector-editable. Highly reusable. | Requires extra steps for runtime dynamic state management. |
When to Use Autoload?
- Things that should be unique application-wide: Sound manager, save/load system, etc.
- Data frequently accessed from multiple unrelated scenes: Player score, money, etc.
When to Consider Alternatives?
- Passing info "only to the next scene": Consider parameter passing during scene transition.
- Managing data as blueprints like item data or character stats: Custom Resources are very powerful.
- When writing unit tests: Autoload's global state makes testing difficult. Adopting dependency injection (DI) principles—passing dependent objects via constructors or
@exportvariables instead of direct Autoload references—makes it easier to swap in mocks (test substitute objects).
Related Topics and Next Steps
After mastering Autoload, challenge yourself with more refined architectures:
- Custom Resources: Learning data-driven design for item databases, skill trees, character stats improves project scalability.
- Signal Bus: Building a global event system (signal bus) using Autoload for game-wide use.
- Data Save and Load: Learn to save information aggregated in
PlayerDatato files usingFileAccessand load it when resuming the game.
Summary
Autoload is fundamental to global data management in Godot and a powerful tool for persisting information across scenes. While setup is simple, its power makes it a double-edged sword—unplanned use can obscure project clarity.
The key is discerning what truly needs to be global, properly separating classes by responsibility, and maintaining loose coupling with other systems using signals. Reference the best practices and alternative pattern comparisons introduced here to design the optimal architecture for your project.