You land a hit but the enemy barely seems to feel it. Action games live or die on that sense of impact. The moment the player strikes an enemy, or takes a hit themselves, the character flashes white for an instant. That alone makes hits feel dramatically more satisfying. The effect is called a white flash .
It is also very easy to implement, with no shader knowledge required. Combine the modulate property with Tween and it takes a few lines of GDScript.
What You'll Learn
- How
modulatechanges color through multiplication- The HDR principle behind glowing white when RGB values go above 1
- The basic "flash white, then ease back" implementation with
Tween- When to reach for shaders instead, and how to wire this into a hit reaction
How the modulate Property Works
modulate is a color adjustment property that every 2D node inheriting from CanvasItem (Sprite2D, Label, ColorRect, and so on) has built in. Setting a Color there changes the color of that node and all of its children through multiplication .
modulate = Color(1, 1, 1)(white): unchanged from the original color (default)modulate = Color(1, 0, 0)(red): only the R component survives, so it turns redmodulate = Color(0.5, 0.5, 0.5)(gray): everything gets darkermodulate = Color(1, 1, 1, 0.5): the fourth value (alpha) makes it semi-transparent
Because it is "original color multiplied by your color," multiplying by 1 leaves it as-is and multiplying by 0.5 darkens it.
Why Does It Glow White? The HDR Effect
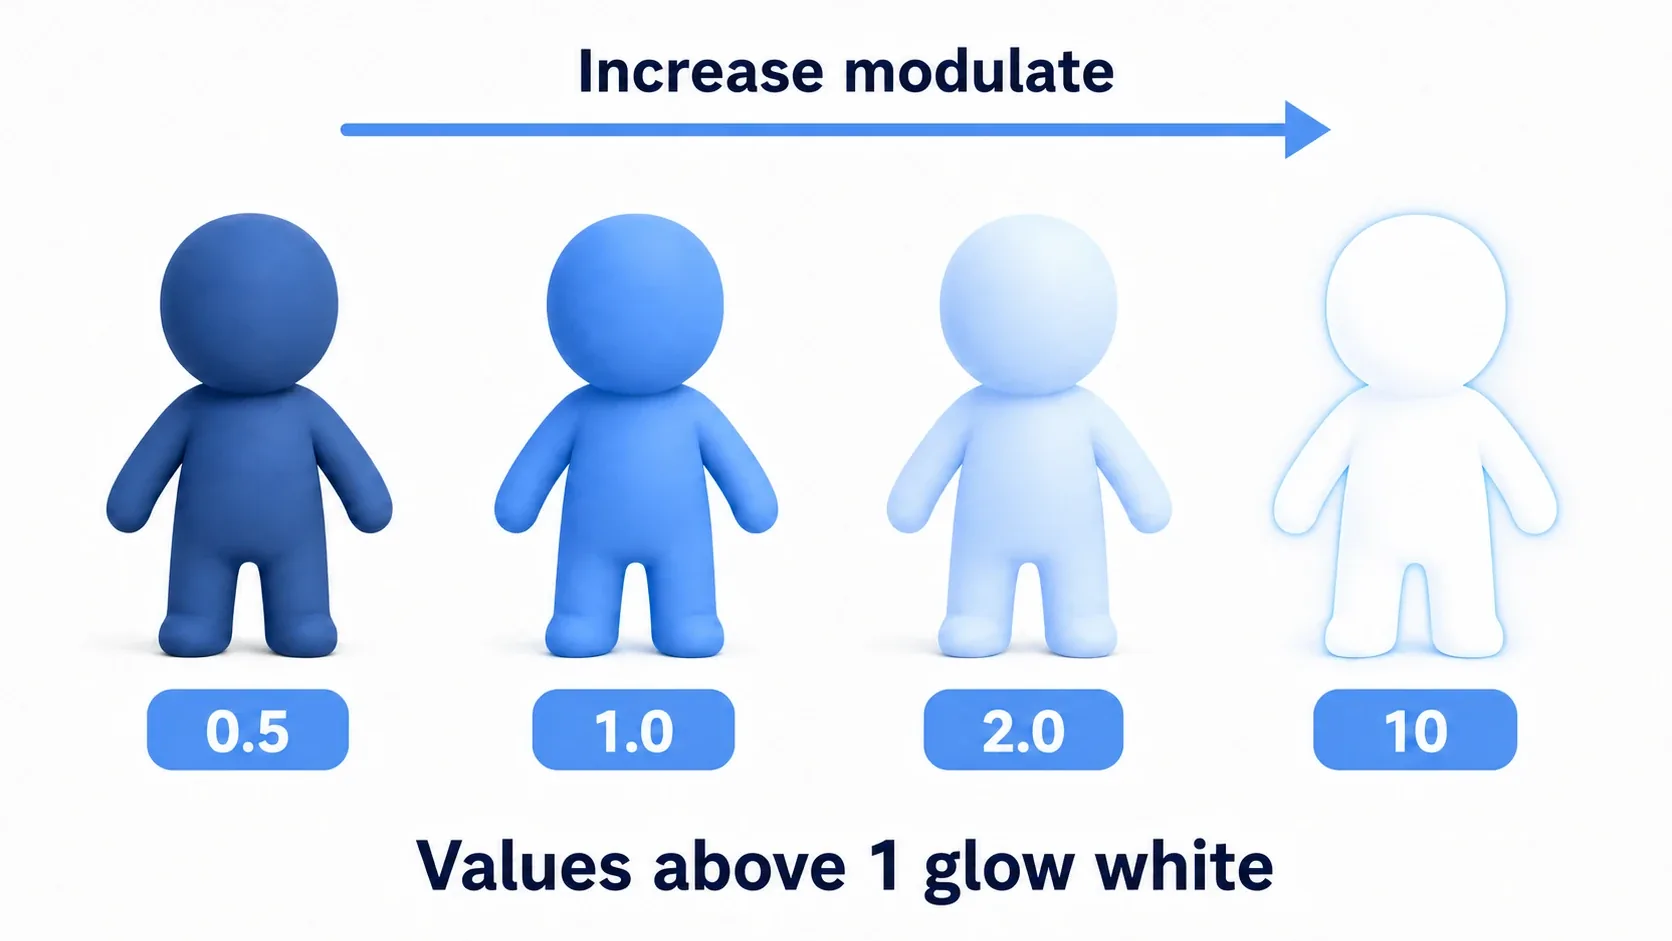
The interesting part of modulate is that RGB values can go above 1 . Normally you think of color as ranging from 0 (no light) to 1 (the original color), but when modulate's RGB goes past 1, the sprite is treated as an HDR (high dynamic range) color and appears to glow from within. That blown-out look is exactly what a white flash is.
As shown at the right end of the diagram above, a large value like modulate = Color(10, 10, 10) makes the sprite glow almost pure white regardless of its original texture colors. Spiking to a large value for an instant and immediately returning is the core of the flash effect.
The Basic Implementation: Flash and Restore with Tween
A white flash is a short animation: turn white instantly, then ease smoothly back to the original color. That kind of change over time is exactly what Tween is for.
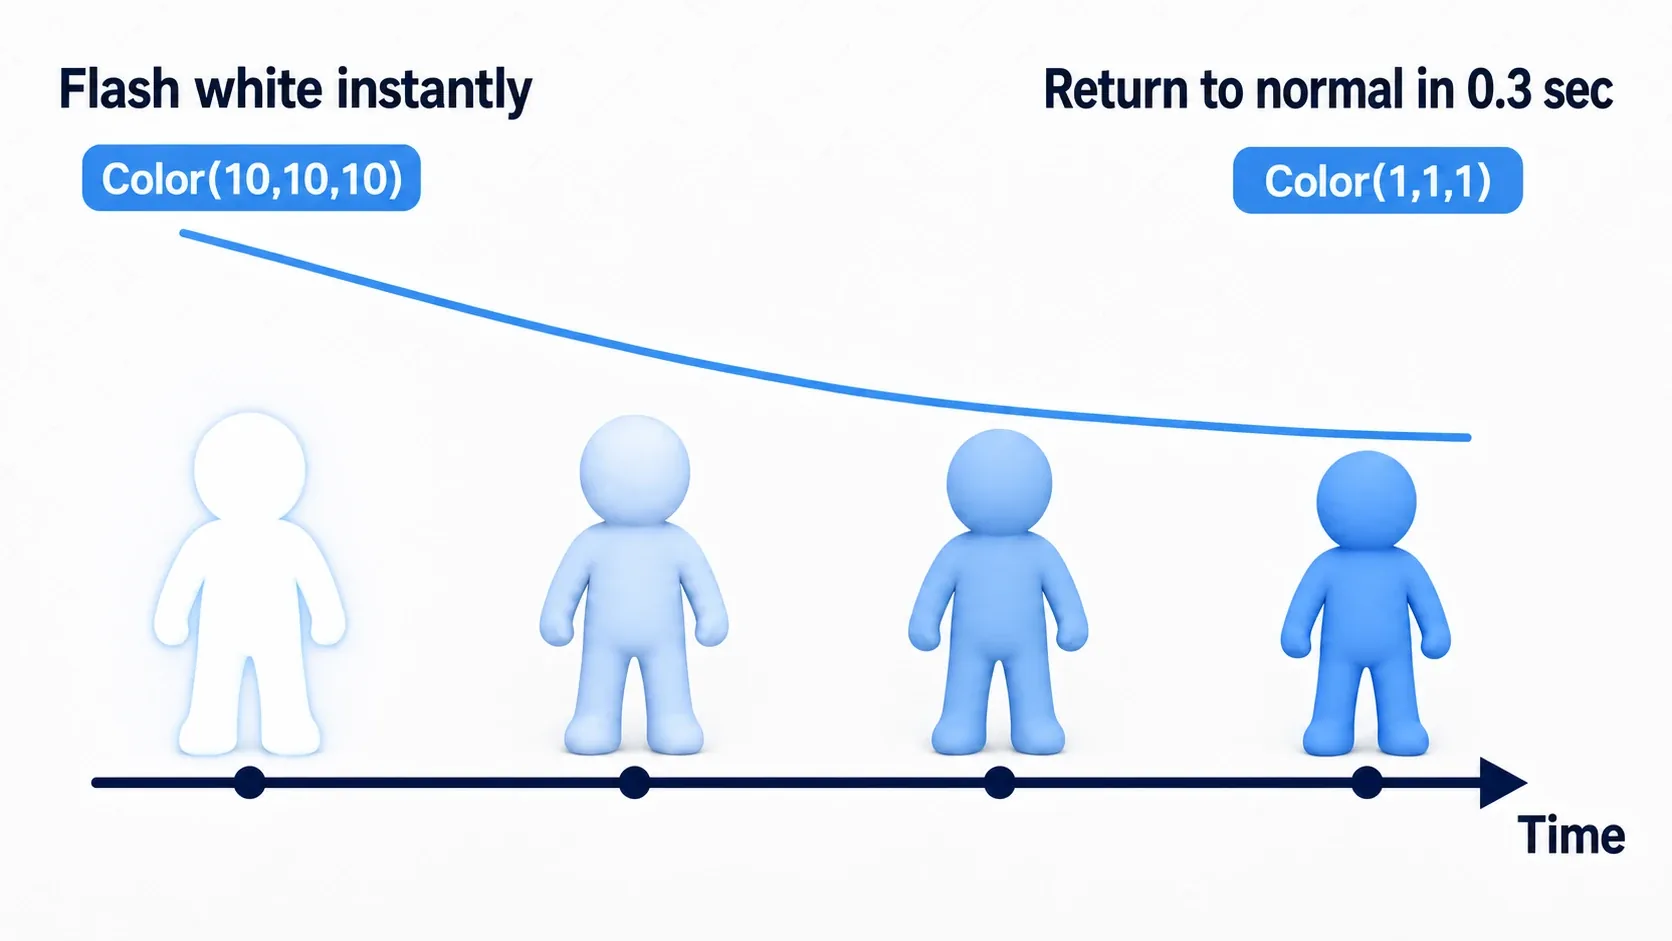
Here is a function that flashes a damaged character (a node with a Sprite2D).
# Script on something like a CharacterBody2D

# Keep the Tween in a variable so we can handle rapid consecutive damage
var flash_tween: Tween

func apply_damage_effect() -> void:
    # ... reduce HP, start invincibility frames, and so on ...
    _start_white_flash()

func _start_white_flash() -> void:
    # If a flash is already running, stop it before starting (handles rapid hits)
    if flash_tween and flash_tween.is_valid():
        flash_tween.kill()

    # 1. Turn white instantly (a large value produces HDR glow)
    $Sprite2D.modulate = Color(10, 10, 10)

    # 2. Ease smoothly back to the original Color(1,1,1) over 0.3 seconds
    flash_tween = create_tween().set_trans(Tween.TRANS_QUINT).set_ease(Tween.EASE_OUT)
    flash_tween.tween_property($Sprite2D, "modulate", Color(1, 1, 1), 0.3)
The trick to structuring this is making the flash itself a direct assignment, and using Tween only for the return . TRANS_QUINT + EASE_OUT starts sharply and settles gently, which suits the afterglow of a flash. Even under rapid damage, calling flash_tween.kill() to clear the previous flash before starting keeps it from breaking.
Warning: If
Color(10, 10, 10)doesn't look white, rendering may be clamping color at 1. Start with something aroundColor(2, 2, 2)toColor(3, 3, 3). Enabling Glow onWorldEnvironmentmakes everything above 1 bleed softly, which reads much more like real emission.
Common Mistakes and Best Practices
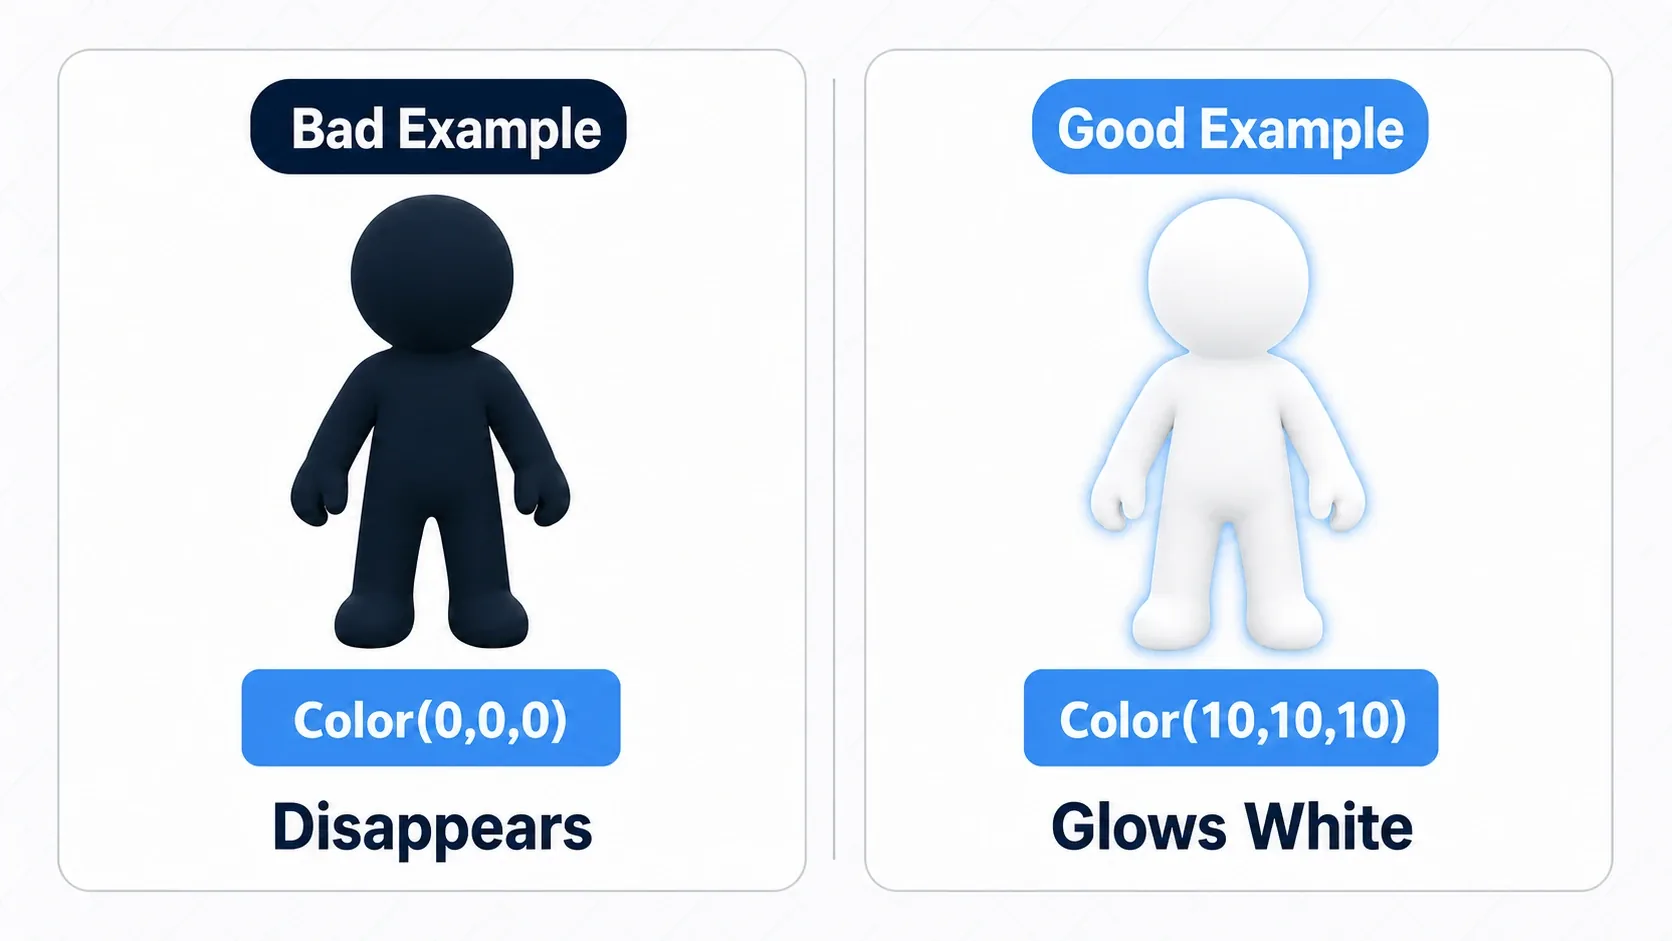
modulate effects are easy, but a few habits keep them stable. Turning something pure black while trying to darken it is a particularly common beginner mistake.
| Common mistake | Best practice |
|---|---|
Hand-animating with a counter variable inside _process | Use Tween or AnimationPlayer and write it declaratively |
Using Color(0, 0, 0) to darken, making the sprite invisible | For a white glow, push RGB above 1. To darken, keep some brightness like Color(0.1, 0.1, 0.1) |
| Mixing damage logic and effect logic in the same function | Separate hit detection from visual effects with signals, so changing the effect doesn't ripple into game logic |
Firing create_tween() on every effect without cleanup | If effects can overlap in quick succession, kill() the existing Tween and rebuild it |
modulate vs Shaders
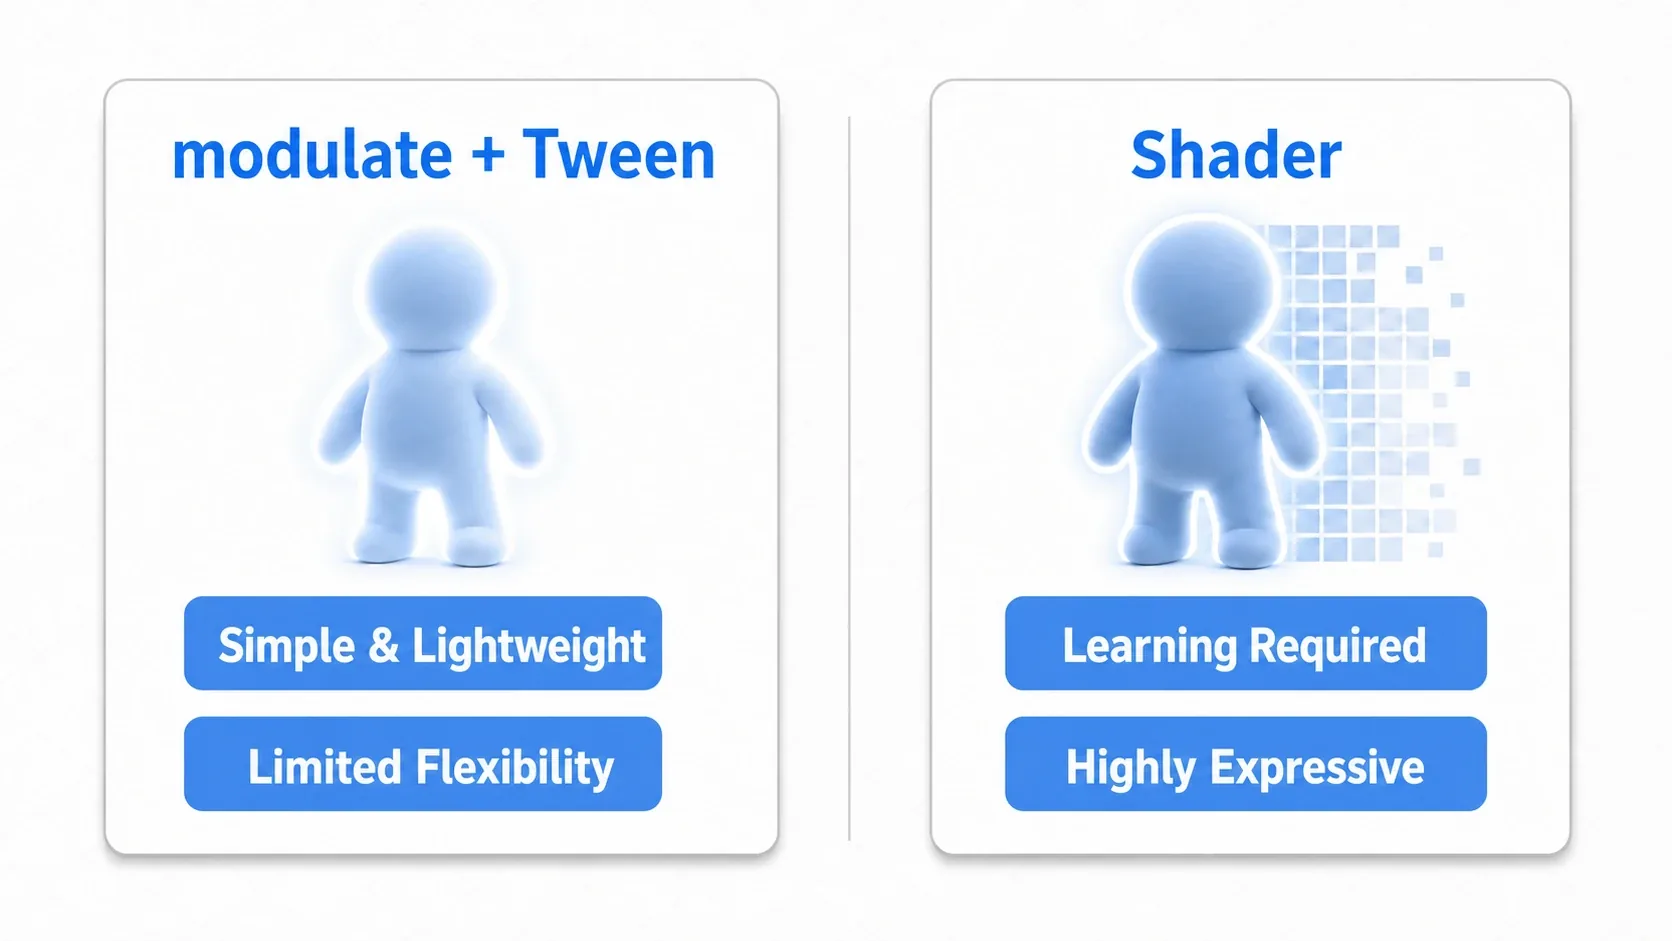
You can also build a white flash with a shader. Let's compare the convenience-focused modulate + Tween approach with the expressiveness-focused shader approach.
| Aspect | modulate + Tween | Custom shader |
|---|---|---|
| Ease of use | Excellent. A few lines of GDScript | Fair. Requires learning a shading language |
| Performance | Good. Very lightweight, fine even with many objects | Good to fair. Cheap when simple, but can get expensive |
| Expressiveness | Fair. Only color multiplication and alpha. Limited | Excellent. Outlines, dissolves, glow, all per-pixel |
| Best suited for | Damage flashes, item pickup glows, other simple effects | Elaborate visuals like a boss's special entrance |
For most damage flashes, modulate + Tween is plenty, given how easy and cheap it is. Once you want elaborate effects like glowing outlines or dissolving away, move on to Fragment Shader basics.
Hands-On: Building a Loosely Coupled Hit Reaction
A flash on its own is effective, but in a real game a hit usually triggers several things at once: a white flash, knockback, and a sound effect.
- Action : slash an enemy and it flashes white and recoils
- Shoot 'em up : a ship struck by a bullet flashes and a hit sound plays
- Roguelike : every landed attack flashes the target to sell the impact
The important part is to separate the damage logic (reducing HP) from the visual effect (the flash) . Once separated, you can reuse the same effect across the player, enemies, and destructible crates. Signals provide the bridge.
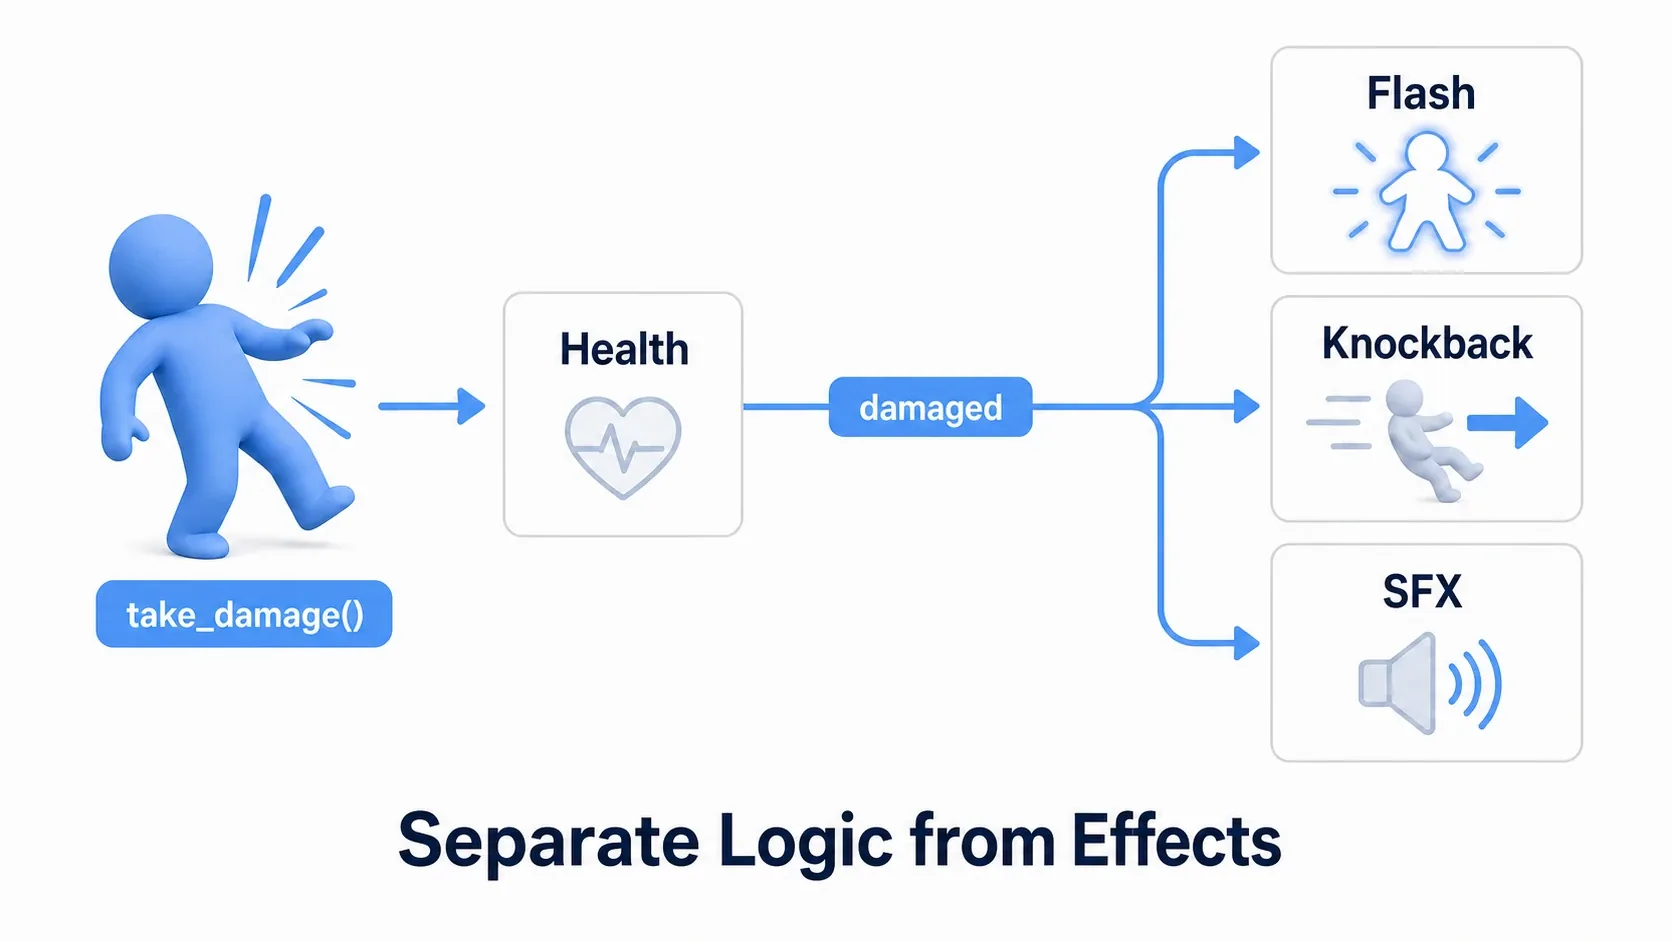
First, the node that owns HP (Health) does nothing but announce the fact that damage was taken.
# health.gd (the node that manages HP)
class_name Health
extends Node

signal damaged(amount: int)
signal died

@export var max_hp: int = 100
var hp: int = max_hp

func take_damage(amount: int) -> void:
    hp = max(hp - amount, 0)
    damaged.emit(amount)   # Just announce the hit. No visuals here
    if hp == 0:
        died.emit()
The presentation side (attached to the Sprite2D) listens for that signal and flashes.
# hit_feedback.gd (in charge of the visuals)
extends Sprite2D

@export var health: Health
var flash_tween: Tween

func _ready() -> void:
    health.damaged.connect(_on_damaged)

func _on_damaged(_amount: int) -> void:
    _flash_white()
    # Knockback and sound effects can be added here

func _flash_white() -> void:
    if flash_tween and flash_tween.is_valid():
        flash_tween.kill()
    modulate = Color(8, 8, 8)
    flash_tween = create_tween().set_ease(Tween.EASE_OUT)
    flash_tween.tween_property(self, "modulate", Color(1, 1, 1), 0.25)
There are two points to take away.
- Split logic and presentation with a signal :
Healthonly says "I got hit," andhit_feedback.gdonly listens and flashes. That is why the samehit_feedback.gddrops onto enemies, the player, and destructible crates alike. Swapping the effect never requires touchingHealth. - Always kill the previous Tween before flashing : even when rapid hits call
_flash_white()repeatedly, rebuilding afterkill()keeps it from freezing at some half-lit brightness.
Sound effects and knockback grow the same way, by adding them to _on_damaged(). Having all effect additions land in one place is the biggest payoff of splitting things up.
Bonus: Good to Know for Later
Once you can build a flash, these are worth knowing about. For now, just knowing the options exist is enough.
- Use
self_modulateto spare the children :modulateapplies to every child node. When you want to tint only a UI panel and leave its labels alone,self_modulateapplies to the node itself only. - Use color to convey meaning : a reddish flash for the player getting hit (
Color(4, 1, 1)) and white for hits on enemies (Color(8, 8, 8)) makes the situation readable at a glance. - Want more glow? Use Glow : enabling Glow on
WorldEnvironmentmakes sprites withmodulateabove 1 bleed softly, giving the flash a much richer look. - Elaborate effects belong to shaders : glowing outlines and noise-based dissolves are Fragment Shader basics territory.
Summary
modulate: a property that multiplies aCanvasItem's color. Pushing RGB above 1 produces an HDR white glow- Building the flash : assign the white directly for the instant, then use
Tweento ease back toColor(1, 1, 1) - Handling rapid hits : call
flash_tween.kill()to stop the previous flash before starting - Design : split damage logic from presentation with signals so the same effect gets reused
The white flash gives you a big boost in game feel for very little effort. Add one to enemy hits first, then layer on sound effects, knockback, and shake with AnimationPlayer, and your sense of impact will keep growing.