Shaders are a powerful way to raise the visual quality of a game, but shaders written in code are full of math and GLSL, and that alone stops a lot of people. VisualShader is the entry point for exactly that situation. It's a system for building shaders by connecting nodes instead of writing code.
This article covers what VisualShader is, the main node types and how they connect to Output, how it maps to code shaders, and when to use each, all with diagrams. Even if math isn't your thing, you can get into shaders through wiring.
What You'll Learn
- What VisualShader is (shaders built by connecting nodes)
- The main node types and the flow of connecting them to Output
- How it maps to code shaders
- When to use VisualShader versus code
What VisualShader Is: Building Shaders from Nodes
There are two ways to make a shader: writing code and connecting nodes (VisualShader). Both end up as the same shader, but the experience of building them is very different.
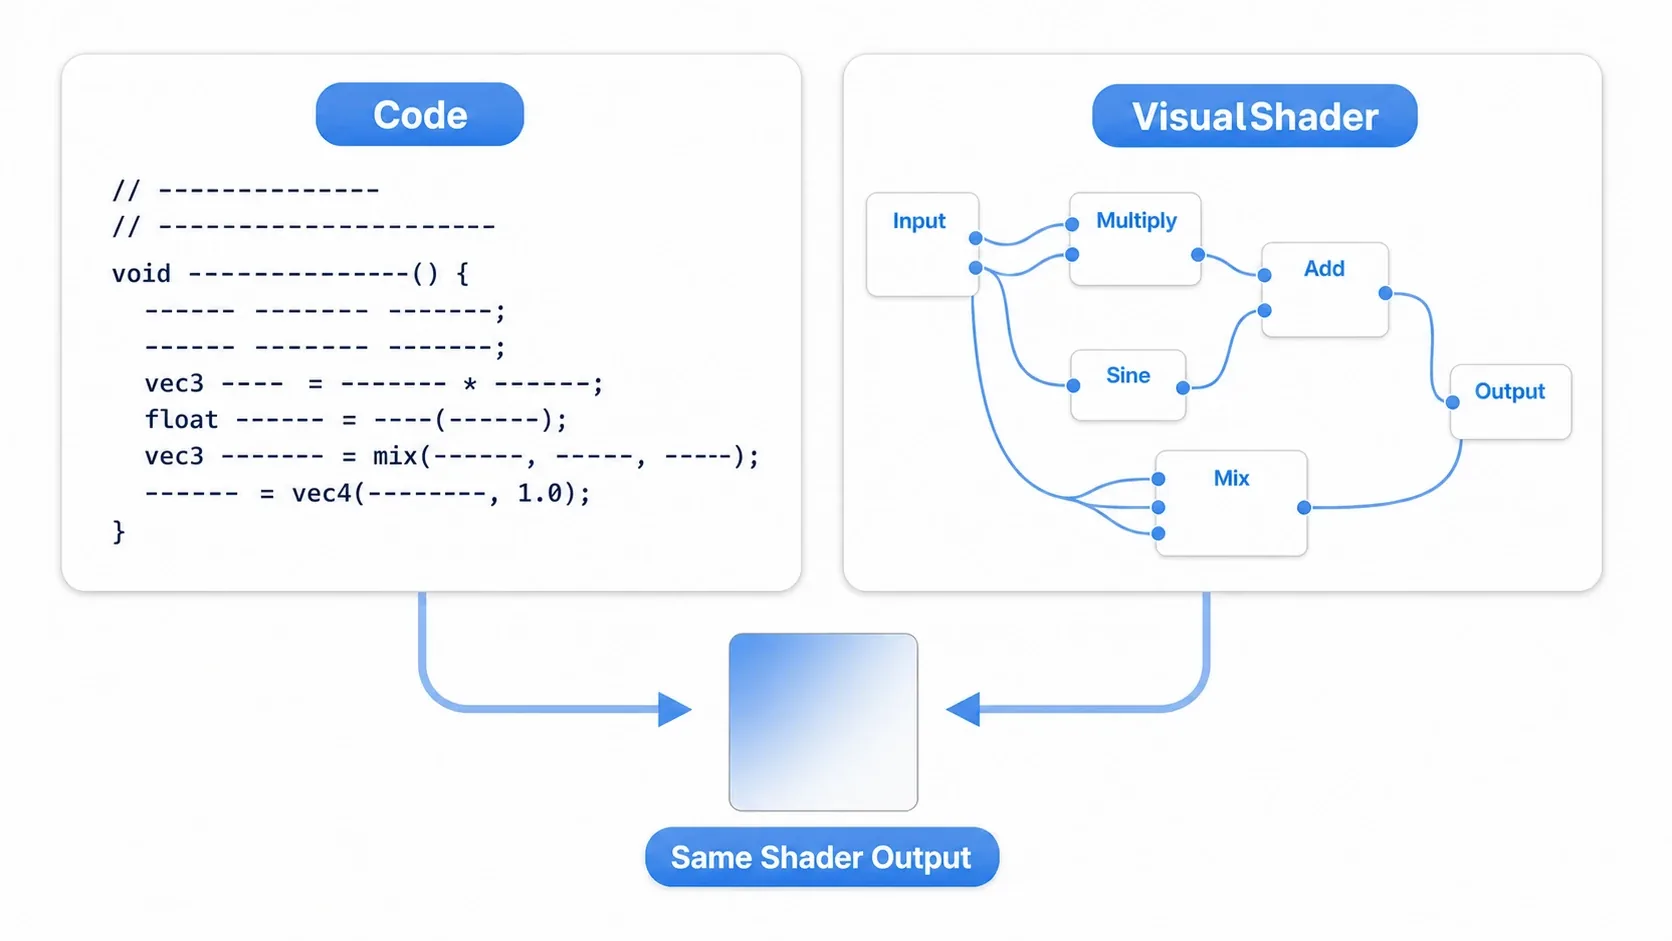
- Code version: you write math in a GLSL-like syntax. Highly flexible and capable of complex work, but a higher bar for beginners.
- VisualShader (node version): you place nodes that represent operations and join them with wires. You can build things visually without typing any math.
Creating one is easy. Assign a ShaderMaterial to the object's material, choose "New VisualShader" in its Shader field, and an editor opens where you lay out and connect nodes.
Connecting Nodes to Output
A VisualShader flows as "input nodes to processing nodes to the Output node." Picture wiring data from left to right.
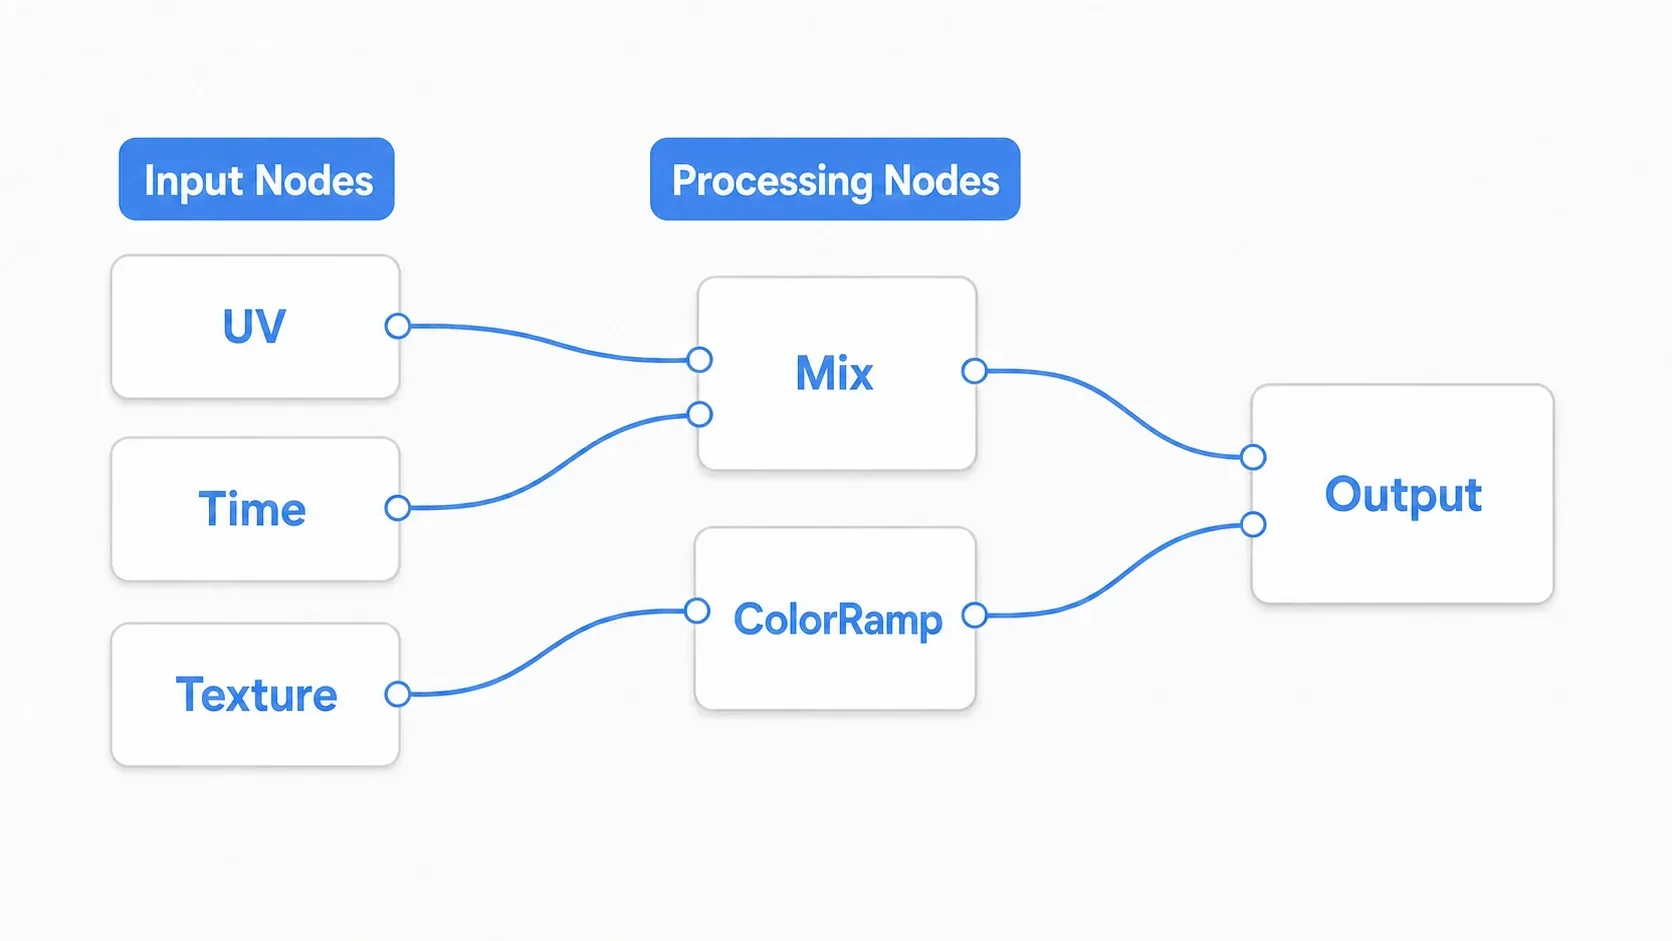
- Input nodes: the raw material.
UV(texture coordinates),Time,Texture(reads an image), and so on - Processing nodes: they compute values.
Mix(blend two values, a lerp), vector math,ColorRamp(a color gradient), and more - Output node: the destination for your result. Whatever you wire in here shows up on screen
To display a texture as-is, for example, you just connect the Texture node's color to Output's color. To change the color over time, mix Time into the math and then feed Output. Connecting nodes with wires instead of typing math is the basic operation of VisualShader.
The Output Node: Different Targets in 2D and 3D
What the Output node contains changes between 2D (canvas_item) and 3D (spatial). Connect to the right target for what you're building.
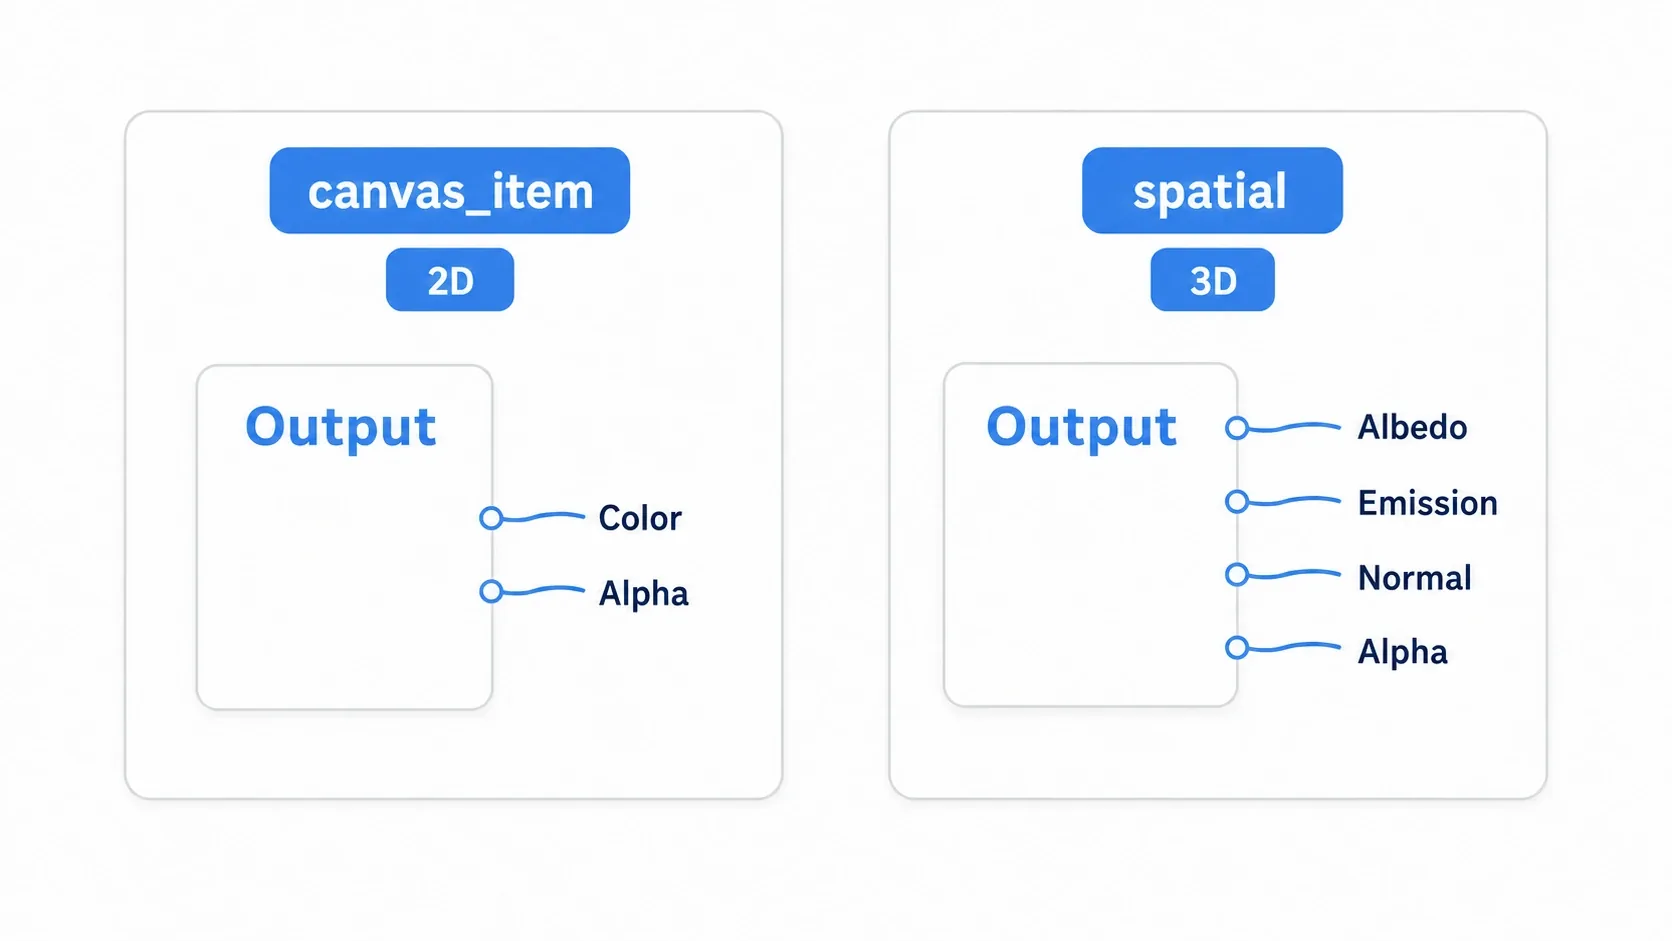
canvas_item(2D): the main targets areColorandAlpha. This is the mode for sprite and UI shaders.spatial(3D): a richer set of 3D material outputs includingAlbedo(base color),Emission(glow),Normal(surface detail), andAlpha.
Which mode you use is determined by what the shader is attached to (a 2D sprite or a 3D mesh). Starting by outputting a color to 2D's Color makes the results easiest to read.
Hands-On: Building a Hit Flash with Nodes
Getting hit in an action game, an enemy taking fire in a shmup, a damage effect in an RPG. A hit flash that makes a character glow white the instant an attack lands is a classic effect. Let's build it out of VisualShader nodes.
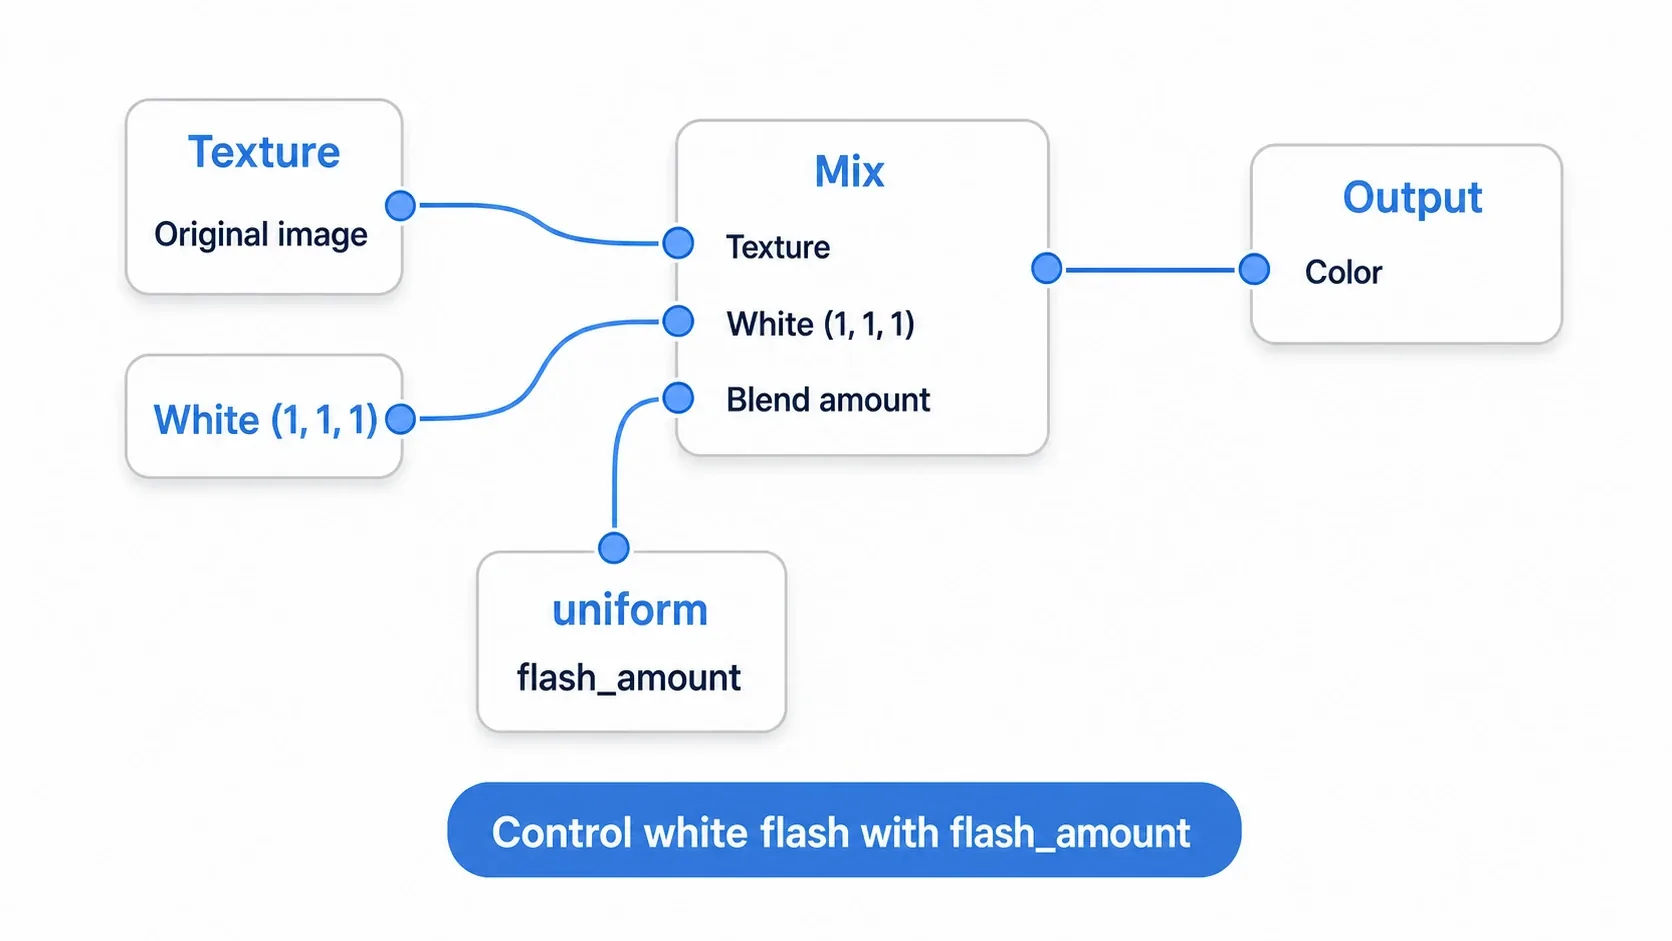
The mechanism is simple. Blend the original texture's color with white using a Mix node, and control the blend factor with a uniform (a value you can change from outside).
- Get the original art's color with a
Texturenode - Prepare a
Vectorfor white ((1, 1, 1)) - Blend "the original color" and "white" with a
Mixnode, usingflash_amount(a uniform) as the factor - Connect the result to
Output'sColor
After that, all you do is raise and lower flash_amount from a script. Set it to 1 the moment damage lands and return it to 0 right away, and you get a quick white flash that snaps back (a Tween is handy for easing the value back).
There are two points to take away.
Mixis the all-purpose blending node:Mix(a lerp) blends two colors or values by a ratio, and it's the foundation for flashes, fades, color shifts, and just about every other effect. Learn this one first and it carries you a long way.- A uniform gives you a knob you can turn from outside: prepare a single uniform like
flash_amountand you can drive the same shader freely from a script. It's the same idea asuniformin code shaders.
If multiplying a color is all you need, a white flash with modulate is the easier route. Think of shaders as the option you reach for when you want more elaborate processing.
Choosing Between Nodes and Code
Neither VisualShader nor the code version is superior. You pick based on the situation.
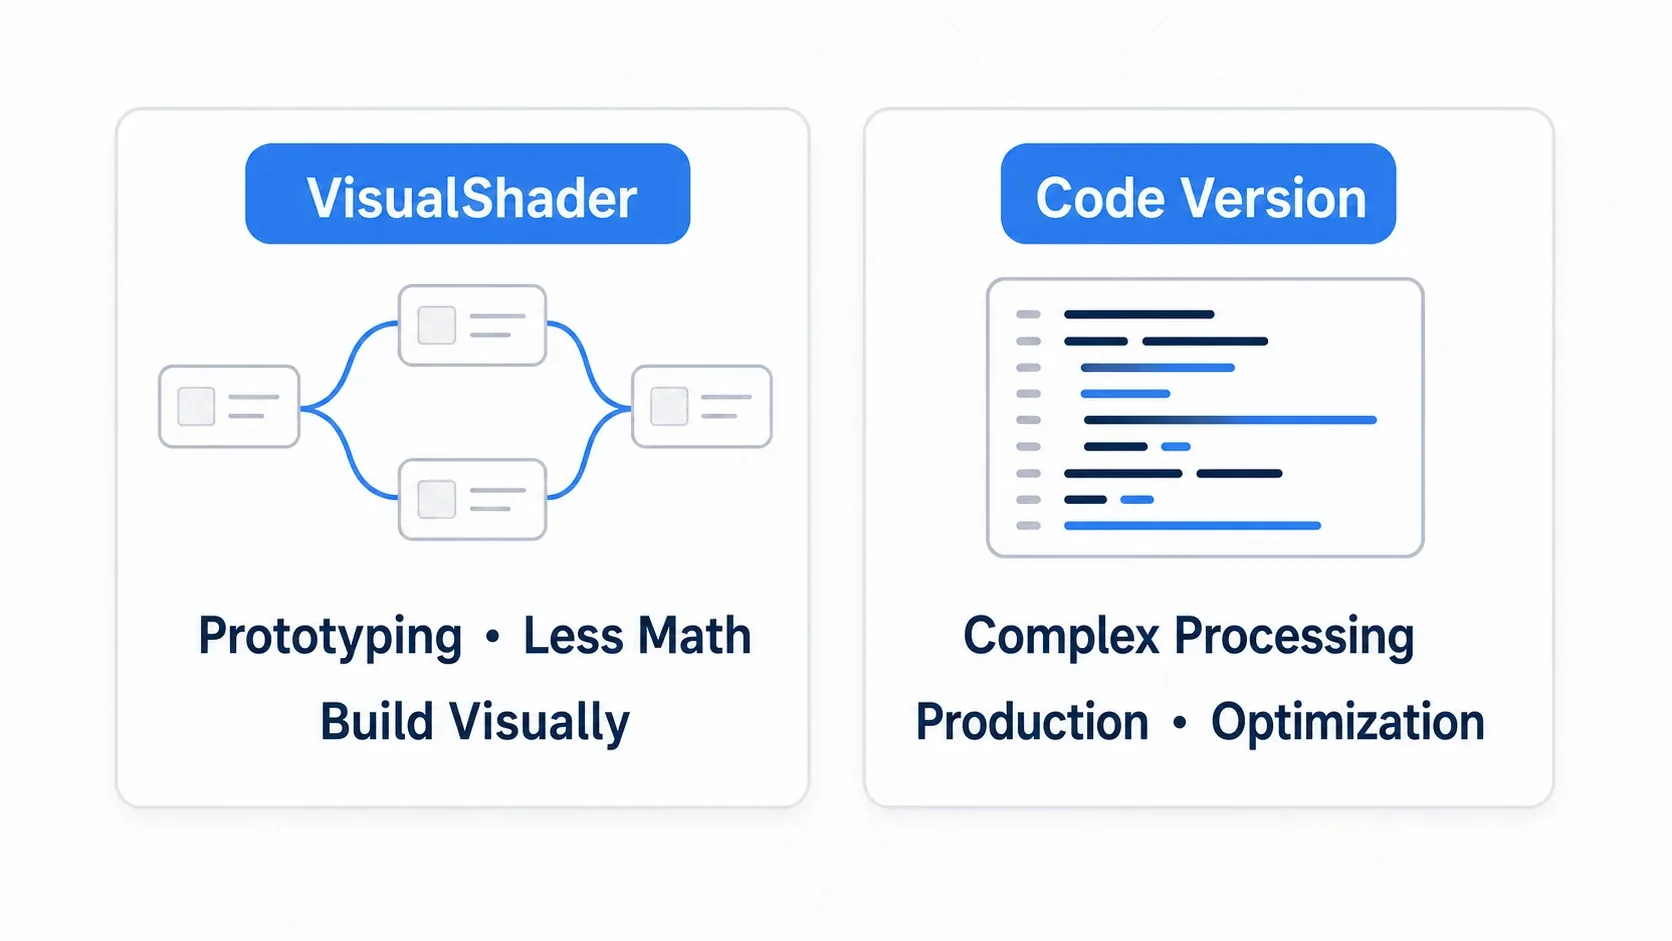
| VisualShader (nodes) | Code version | |
|---|---|---|
| Best for | Prototyping, not being comfortable with math, building visually | Complex logic, mass production, fine-grained optimization |
| Strengths | Intuitive, just connect things, results are easy to see | Highly flexible, reusable, easy to diff and version |
The route I recommend is getting a feel for shaders in VisualShader, then moving to code once you're comfortable. Having experienced "blend a texture" and "animate over time" as nodes, you'll recognize mix() and TIME in the code version instantly. Conversely, when your node count grows and the wiring turns into spaghetti, that's the sign to move to code.
Bonus: Good to Know for Later
- Check results with previews: many nodes show a small preview of their resulting color right there. Being able to visually check what's happening while you wire is one of VisualShader's biggest advantages.
- The official node list when you're stuck: there are a lot of node types. Searching the node list in the official documentation is the fastest way to find one that matches what you want.
- Full-screen effects are a separate technique: outlines and chromatic aberration applied across the entire screen belong to post-processing with
hint_screen_texture(mostly code-based, though the concepts carry over to VisualShader).
Summary
- VisualShader builds shaders by connecting nodes instead of writing code
- Create one with "New VisualShader" in a
ShaderMaterial'sShaderfield, and wire it in the order input, processing, Output - Output targets are Color/Alpha in 2D (
canvas_item) and Albedo/Emission in 3D (spatial), among others - With
Mixand a uniform, you can build effects like a hit flash entirely out of nodes - Use VisualShader for prototyping and when math isn't your thing, code for complex or mass-produced shaders
Start with the smallest possible shader on a 2D sprite: Texture connected to Output.Color. Once you get the feel of "connect a wire, the picture changes," shaders stop being scary.
Further Reading
- Fragment Shader Basics: shaders written in code (the companion piece to this article)
- White Flash with modulate: a simpler damage effect that doesn't use shaders
- Smooth Animation with Tween: animating uniforms smoothly
- Godot Official Docs: Using VisualShaders: primary reference for VisualShader