When you build a 2D map, picking every seam by hand is far more tedious than it sounds: the border between grass and dirt, the corner of a cliff, the curve of a road. And every time you redraw a small part of the map, you have to redo all the surrounding border tiles too.
Godot 4's Terrains (autotiling) feature makes that work disappear. You roughly paint "grass here, dirt there," and the engine picks and places the tiles that fit the borders. This article walks through it in order, following the actual editor screens: creating the TileMapLayer node, understanding Peering Bits (the heart of Terrains), drawing a map, and finally generating one procedurally from GDScript.
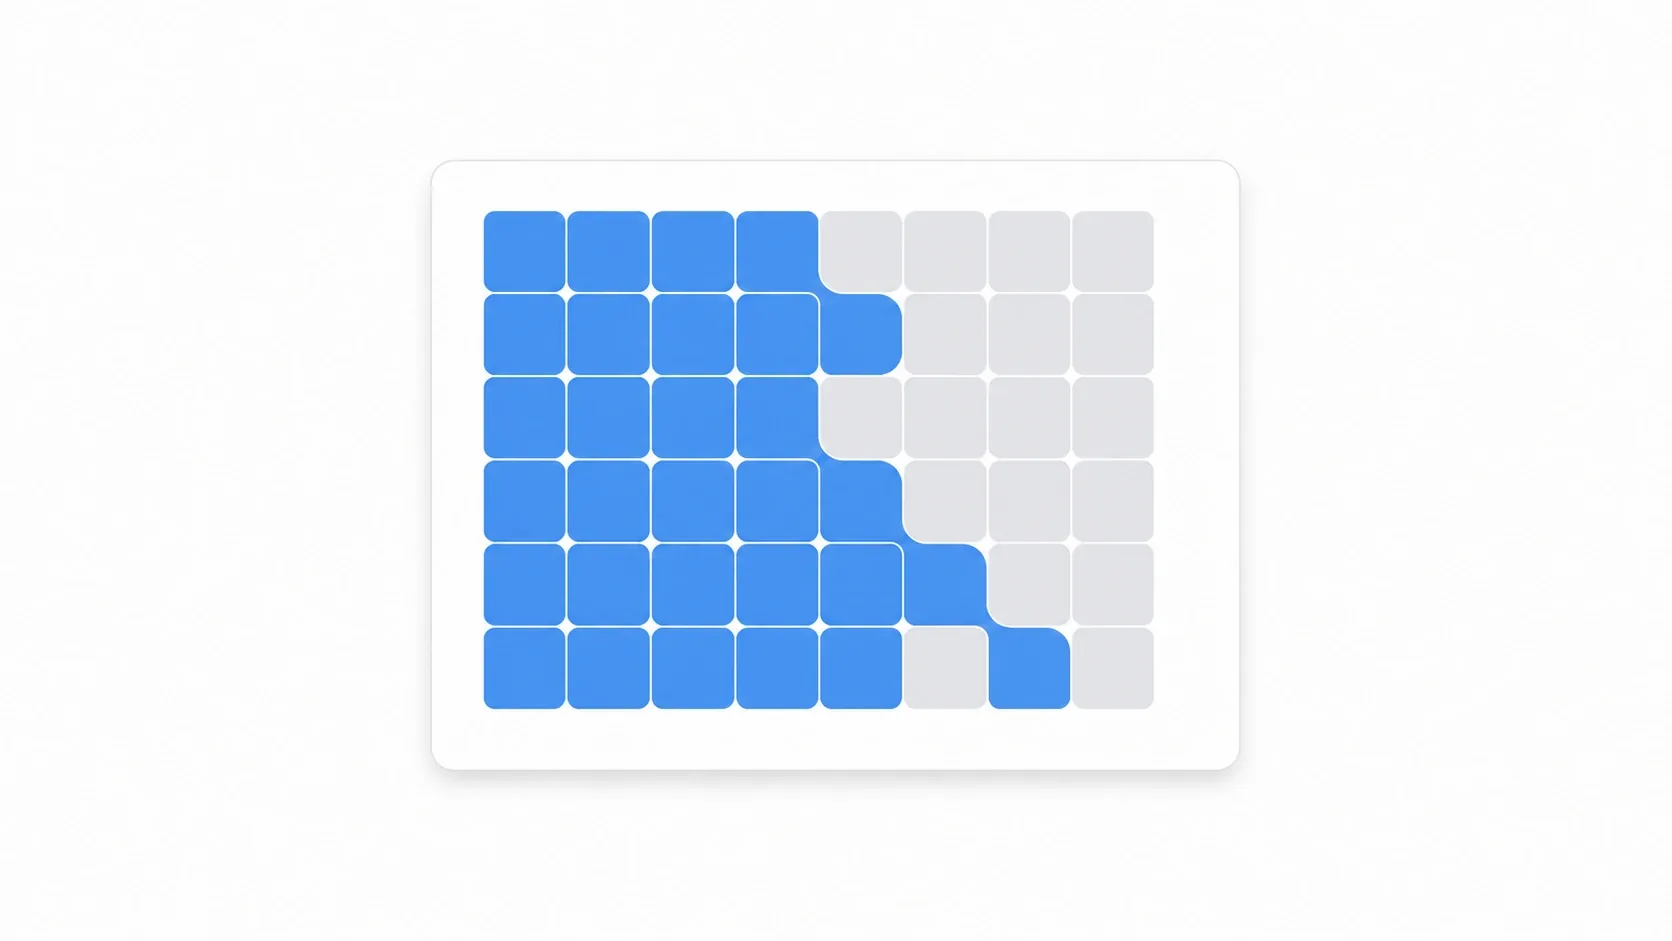
What You'll Learn
- What autotiling actually automates
- How to prepare the
TileMapLayernode and a TileSet (and how it differs from the oldTileMap)- The core idea behind Peering Bits, the 3x3 connection rules at the heart of Terrains
- Drawing with the Terrain brush, and procedural generation via
set_cells_terrain_connect()
- What Autotiling Automates
- Setup: Preparing a TileMapLayer and a TileSet
- The Heart of Terrains: Understanding Peering Bits
- Configuring the Terrain Set and Peering Bits
- Drawing the Map with the Terrain Brush
- Common Mistakes and Best Practices
- Performance Optimization
- Hands-On: Generating a Dungeon from GDScript
- Summary
What Autotiling Automates
What autotiling solves is the monotonous job of choosing border tiles.
Building a map by hand means picking the right tile for every position yourself: the "grass center" tile in the middle of a field, the "grass on the left, dirt on the right" tile at the seam, a dedicated corner tile at corners, and so on. Redraw the map and you redo all the surrounding border tiles too.
Set up Terrains and the engine takes that judgment off your hands. All you do is paint terrain: "this area is grass, this area is dirt." The engine looks at how neighboring cells combine and automatically places the appropriate corner, edge, and center tiles.
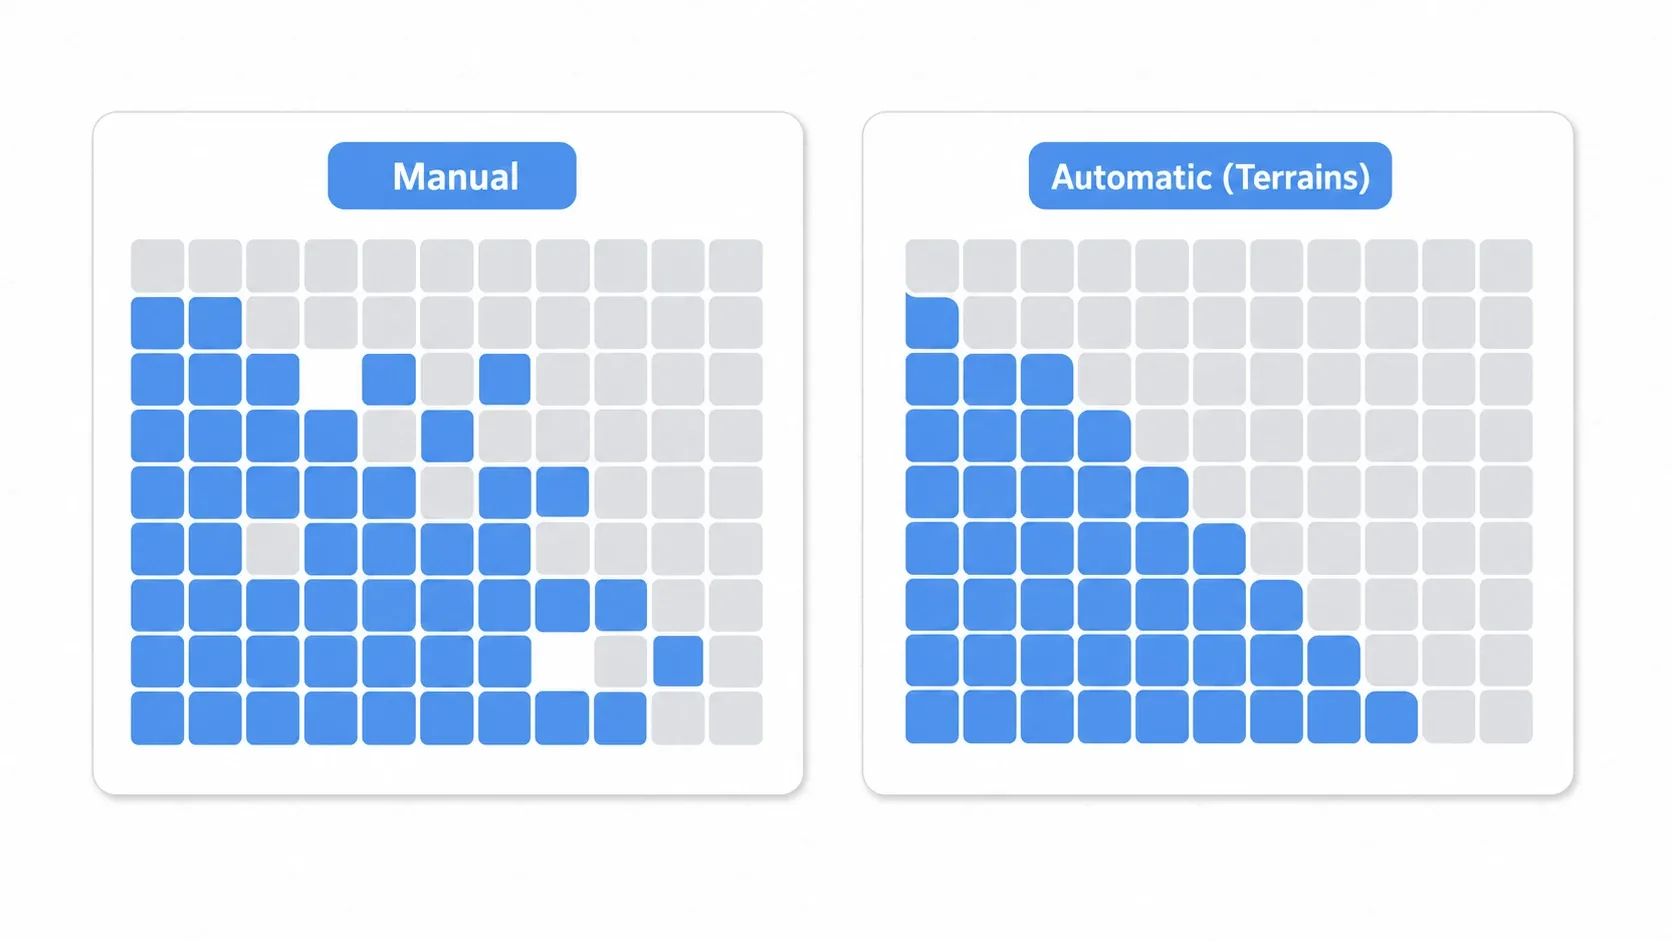
RPG overworlds, roguelike dungeons, destructible sandbox terrain: the more often your map's shape changes, the more this automation pays off.
Setup: Preparing a TileMapLayer and a TileSet
First, build the foundation you'll draw the map on.
Step 1: Create a TileMapLayer Node
Add a tilemap node to your scene. Searching for "tilemap" in the node creation dialog turns up two entries, TileMap and TileMapLayer.
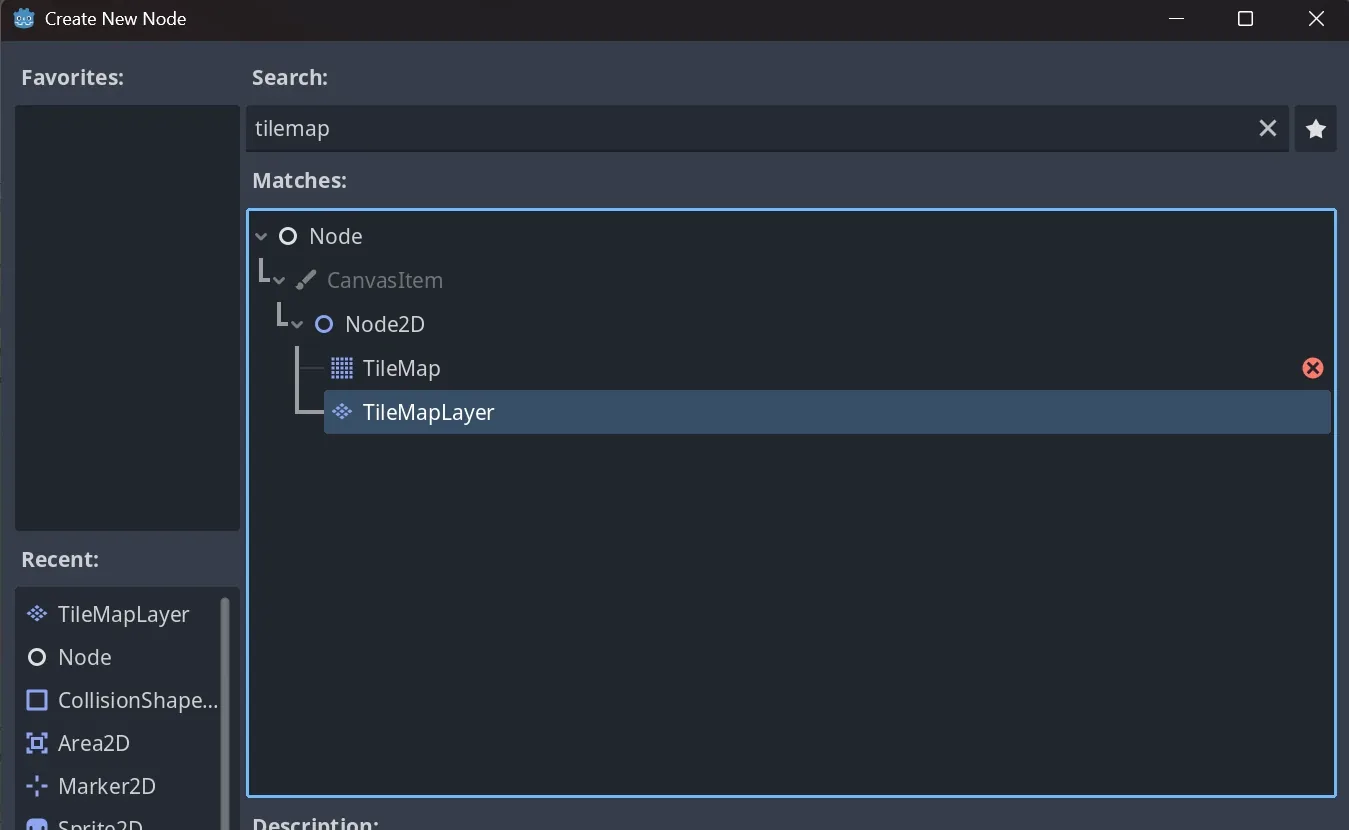
The one to pick is TileMapLayer. The old TileMap node was deprecated in Godot 4.3, and you can see the warning icon on it in the image above. The current design treats one layer as one TileMapLayer node, so ground, decoration, and collision each live in their own TileMapLayer.
Step 2: Create a New TileSet
Select the TileMapLayer and choose "New TileSet" from the "Tile Set" property in the Inspector. That creates the TileSet resource that defines how tiles look and how they collide.
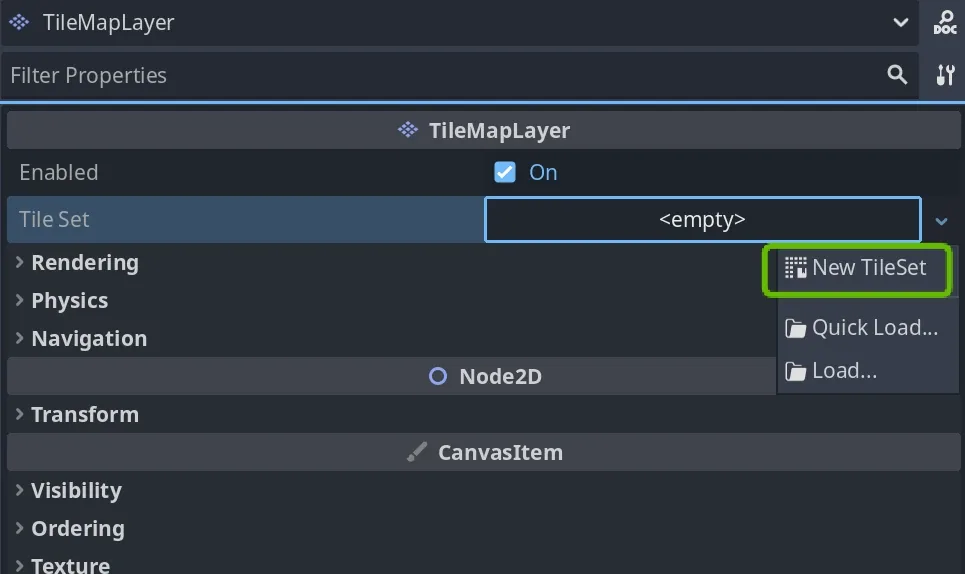
Step 3: Add Your Tileset Image to an Atlas
Click the TileSet you just created and the TileSet editor opens at the bottom of the screen. In the "TileSet" tab, create an atlas with the "+" button at the lower left, then drag and drop your tileset image in. In "Setup" mode, set the Tile Size to match the grid in the image (16x16 px in this example).
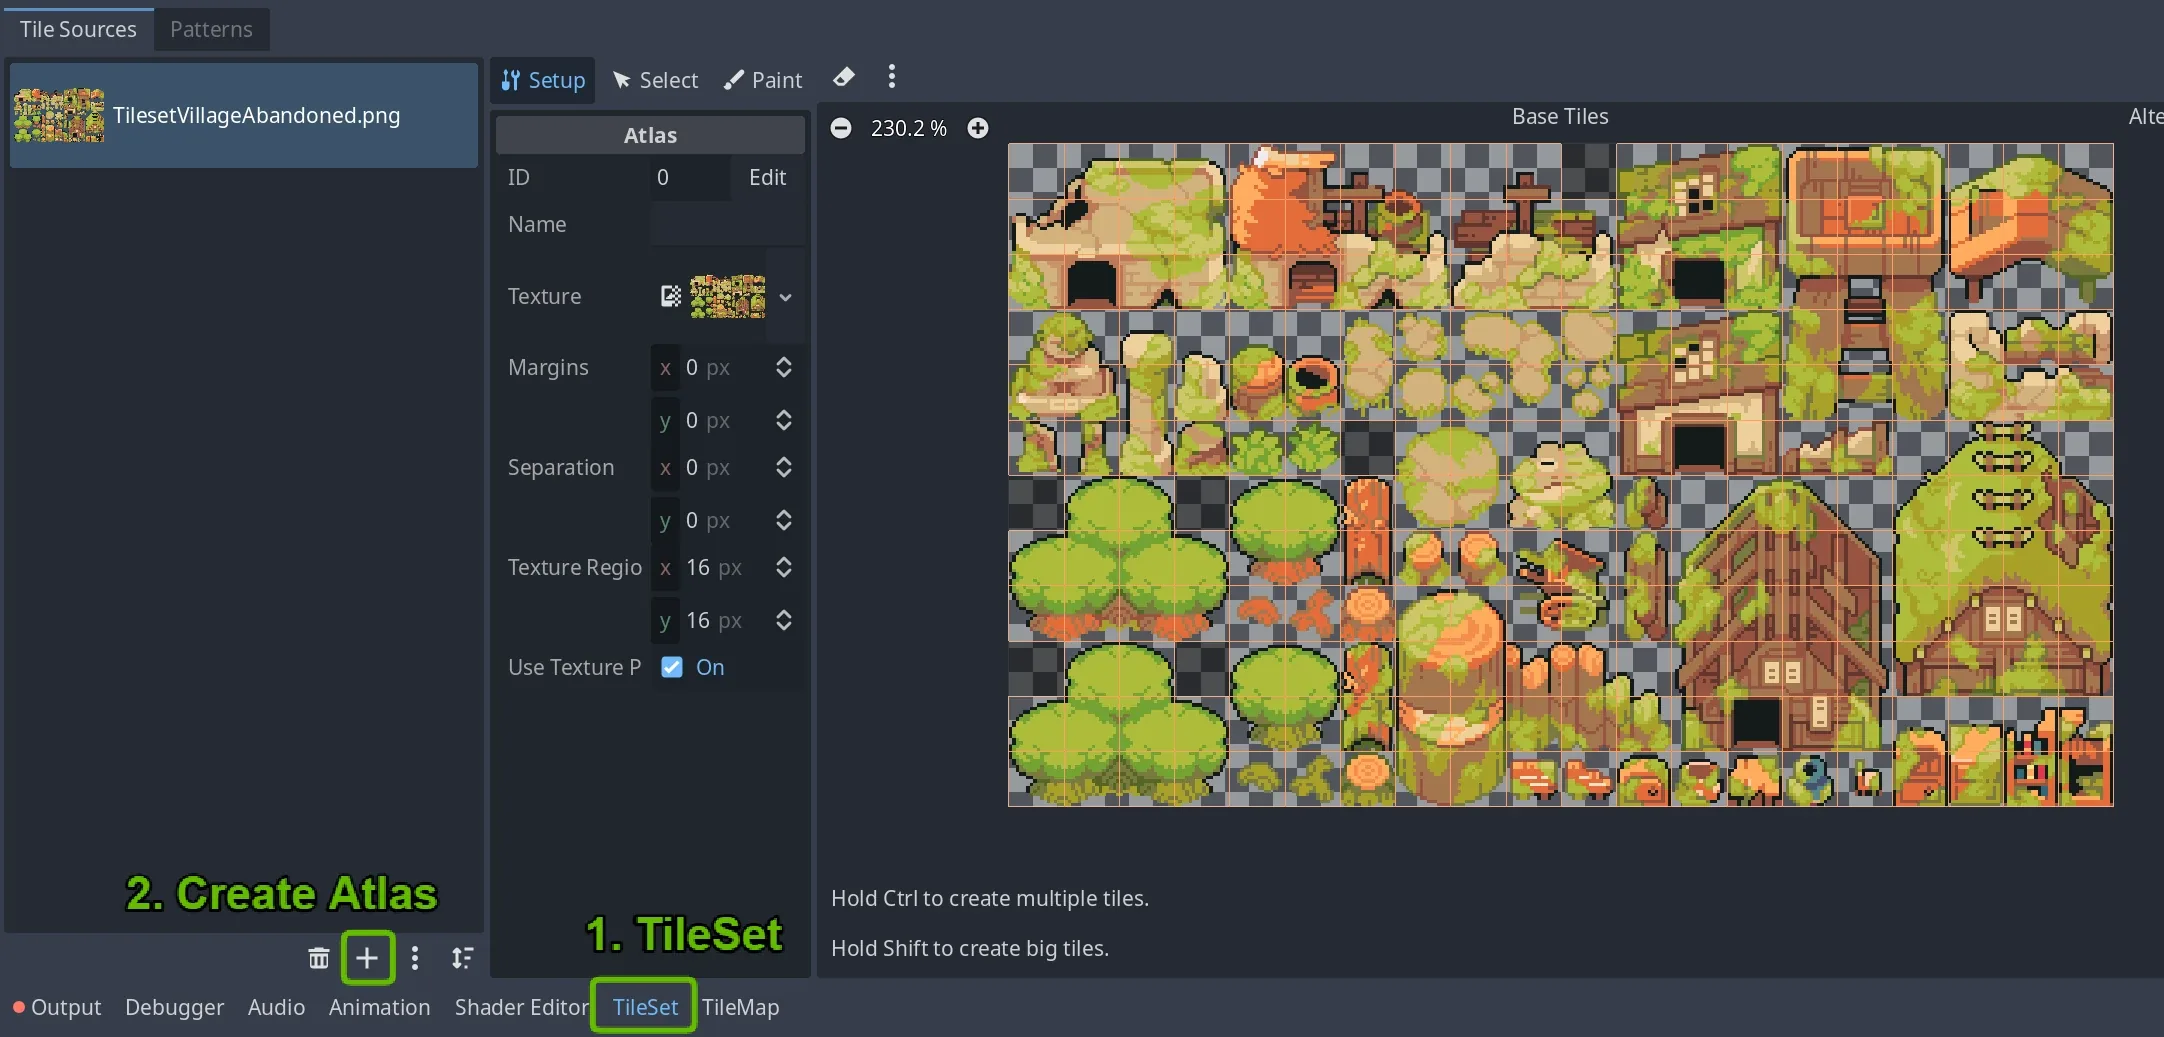
You're now ready to draw a map. From here on, we get to the real topic: configuring Terrains.
The Heart of Terrains: Understanding Peering Bits
Before diving into settings, let's get the idea of Peering Bits straight, since they're the heart of Terrains. Once this clicks, the meaning of every setup step below becomes obvious.
Peering Bits are the connection rules you teach each tile: "which terrains must surround me for this tile to be used?" You specify them per tile on a 3x3 grid.
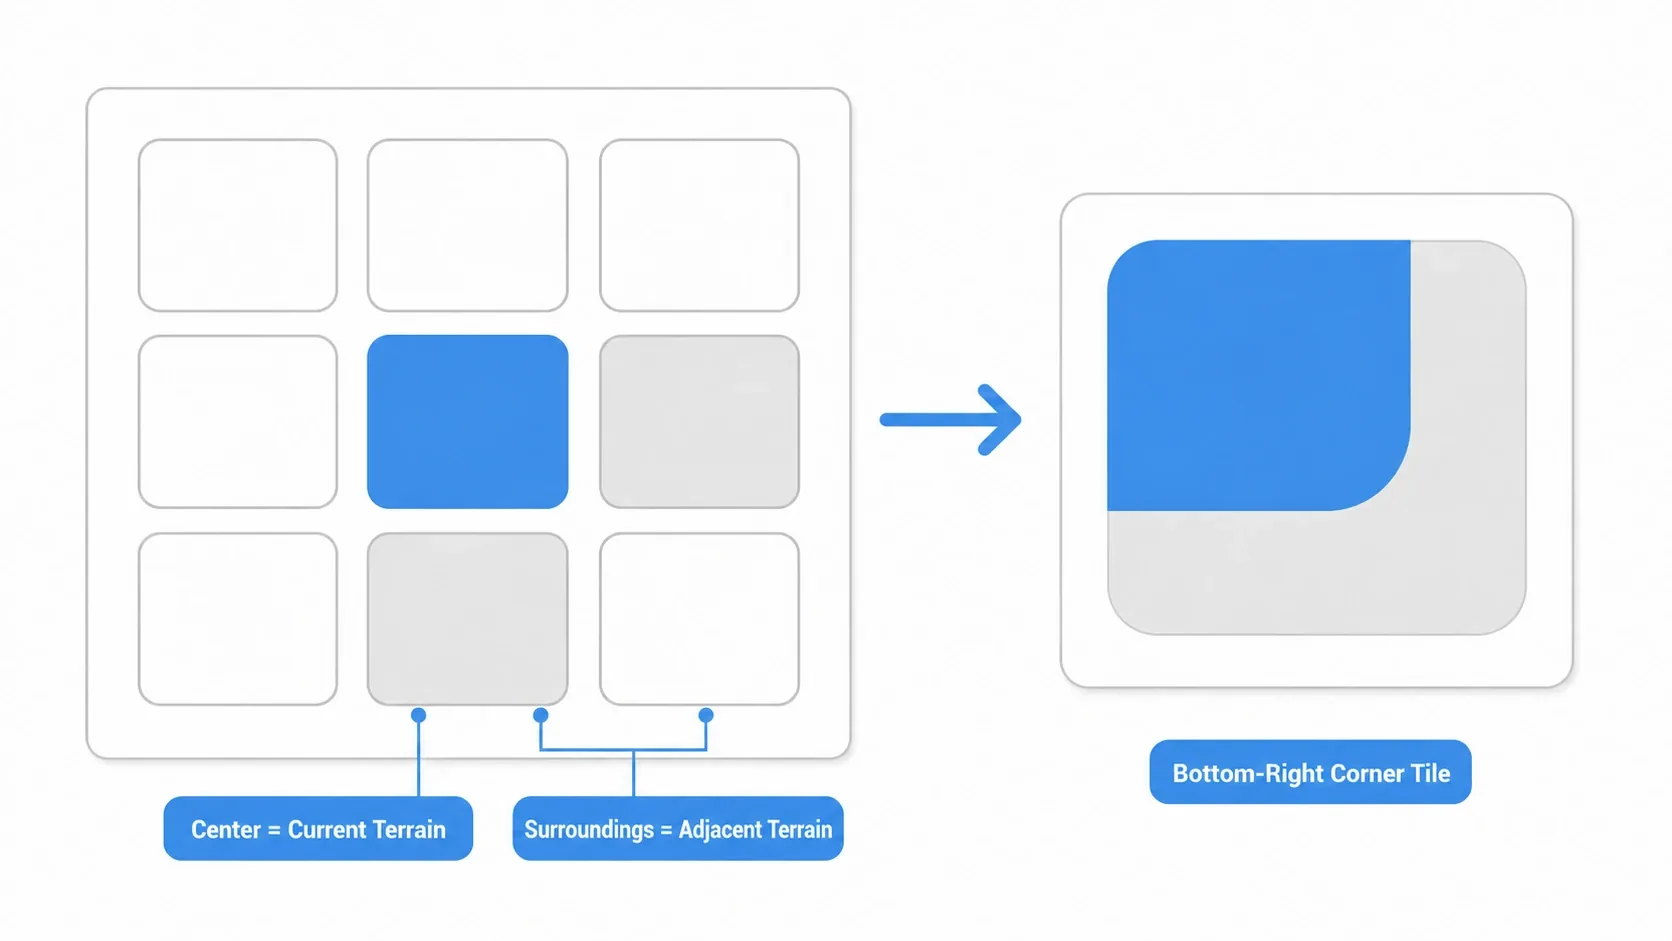
- The center cell: Which terrain this tile itself is (grass, for example).
- The eight surrounding cells: Which terrains its orthogonal and diagonal neighbors are.
A tile painted "grass in the center, dirt to the right and below," for instance, tells the engine that it belongs at the bottom-right corner of a grass field. When you paint the map, the engine inspects each cell's surroundings and automatically picks the tile whose Peering Bits match.
In other words, configuring Terrains is nothing more than teaching the engine, tile by tile, which tile is used in which neighborhood.
Choosing a Mode
How finely the Peering Bits are examined is decided by the Terrain Set's mode.
| Mode | What it examines | Best-suited tileset |
|---|---|---|
| Match Corners and Sides | Both edges and corners (8 directions) | Tilesets with smooth borders that include corner patterns |
| Match Corners | Corners only | Tilesets built around corners |
| Match Sides | Edges only (4 directions) | Simple tilesets that don't need corner connections |
Match Corners and Sides is the most flexible. It can express complex borders, at the cost of more bits to paint. Starting with this mode is a good default.
Configuring the Terrain Set and Peering Bits
Now that the concept is clear, let's actually set it up.
Step 4: Create a Terrain Set and a Terrain
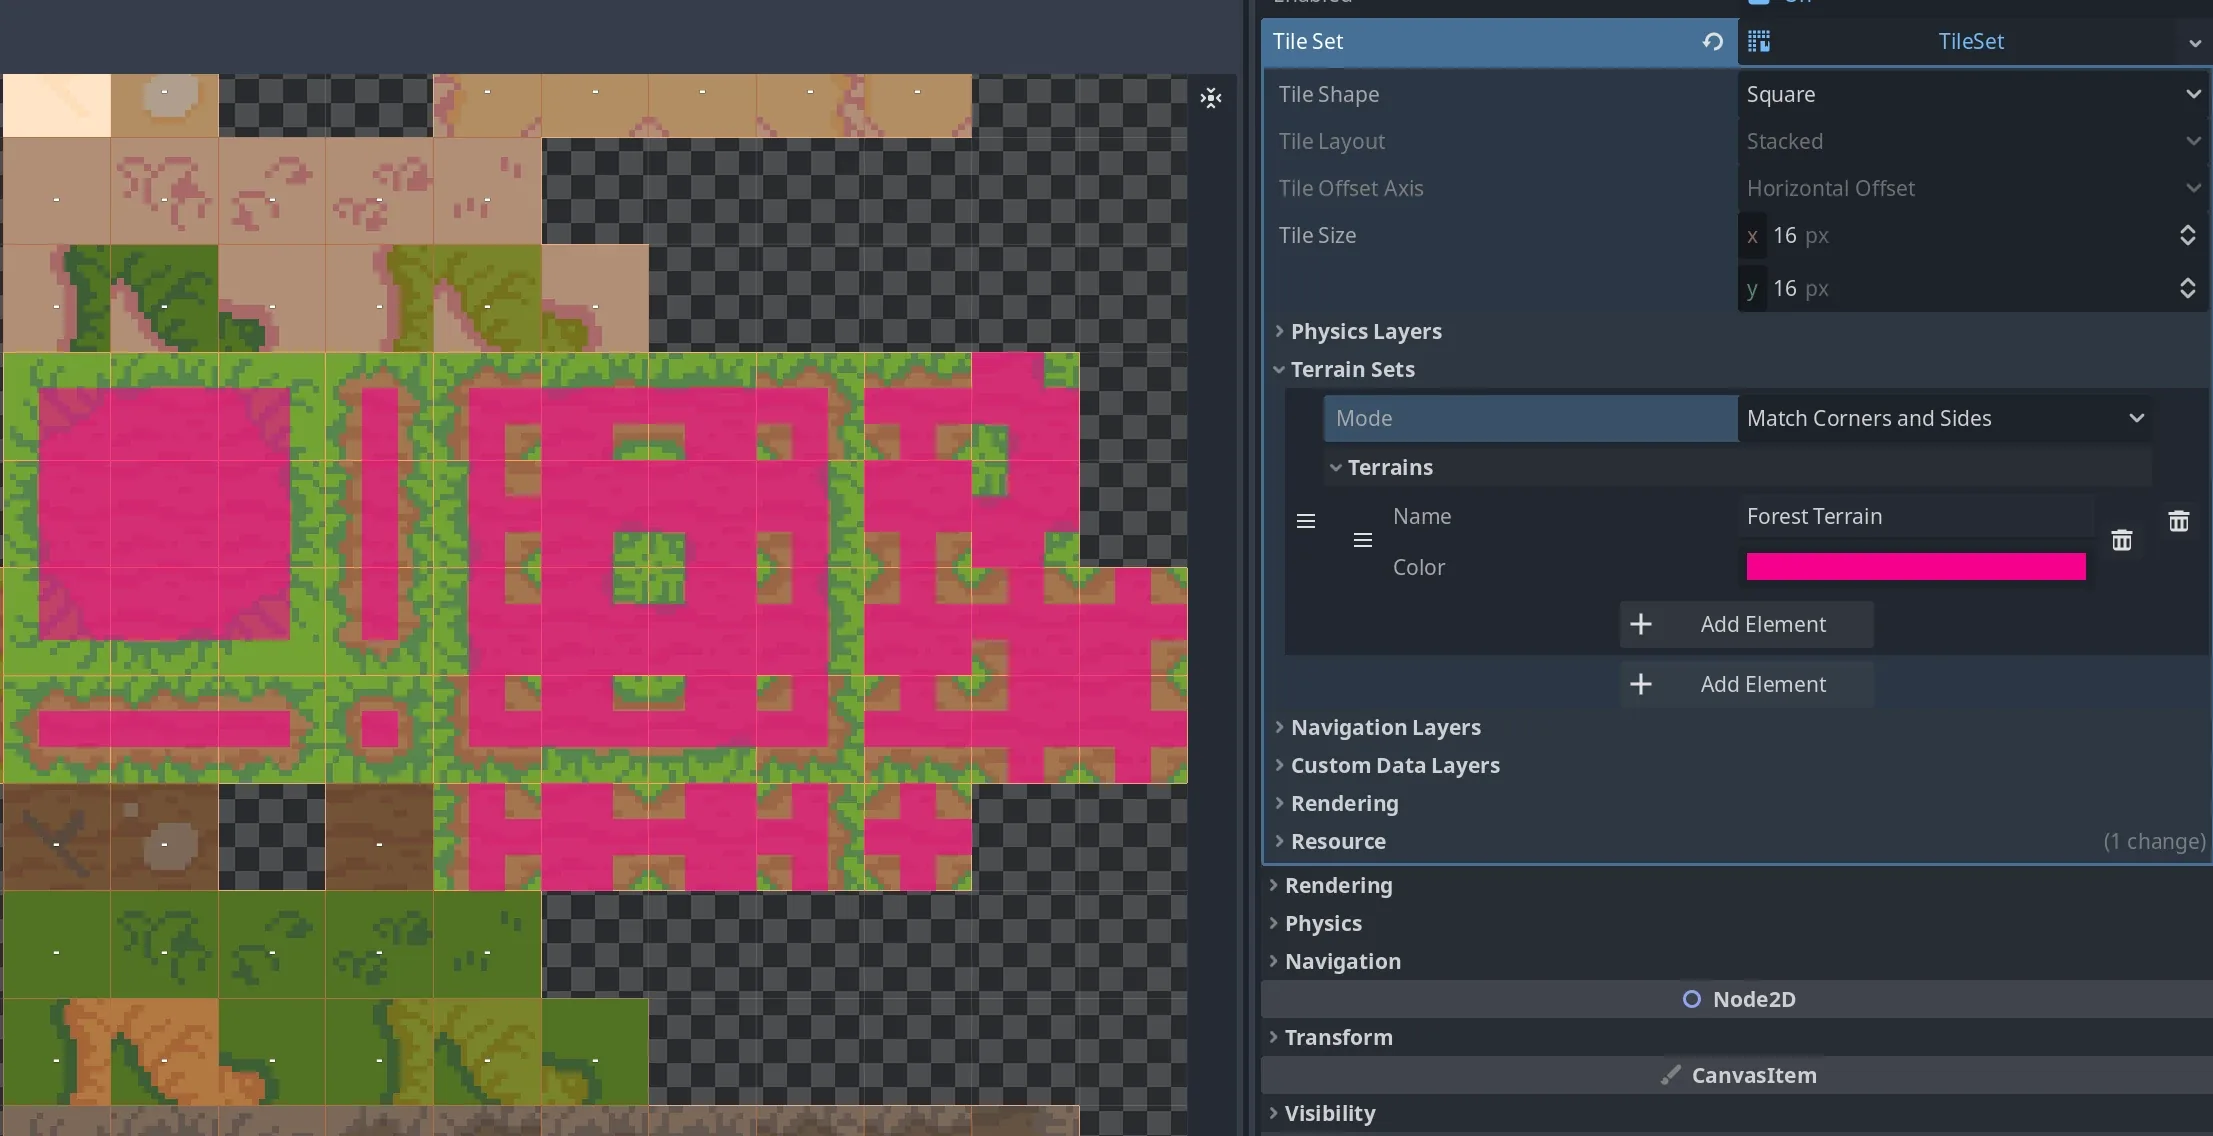
In the TileMapLayer Inspector, expand the TileSet and add an element under "Terrain Sets." Choose a Mode (Match Corners and Sides here), then add a terrain under "Terrains" and set its Name and an identifying Color. In this example we create one terrain called "Forest Terrain" in a bold color.
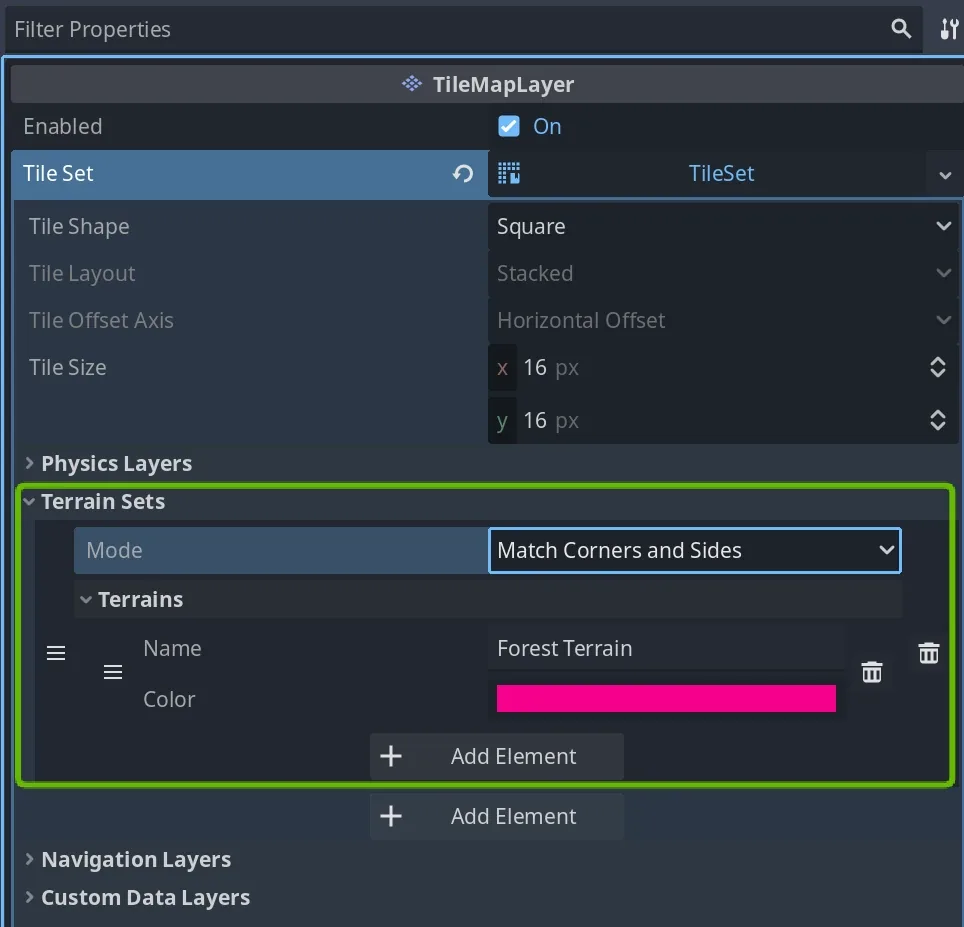
The Color is the "brush color" you'll paint onto tiles in the next step. It has no effect on how the map looks, so any color that's easy to tell apart from your other terrains will do.
Step 5: Paint Peering Bits on Each Tile in Paint Mode
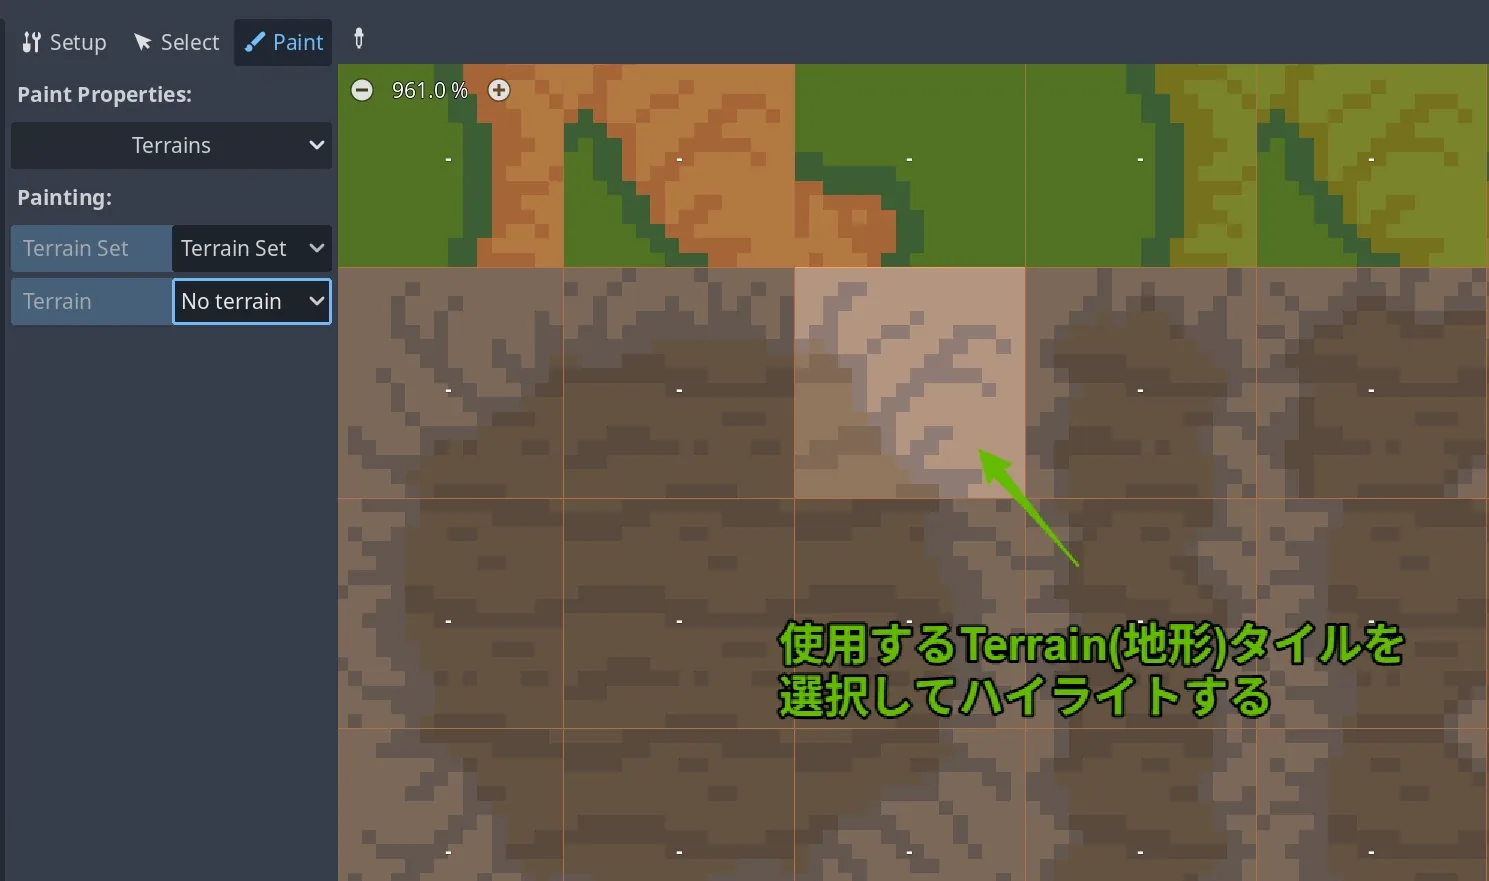
Switch the TileSet editor to "Paint" mode and choose Terrains from the "Paint Properties" dropdown.
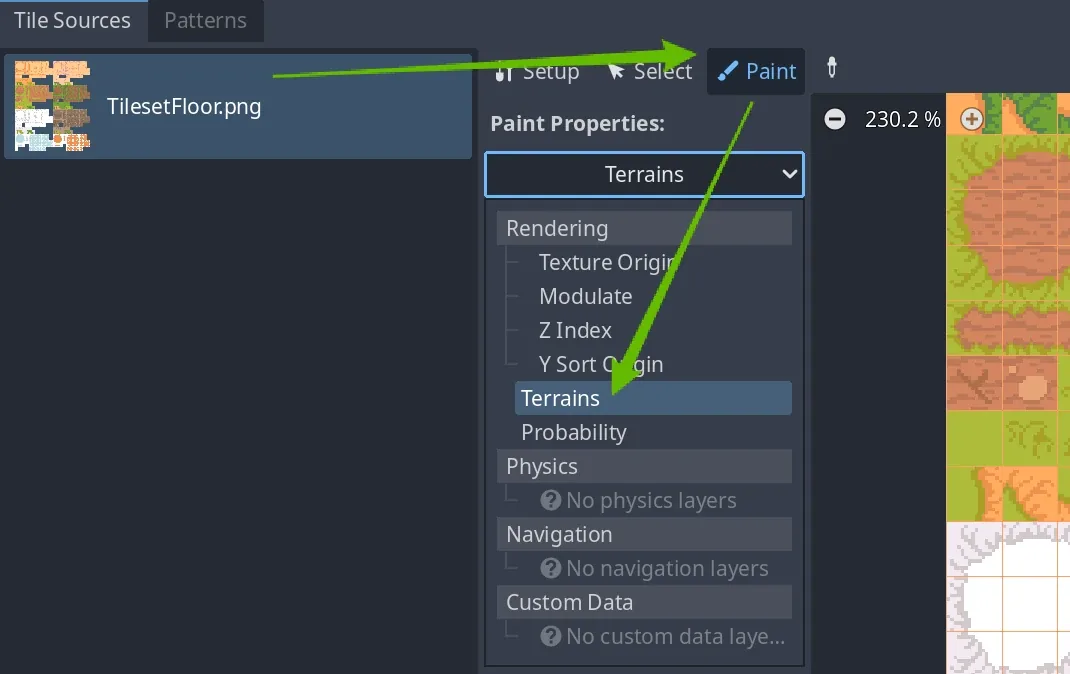
Pick the terrain you want to paint and you can start painting tiles in its color. Here you paint each tile's center cell plus the directions it should connect to. This is the tile-by-tile registration of the Peering Bits we just covered.
Once you've painted Peering Bits across the whole tileset, the tiles registered to the terrain appear highlighted in color, as in the image below. That completes the TileSet side of the setup.
Drawing the Map with the Terrain Brush
Time to draw the map. Select the TileMapLayer in the scene and a "Terrains" tab appears in the TileMap panel at the bottom of the screen.
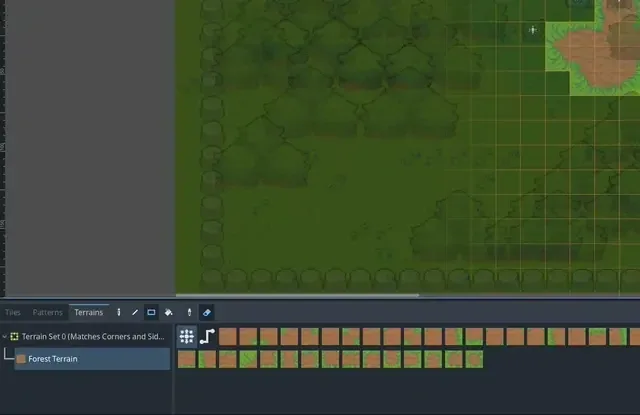
Open the "Terrains" tab, pick the terrain you created (Forest Terrain), and drag across the map. Center tiles, border tiles, corner tiles: the engine picks each one automatically according to the Peering Bits rules. Borders that used to take deliberation tile by tile now join smoothly as you drag.
Common Mistakes and Best Practices
| Common mistake | Best practice |
|---|---|
| Leaving Peering Bits unpainted | Cover every border pattern. The "terrain vs. empty space" border tiles are the ones most often forgotten. |
| Using the old TileMap node | Use TileMapLayer from Godot 4.3 onward. Splitting layer nodes by role makes management easier. |
| One enormous tileset | Split TileSets by role. Separating "ground," "decoration," and "collision" makes edits and swaps easier. |
| Trying to automate every placement | Combine autotiling with manual placement. Draw the base terrain with Terrains and drop special one-off tiles in by hand. |
Missed Peering Bits show up as "one weird tile right there" or "a gap in the border." When things don't connect properly, the fastest route to a fix is to suspect whether the Peering Bits on that tile are what you intended.
Performance Optimization
TileMapLayer is very efficient, but on huge maps in the tens of thousands of tiles, draw cost stops being negligible.
- Split layers: Put ground, buildings, and decoration in separate
TileMapLayernodes, organized by update frequency and role. You can then manipulate or hide just the layers you need, and the scene stays readable. - Stop drawing off-screen content:
VisibleOnScreenEnabler2Dautomatically disables processing when its target moves off-screen. (Godot 3'sVisibilityEnabler2Dwas removed in Godot 4 and replaced byVisibleOnScreenEnabler2D/VisibleOnScreenNotifier2D.) - Chunking: On open-world-scale maps, dynamically loading and freeing only the region around the player works well. Divide the map into fixed-size blocks, generate them as the player approaches, and release them as the player leaves.
Hands-On: Generating a Dungeon from GDScript
Terrains isn't only for hand-drawing in the editor. Call it from GDScript and you can generate maps at runtime. Roguelike dungeons that change every run, dug-out sandbox terrain, generated simulation landscapes: it shines in any genre where the map is built by rules rather than drawn to a fixed design.
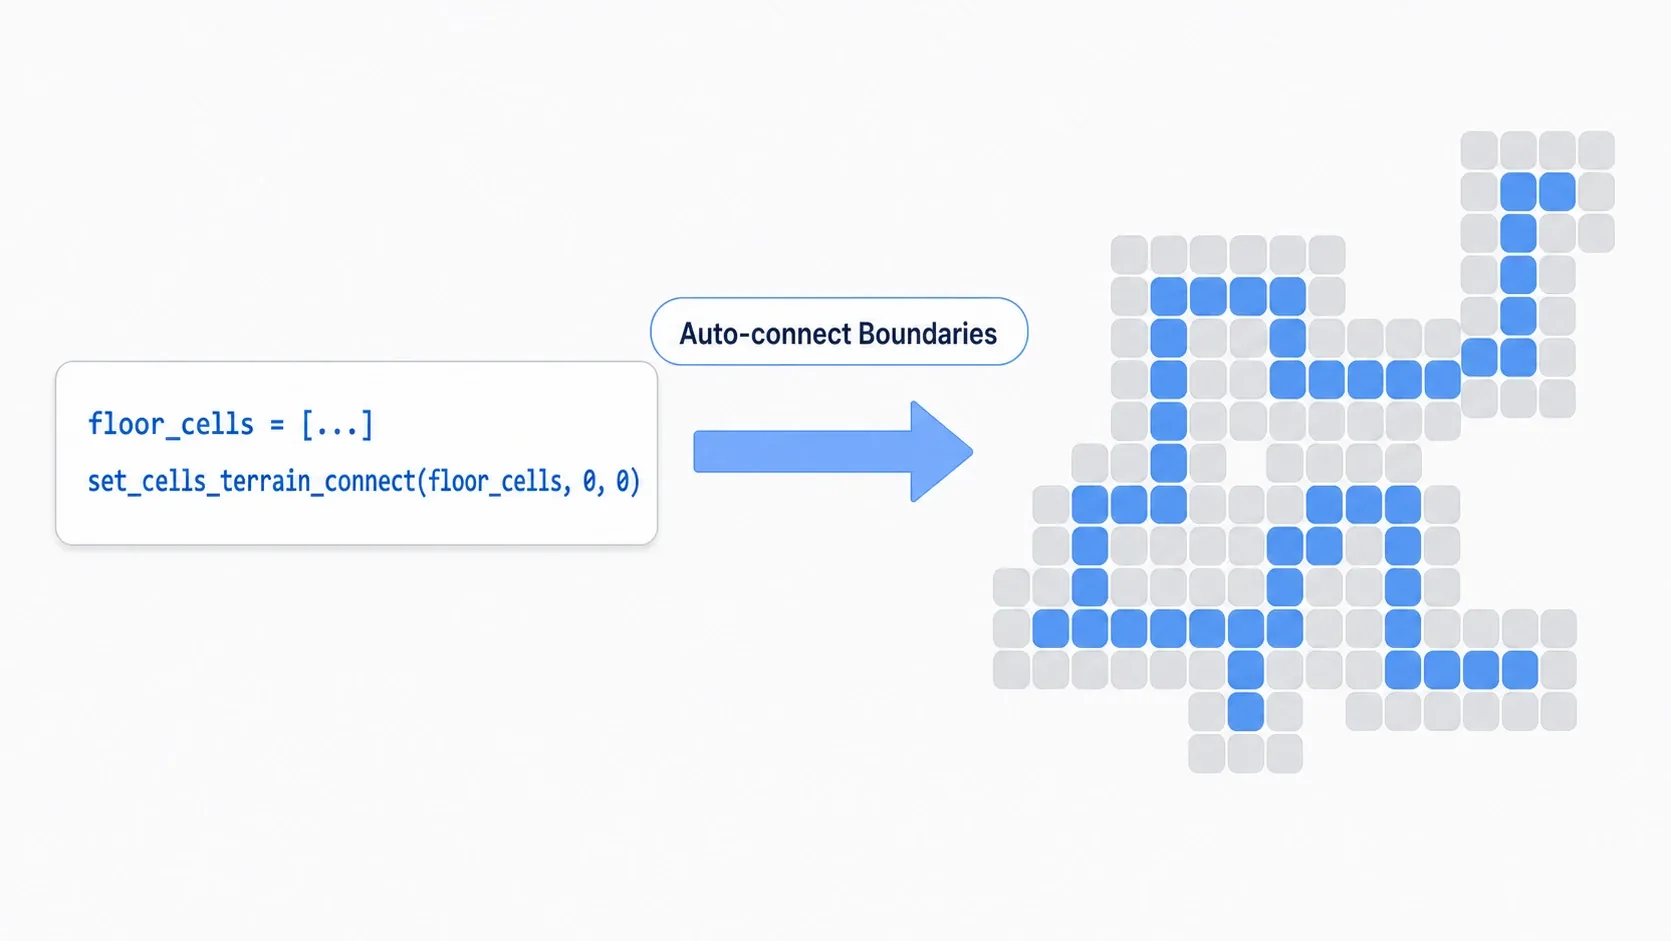
The key call is set_cells_terrain_connect(). You just hand it an array of coordinates and say "make these cells terrain X," and it handles border connection for you.
extends TileMapLayer

const TERRAIN_SET := 0
const FLOOR_TERRAIN := 0     # index of the terrain created in step 4

func _ready() -> void:
    generate_dungeon()

func generate_dungeon() -> void:
    var floor_cells: Array[Vector2i] = []
    # Dig corridors with a random walk and collect the cells that become floor
    var pos := Vector2i.ZERO
    for i in 200:
        floor_cells.append(pos)
        pos += [Vector2i.UP, Vector2i.DOWN, Vector2i.LEFT, Vector2i.RIGHT].pick_random()

    # Turn the collected cells into terrain at once; the engine connects the borders
    set_cells_terrain_connect(floor_cells, TERRAIN_SET, FLOOR_TERRAIN)
There are two points to take away.
- Placement is just "collect coordinates and hand them over": You never think about which tile is a corner, an edge, or a center. Pass
set_cells_terrain_connect()the array of cells you want as floor and the border tiles are chosen too, following the Peering Bits rules. Your generation algorithm (random walk, BSP, cellular automata) only has to decide which cells are floor. TileMapLayerneeds no layer-index argument: Unlike the oldTileMap'sset_cells_terrain_connect(layer, ...),TileMapLayeris one node per layer, so there is no leading layer argument. The same goes forset_cell()andget_cell_source_id(). Watch for this difference when following code from older articles.
When you want to place individual tiles directly, use set_cell() (it doesn't auto-connect; it places exactly the tile you name).
# Place atlas 0, tile (2, 3) directly at coordinate (10, 5) (no auto-connection)
set_cell(Vector2i(10, 5), 0, Vector2i(2, 3))
Once you want enemies to navigate the map you generated, NavigationRegion2D and Navigation Meshes shows how to build a pathfinding mesh from a tilemap.
Summary
- Terrains (autotiling) hands border tile selection to the engine. Paint terrain and corners, edges, and centers are placed for you
- Use the
TileMapLayernode (the oldTileMapwas deprecated in Godot 4.3) - The core is Peering Bits, the per-tile 3x3 rules that say which neighborhood a tile belongs to
set_cells_terrain_connect()in GDScript gives you procedural generation by passing coordinates alone (no layer argument onTileMapLayer)- Optimize huge maps with layer splitting,
VisibleOnScreenEnabler2D, and chunking
Start with two terrains and feel how satisfying it is to paint roughly and watch the borders tidy themselves. Once Peering Bits are set up, your level design speed changes dramatically.
Further Reading
- NavigationRegion2D and Navigation Meshes — building an enemy pathfinding mesh over a tilemap
- Practical Camera2D Techniques — showing large tilemaps through scrolling
- Creating and Using Custom Resources — turning map generation parameters into data
- Godot Docs: Using Tilemaps — the primary source on TileSet and Terrains