Softly darkening the corners of the screen. Laying retro CRT scanlines over everything. Flashing the whole screen red the instant you take a hit. Effects that act on the entire game screen can't be built with shaders on individual objects. What you want is a post-processing shader.
Post-processing is a technique that reads the entire already-rendered screen and applies processing on top of it. This article covers the setup (CanvasLayer plus a full-screen ColorRect), the key to reading the screen (hint_screen_texture), standard recipes like vignette and chromatic aberration, and a hands-on damage flash.
What You'll Learn
- The post-processing setup (CanvasLayer plus a full-screen ColorRect)
- Reading the rendered screen with
hint_screen_textureandSCREEN_UV- Standard recipes (vignette, chromatic aberration, CRT scanlines, and more)
- A hands-on damage flash, and when to use the SubViewport approach instead
How Post-Processing Works
The idea behind post-processing is "draw the game screen as a single image, then process that image." It's like taking a photo and then applying a filter.
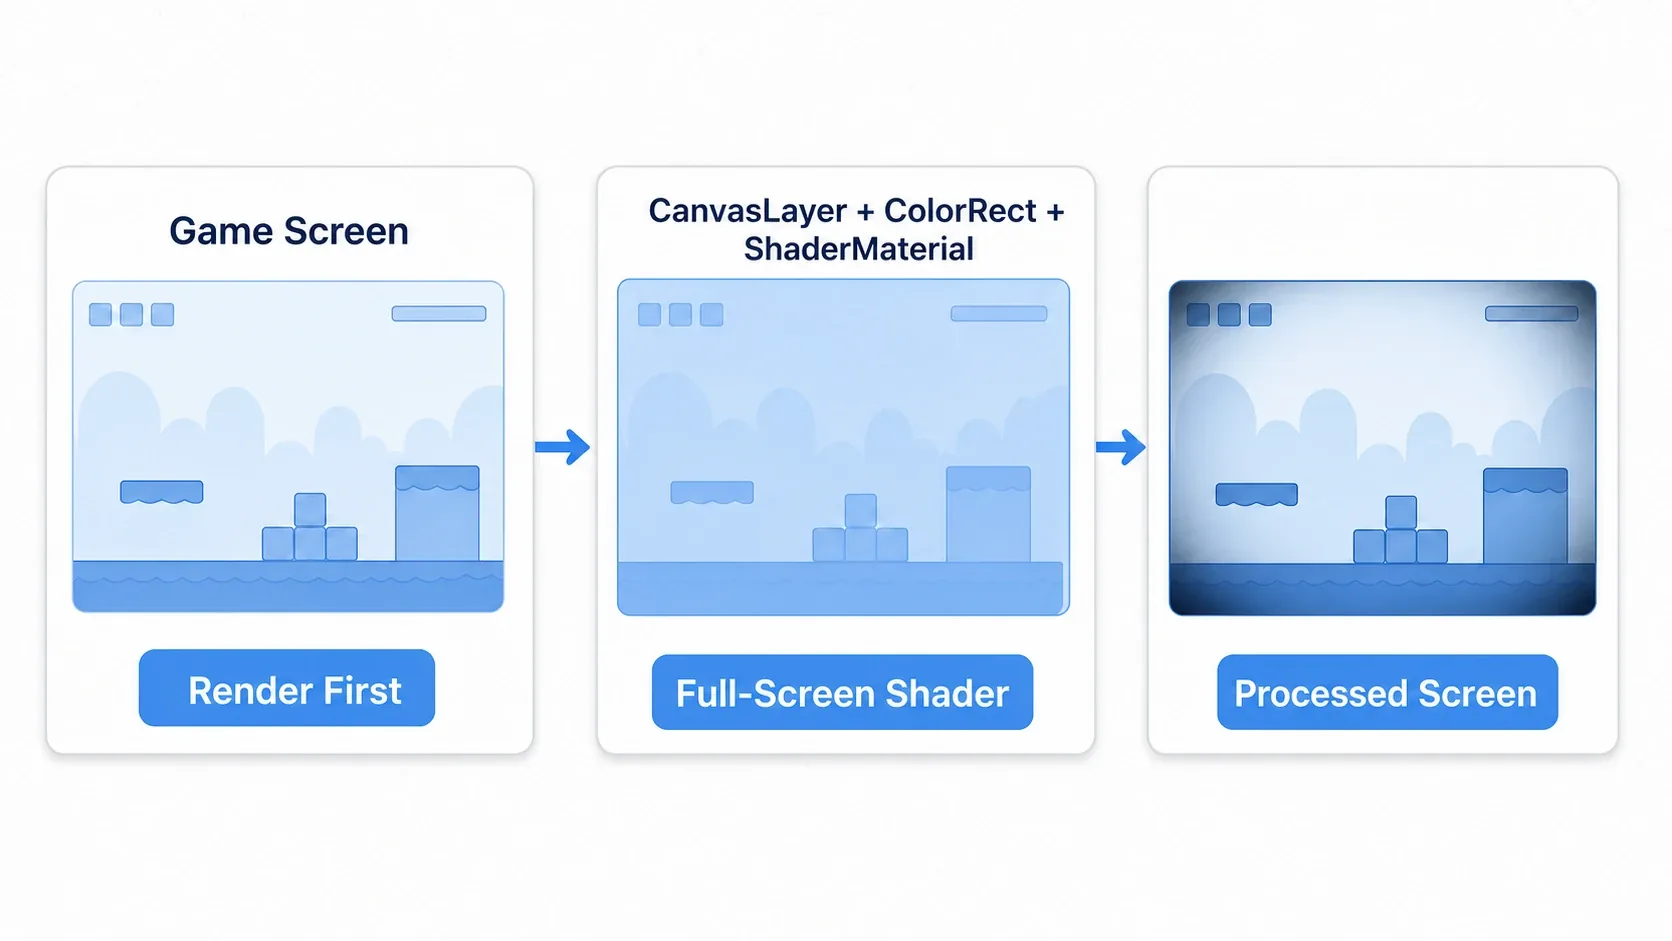
The setup for this in Godot is simple.
CanvasLayer: a layer always drawn in front of the game screen. Anything you put here ends up on top- A full-screen
ColorRect: a rectangle stretched to fill the screen. This is the canvas you apply processing to ShaderMaterial: the processing itself (the shader), assigned to that ColorRect
In other words, you apply a shader to a ColorRect covering the whole screen and process the game screen beneath it. Set the ColorRect's anchors to "Full Rect" so it fills the screen and you're ready.
Reading the Whole Screen: hint_screen_texture
The heart of post-processing is hint_screen_texture. It's the mechanism that hands your shader the screen exactly as it was just drawn.
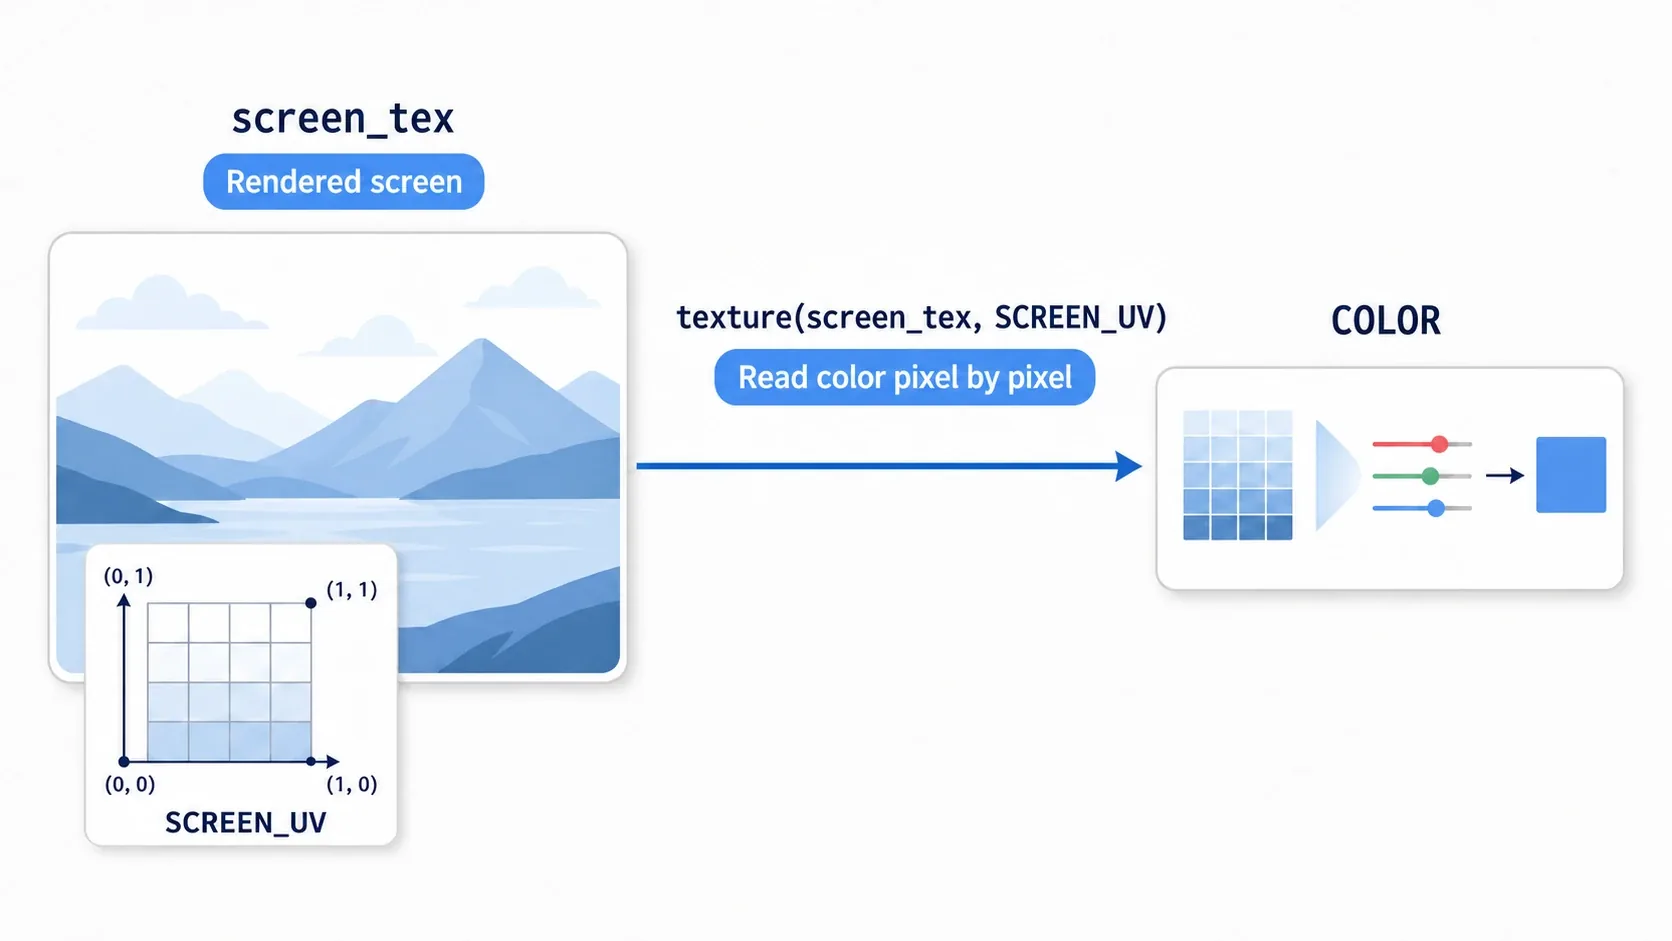
On the shader side, you declare and read it like this.
shader_type canvas_item;

// hint_screen_texture receives the already-rendered screen
uniform sampler2D screen_tex : hint_screen_texture, filter_linear_mipmap;

void fragment() {
    // SCREEN_UV is the coordinate on screen. Read the color there
    vec3 screen_color = texture(screen_tex, SCREEN_UV).rgb;

    // Process screen_color here (this example just passes it through)
    COLOR = vec4(screen_color, 1.0);
}
There are two things to note. hint_screen_texture feeds the unprocessed screen into screen_tex, and SCREEN_UV represents the position on that screen (0.0 to 1.0). Read each pixel's color with those two, write your processed result to COLOR, and the whole screen changes. From there, what you do with the color you read is what makes each recipe distinct.
Standard Recipes
How you process the screen you read produces a wide range of screen effects. Let's look at the main ones.
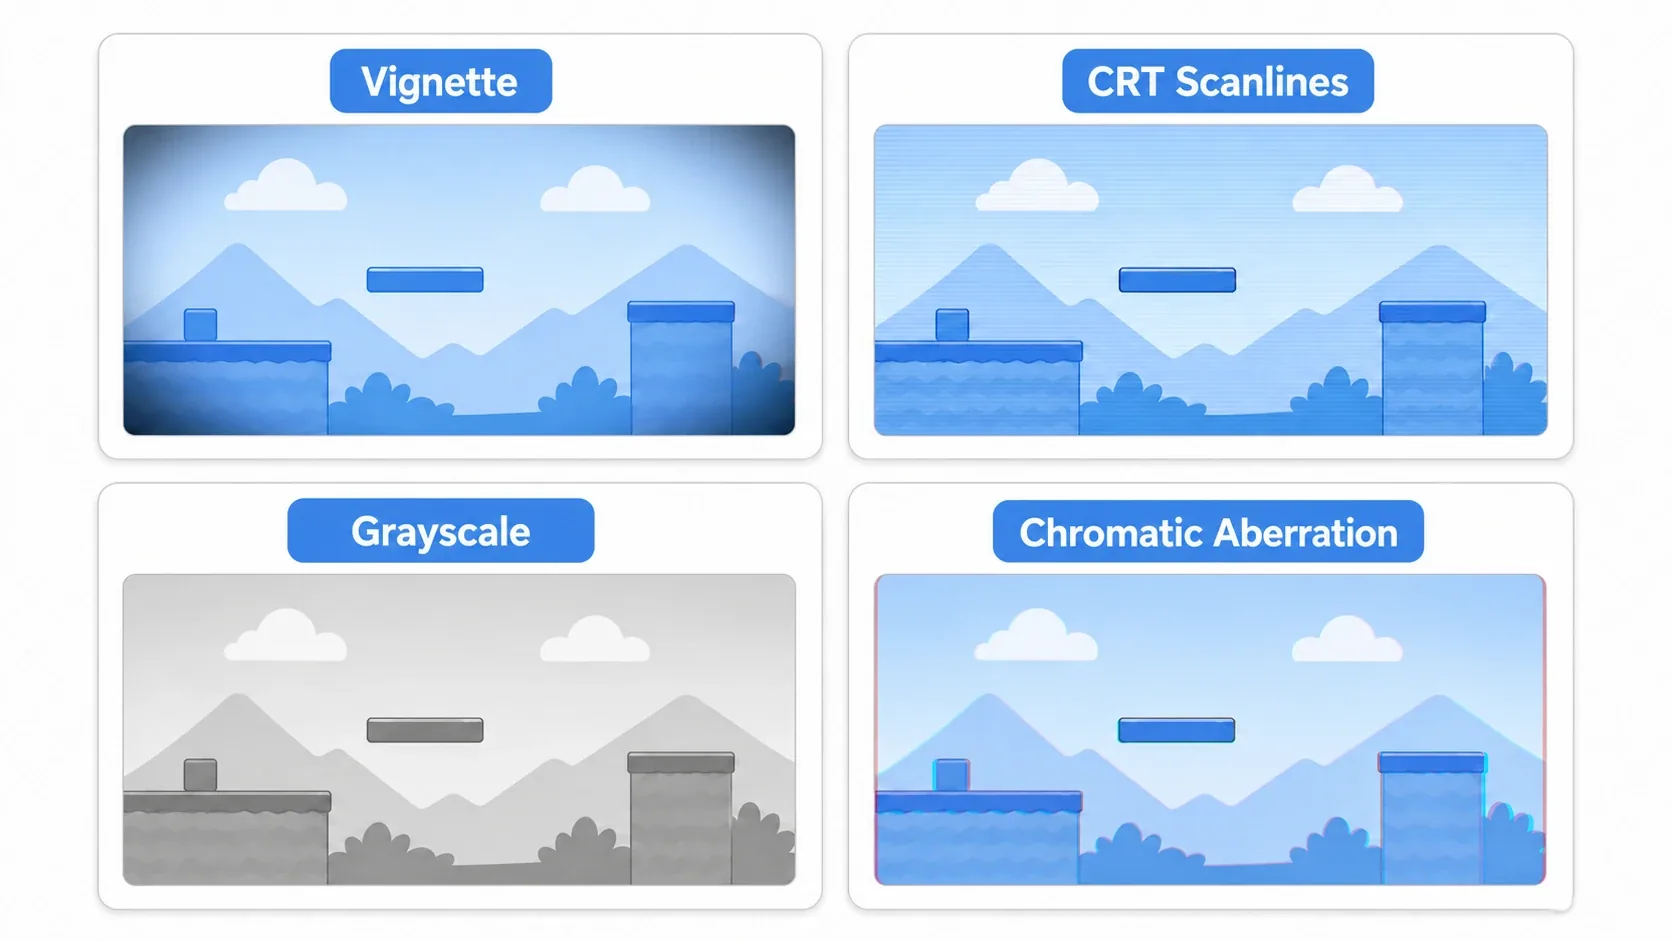
| Recipe | What It Does | Common Uses |
|---|---|---|
| Vignette | Darkens the corners of the screen | Focus, cinematic mood |
| Chromatic aberration | Offsets colors slightly at the screen edges | Impact, disorientation, glitch effects |
| CRT scanlines | Adds horizontal lines and bleed for a tube-TV look | Retro game atmosphere |
| Grayscale | Removes color for monochrome | Near death, flashbacks, pause screens |
All of them share the same skeleton: read the screen with SCREEN_UV, tweak the color or coordinates, and write it back to COLOR. A vignette darkens based on distance from the screen center; grayscale averages the RGB to strip the color. Only the math differs, the structure is the same.
Hands-On: Flashing the Screen Red on Damage
Taking damage in an action game, a scare in a horror game, showing danger in a shmup. Flashing the whole screen red the instant you take damage is a standard screen effect for conveying state intuitively. Let's build it with post-processing.
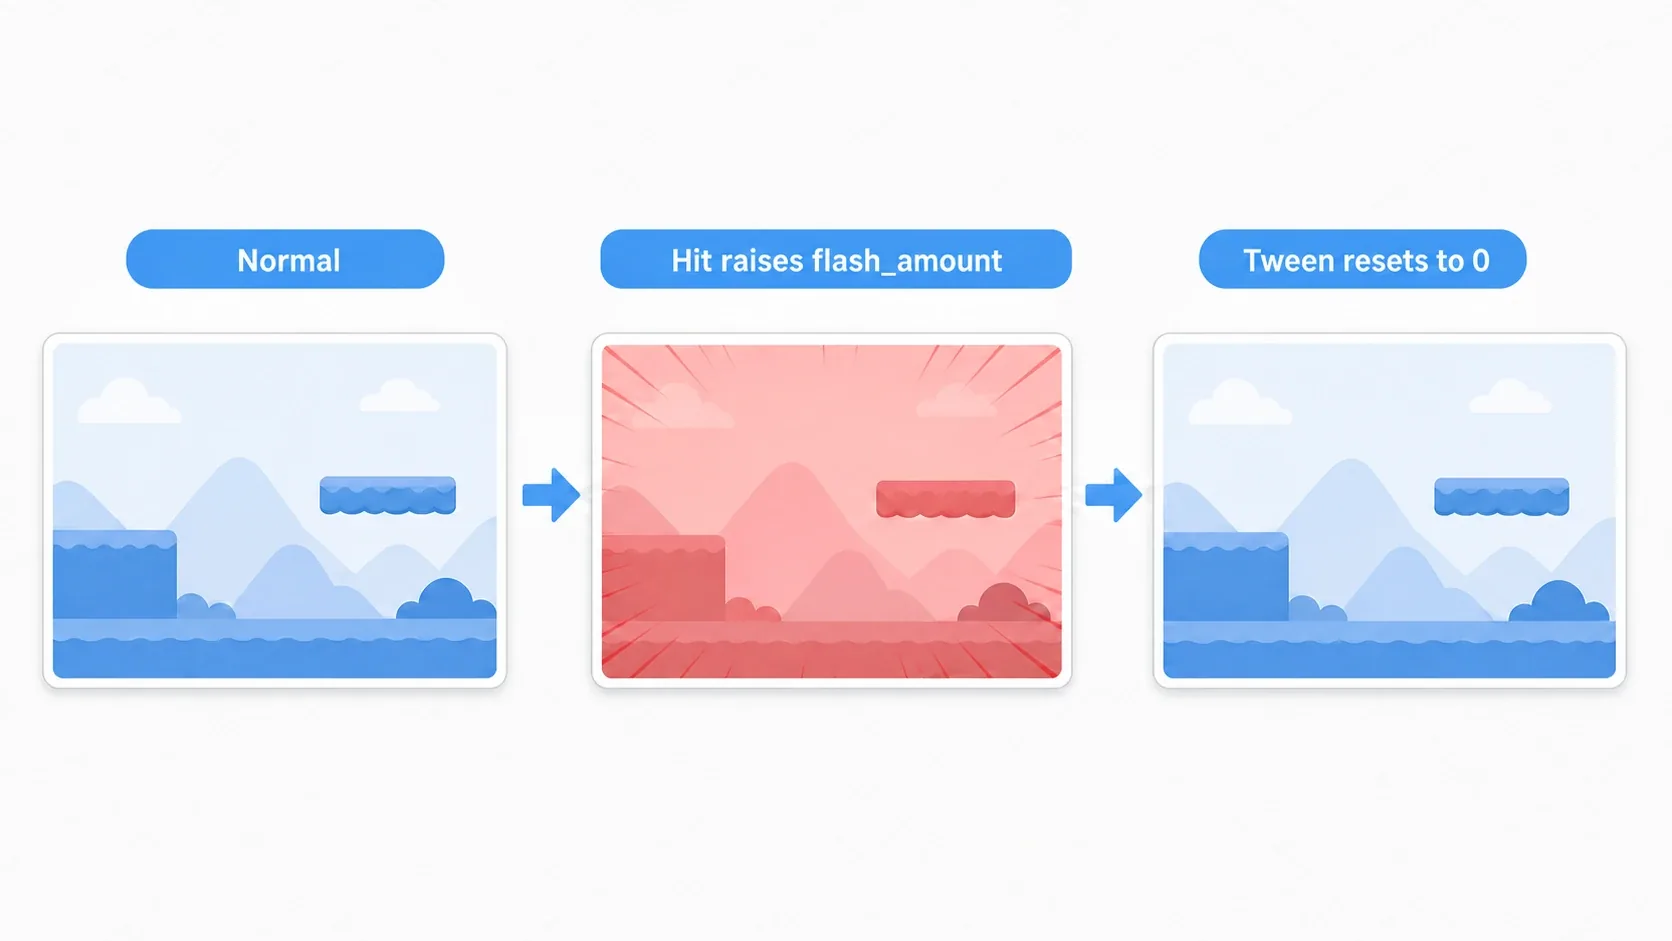
All it does is push the screen color toward red according to flash_amount (a uniform).
shader_type canvas_item;

uniform sampler2D screen_tex : hint_screen_texture, filter_linear_mipmap;
uniform float flash_amount : hint_range(0.0, 1.0) = 0.0;  // The redness, controlled from outside

void fragment() {
    vec3 screen_color = texture(screen_tex, SCREEN_UV).rgb;
    vec3 red = vec3(0.8, 0.0, 0.0);
    // Push toward red by the amount of flash_amount
    COLOR = vec4(mix(screen_color, red, flash_amount), 1.0);
}
On the script side, raise flash_amount to 1 on damage and drop it back to 0 right away.
@onready var mat: ShaderMaterial = $CanvasLayer/ColorRect.material

func on_damaged() -> void:
    mat.set_shader_parameter("flash_amount", 0.6)   # Snap to red
    # Returning it to 0 with a Tween makes the redness drain away
    create_tween().tween_property(mat, "shader_parameter/flash_amount", 0.0, 0.3)
There are two points to take away.
- It applies uniformly across the whole screen: unlike modulate, which lights up an individual character, this turns the entire screen red. It strongly conveys "I took that hit."
- Control it with a
uniformplus a Tween: prepare a singleflash_amountand drive it withset_shader_parameter(). Returning it to 0 with a Tween drains the redness smoothly.
Choosing Between This and SubViewport
There's also a way to process the screen using SubViewport. Choose based on your goal.
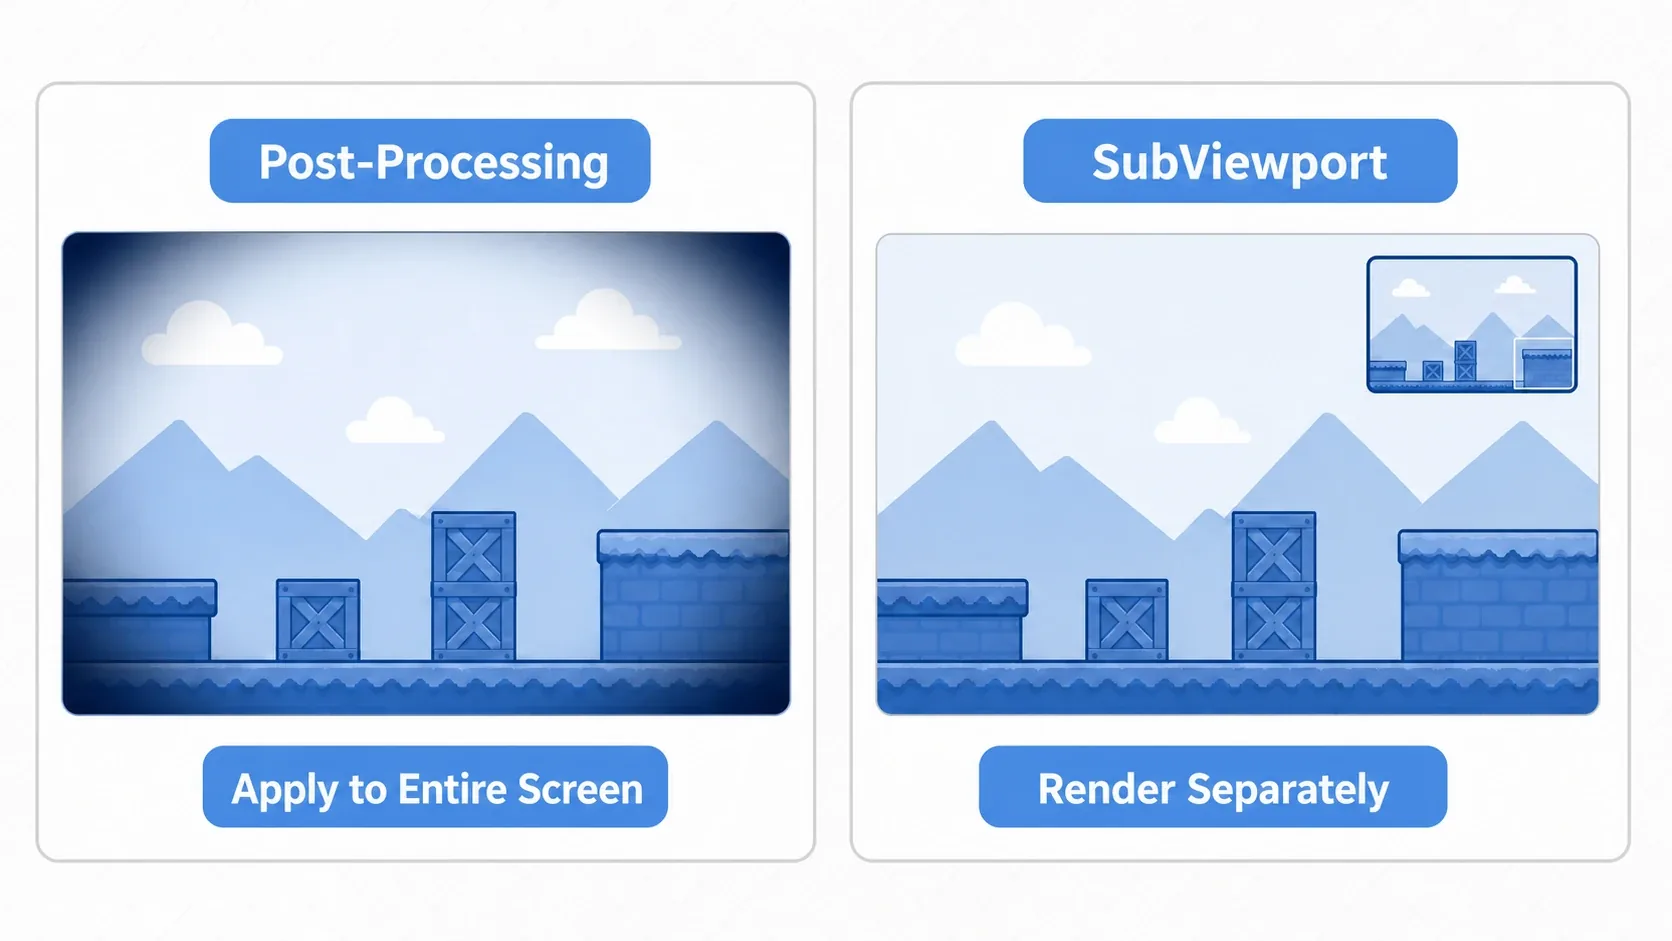
- Post-processing: applied uniformly and after the fact to the finished screen. Vignette, CRT, full-screen flashes
- SubViewport: renders specific footage separately and processes it. Minimaps, security cameras, effects on just part of the screen
Remember it as post-processing for the entire game screen and SubViewport for crafting a specific piece of footage, and you won't get stuck.
Bonus: Good to Know for Later
- It works on 3D too: a full-screen ColorRect on a CanvasLayer sits on top of both 2D and 3D games, so you can apply the same post-processing to a 3D game's screen.
- Watch the order when stacking: to apply multiple effects (vignette plus CRT, say), either combine them into one shader or stack ColorRects. When stacking, keep the bottom-to-top processing order in mind.
- Great for screen-transition wipes: using
SCREEN_UVand time to progressively fill the screen from the left lets you build scene-transition wipes with post-processing too.
Summary
- Post-processing reads the finished screen and processes it. The setup is CanvasLayer plus a full-screen ColorRect plus a ShaderMaterial
- Receive the screen through
hint_screen_textureand read each pixel withSCREEN_UV - Vignette, chromatic aberration, CRT scanlines, grayscale: only the processing math changes to produce a wide range of screen effects
- A damage flash just pushes the color you read toward red with
flash_amount(a uniform), then eases it back with a Tween - Use post-processing for full-screen and SubViewport for partial
Start with the minimal shader that passes the screen through unchanged, then add a vignette to it. The moment the whole screen visibly tightens up is when post-processing clicks.
Further Reading
- Fragment Shader Basics: shader syntax fundamentals (the foundation for post-processing)
- Making Use of SubViewport: when to reach for partial footage processing instead
- White Flash with modulate: damage effects on individual objects
- Godot Official Docs: Screen-reading shaders: primary reference for screen-reading shaders