Overview
Tested on: Godot 4.3+
The Godot editor is highly extensible: with the EditorPlugin class you can add custom docks and inspector UI. But if you don't understand how the @tool annotation behaves and how a plugin's lifecycle works, you'll end up crashing the editor or getting unexpected behavior.
This article walks through the basic structure of a plugin all the way to implementing custom docks and inspector plugins, with steps you can use in real projects.
What You'll Learn
- How
@toolruns your script inside the editor, and what to watch out for- The basic plugin structure of
plugin.cfgplusEditorPlugin- How to implement custom docks, toolbar buttons, and inspector extensions
- Best practices for not crashing the editor
Basics of the @tool Annotation
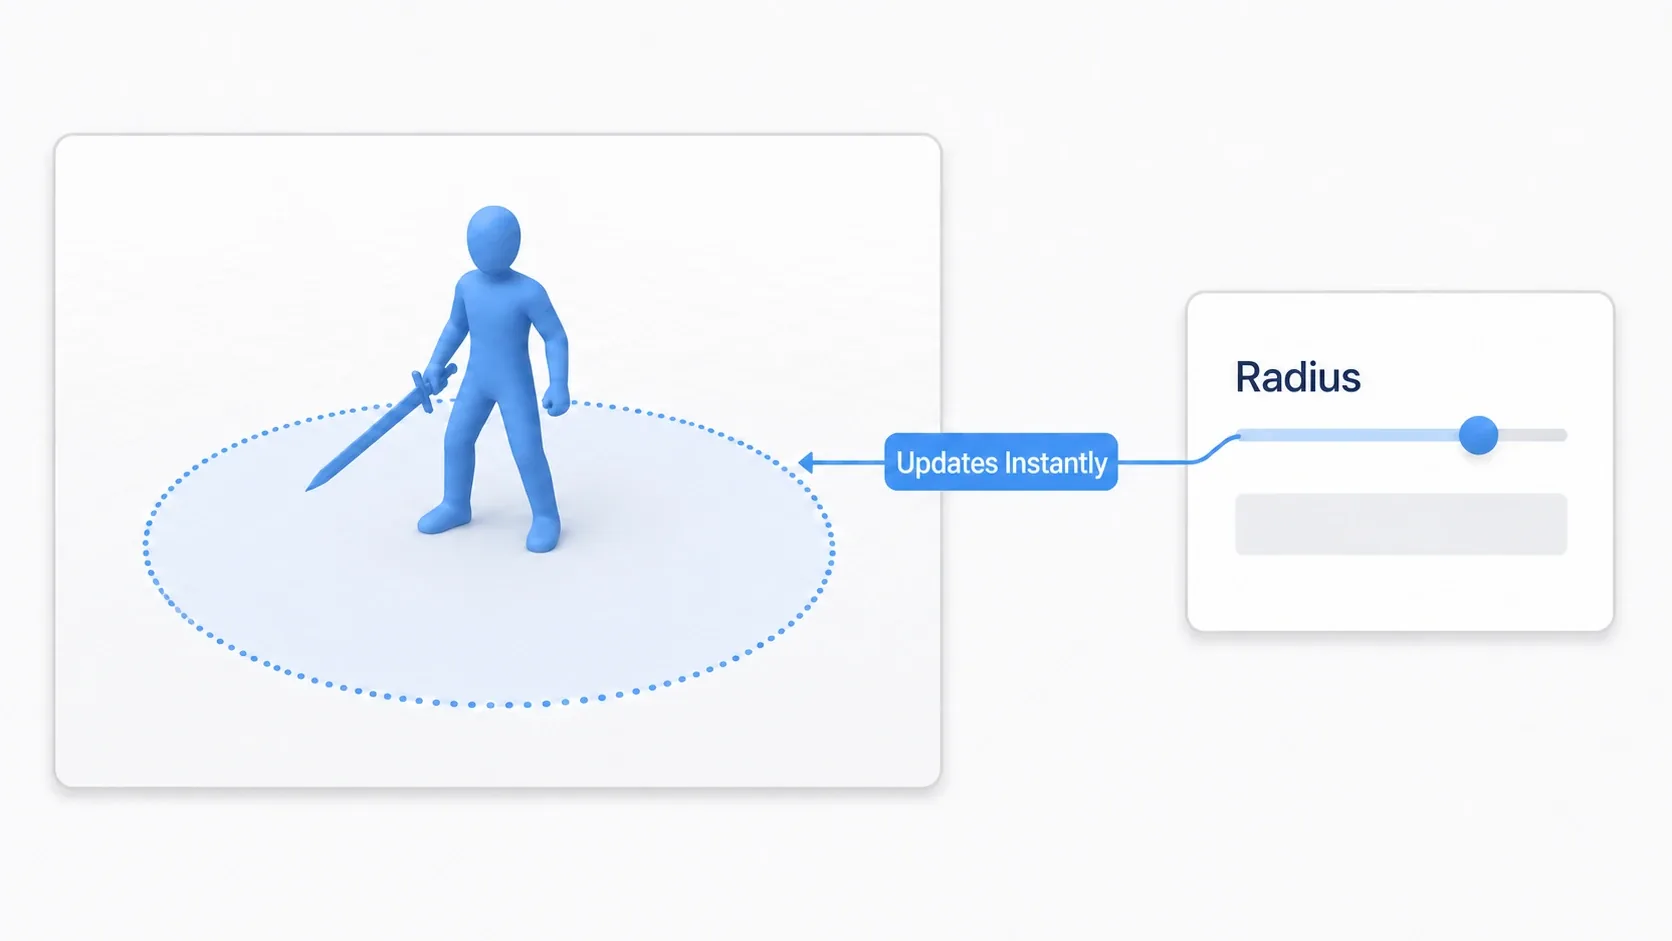
The first thing to understand about editor extensions in Godot is the @tool annotation. It shines in situations like "I want to draw the Attack Range as a circle in the editor so I can check it."
Adding @tool at the top of a script makes that script run inside the editor too. The important part is separating editor behavior from runtime behavior.
@tool
extends Node2D

func _process(delta):
    if Engine.is_editor_hint():
        # Runs only inside the editor
        queue_redraw()
    else:
        # Runs during gameplay
        move_character(delta)
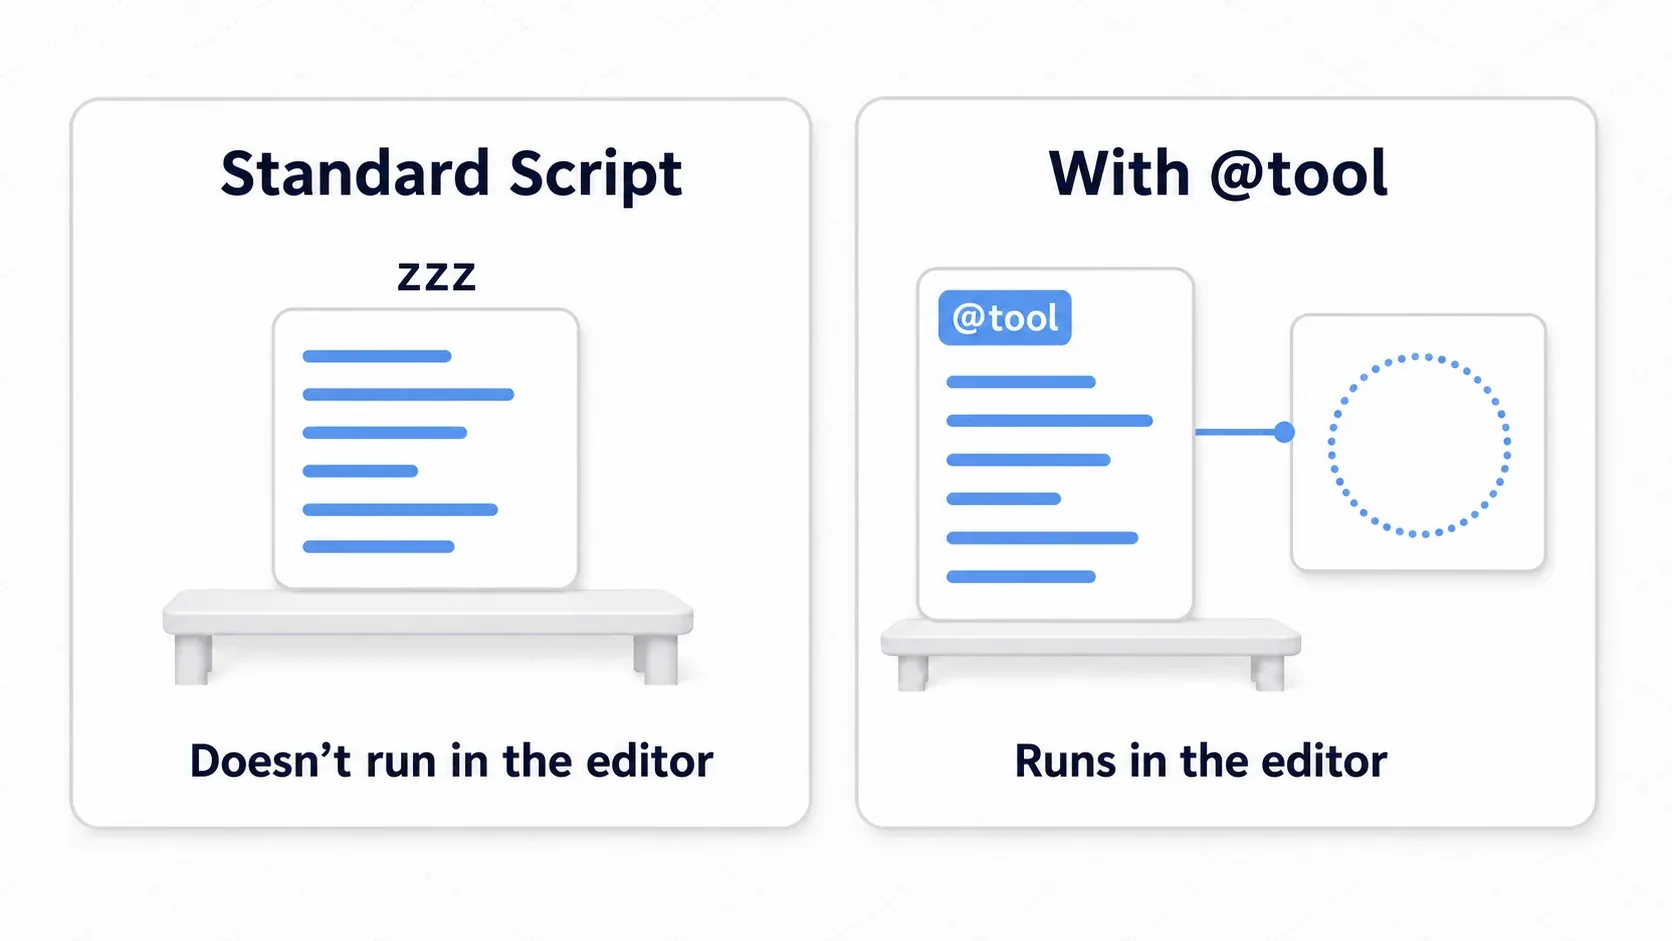
Important: without a branch on Engine.is_editor_hint(), your game logic will run inside the editor as well.
Next, let's look at a practical example combining a @tool setter with _draw(). Changing radius in the Inspector updates the circle in the editor in real time.
Main uses for @tool:
| Use | Description |
|---|---|
| Custom drawing | Show guide lines and previews in the editor with _draw() |
| Live property updates | Refresh a preview the moment an @export value changes |
| EditorPlugin | Required on the plugin's main script |
@tool
extends Sprite2D

@export var radius: float = 100.0:
    set(value):
        radius = value
        queue_redraw()  # Redraw whenever the value changes

func _draw():
    if Engine.is_editor_hint():
        draw_circle(Vector2.ZERO, radius, Color(0, 1, 0, 0.3))
Structuring plugin.cfg and EditorPlugin
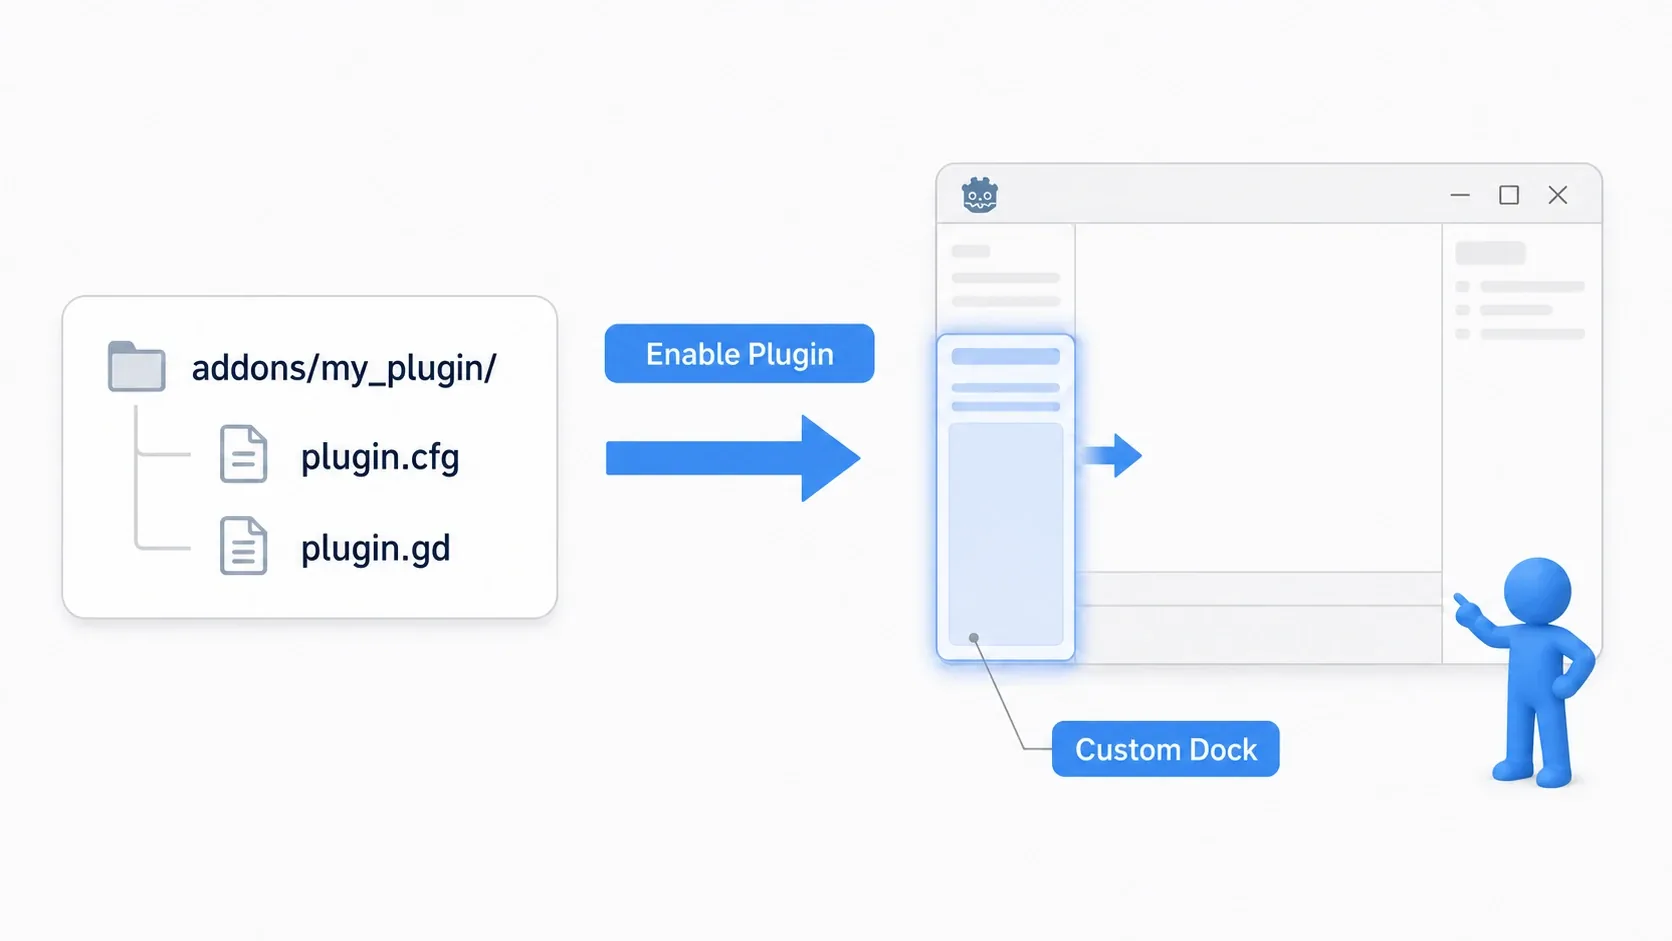
With the @tool basics down, let's move on to building an actual plugin. Plugins require a specific directory layout. Godot detects that structure automatically and lists your plugin in the plugin settings screen.
Directory structure
addons/
└── my_plugin/
    ├── plugin.cfg          # Plugin config file
    ├── my_plugin.gd        # EditorPlugin script
    └── dock/
        └── my_dock.tscn    # Custom dock scene (optional)
plugin.cfg
[plugin]

name="My Plugin"
description="A plugin that adds a custom dock"
author="Your Name"
version="1.0.0"
script="my_plugin.gd"
EditorPlugin basics
@tool
extends EditorPlugin

func _enter_tree():
    # Called when the plugin is enabled
    print("Plugin activated")

func _exit_tree():
    # Called when the plugin is disabled
    # Always remove the UI elements you added here
    print("Plugin deactivated")
How to enable a plugin:
- Go to Project → Project Settings → Plugins
- Find your plugin in the list and tick its checkbox
Adding a Custom Dock
Once the skeleton of your plugin exists, let's actually add something to the editor. The most common use is adding a custom panel (dock). You could build a debug tool that lists every object in the scene, or a texture preview UI.
The code below adds a custom dock to the upper-left panel.
@tool
extends EditorPlugin

var dock: Control

func _enter_tree():
    dock = preload("res://addons/my_plugin/dock/my_dock.tscn").instantiate()
    add_control_to_dock(DOCK_SLOT_LEFT_UL, dock)

func _exit_tree():
    if dock:
        remove_control_from_docks(dock)
        dock.queue_free()
Dock slots
| Slot constant | Position |
|---|---|
DOCK_SLOT_LEFT_UL | Upper-left panel |
DOCK_SLOT_LEFT_BL | Lower-left panel |
DOCK_SLOT_RIGHT_UL | Upper-right panel |
DOCK_SLOT_RIGHT_BL | Lower-right panel |
Building a dock scene
The contents of a dock can be built as an ordinary scene.
Use a Control node as the root and lay out whatever UI elements you need.
# dock/my_dock.gd
@tool
extends VBoxContainer

@onready var label = $StatusLabel
@onready var button = $RunButton

func _ready():
    button.pressed.connect(_on_run_pressed)

func _on_run_pressed():
    label.text = "Running..."
    # Plugin-specific work goes here
    # EditorInterface is directly accessible inside an EditorPlugin script
    # From a dock script, going through the EditorPlugin is safer
    label.text = "Done"
Adding a Toolbar Button
A dock is a panel that's always visible. If all you need is "run this one thing with a single click," a toolbar button is simpler. It's a good fit for something like a button that validates every node in the scene.
@tool
extends EditorPlugin

var button: Button

func _enter_tree():
    button = Button.new()
    button.text = "My Tool"
    button.pressed.connect(_on_button_pressed)
    add_control_to_container(CONTAINER_TOOLBAR, button)

func _exit_tree():
    if button:
        remove_control_from_container(CONTAINER_TOOLBAR, button)
        button.queue_free()

func _on_button_pressed():
    print("Toolbar button clicked")
Common container constants
| Constant | Location |
|---|---|
CONTAINER_TOOLBAR | Main toolbar |
CONTAINER_SPATIAL_EDITOR_MENU | 3D editor menu |
CONTAINER_CANVAS_EDITOR_MENU | 2D editor menu |
CONTAINER_INSPECTOR_BOTTOM | Bottom of the Inspector |
Custom Inspector Plugins
After docks and toolbars, the other powerful extension point is the Inspector. Normally the Inspector just lists a node's properties automatically, but you can also add dedicated UI when a particular node type is selected. For example, you could add a widget that displays velocity values clearly whenever a CharacterBody2D is selected.
First register the inspector plugin from your EditorPlugin, then define the plugin class itself.
# my_plugin.gd
@tool
extends EditorPlugin

var inspector_plugin: MyInspectorPlugin

func _enter_tree():
    inspector_plugin = MyInspectorPlugin.new()
    add_inspector_plugin(inspector_plugin)

func _exit_tree():
    if inspector_plugin:
        remove_inspector_plugin(inspector_plugin)
# my_inspector_plugin.gd
@tool
class_name MyInspectorPlugin
extends EditorInspectorPlugin

func _can_handle(object: Object) -> bool:
    # Decide which objects this plugin handles
    return object is CharacterBody2D

func _parse_begin(object: Object):
    # Add UI elements at the top of the Inspector
    var label = Label.new()
    label.text = "== Character Info =="
    add_custom_control(label)

func _parse_property(object, type, name, hint_type, hint_string, usage_flags, wide):
    # Add a custom control for a specific property
    if name == "speed":
        var label = Label.new()
        label.text = "Speed: %s" % str(object.get(name))
        add_custom_control(label)
        return true  # Override the default display
    return false
Best Practices
Now that you've seen the main features, let's collect the pitfalls that trip people up in plugin development. There are considerations here that don't apply to regular GDScript work, and neglecting resource management in particular will crash the editor or leak memory.
| Item | Recommendation |
|---|---|
| Null checks | Always null-check before removing things in _exit_tree() |
| Editor/runtime split | Branch editor-only logic on Engine.is_editor_hint() |
| Resource management | Call queue_free() on every UI element you added, in _exit_tree() |
| Use preload | Load scenes and resources ahead of time with preload() |
| Error handling | Notify the user of problems with push_warning() |
A common mistake:
# Bad: forgetting to release UI elements in _exit_tree()
func _exit_tree():
    pass  # Causes memory leaks and editor crashes

# Good: always release them
func _exit_tree():
    if dock:
        remove_control_from_docks(dock)
        dock.queue_free()
    if inspector_plugin:
        remove_inspector_plugin(inspector_plugin)
Summary
- Adding @tool to the top of a script makes it run inside the editor
- Use Engine.is_editor_hint() to branch editor-only logic
- Build a plugin by implementing
_enter_tree()/_exit_tree()on an EditorPlugin class - Add a custom dock to the left or right panels with
add_control_to_dock() - An inspector plugin extends the UI for specific nodes by inheriting
EditorInspectorPlugin - Always release everything you added in
_exit_tree()to prevent memory leaks