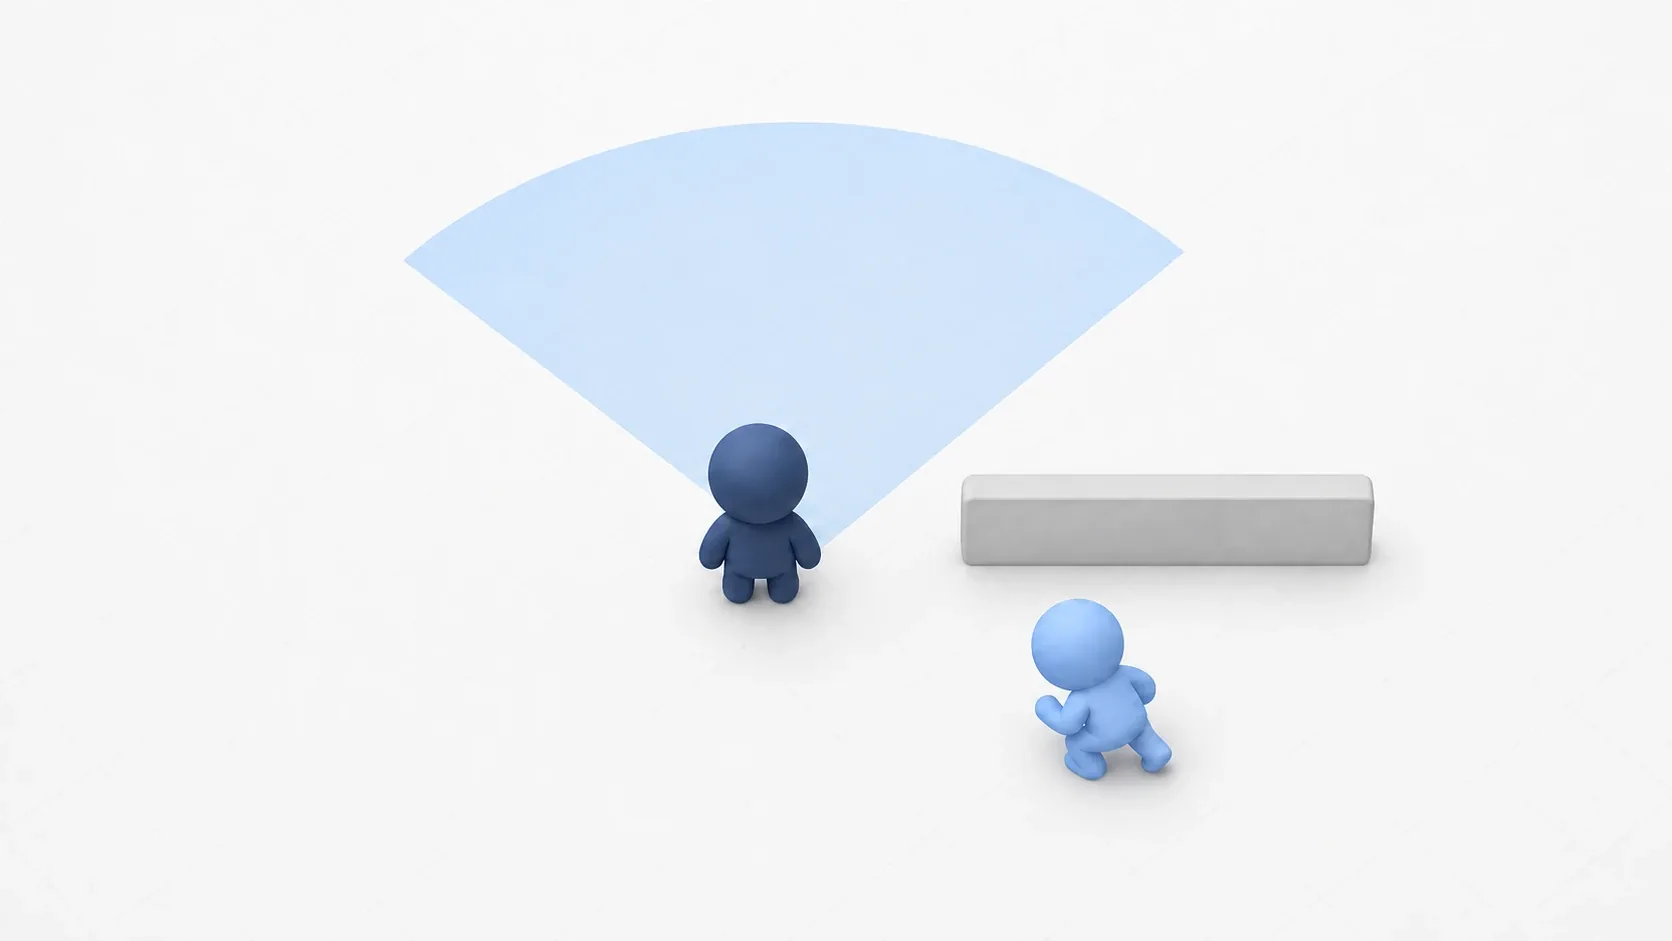
Stand in front of an enemy and you're spotted; sneak up from behind and you go unnoticed. The tension in a stealth game comes from recreating exactly that: the enemy's field of vision. With a plain distance check, you get detected even when standing directly behind an enemy, and stealth stops working at all.
Convincing vision needs three things: distance from the enemy, angle relative to the enemy's facing, and whether a wall sits in between. This article builds a forward-facing FOV (field of view) system in three stages: Area3D for range, a dot product for angle, and RayCast3D for occlusion.
What You'll Learn
- The three-stage structure of vision checks (range, angle, occlusion)
- How the dot product determines whether a target is inside the view angle
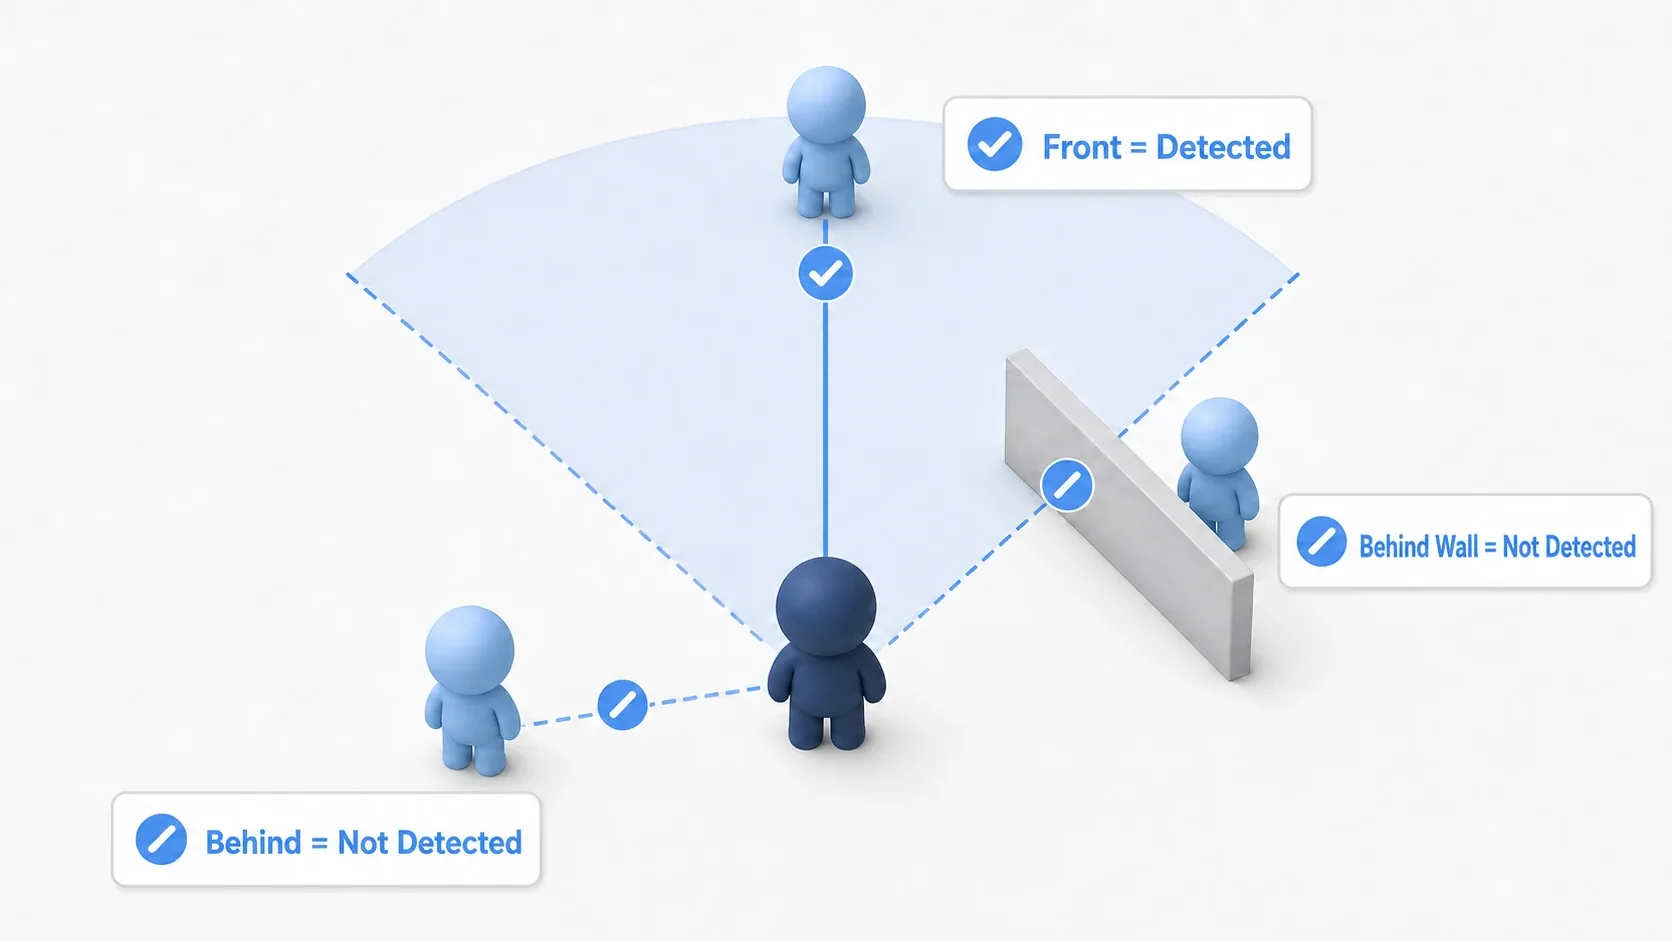
- Implementing basic FOV detection (telling front, behind, and behind-a-wall apart)
- Catching "only the head is visible" cases with multiple raycasts
- Managing alert levels in stages (notice, suspect, spot)
The Three-Stage Structure of Vision Checks
"In front, but behind a wall, so not visible." "Right nearby, but behind the enemy, so unnoticed." To handle situations like these correctly, vision checks narrow things down in three stages, cheapest first.
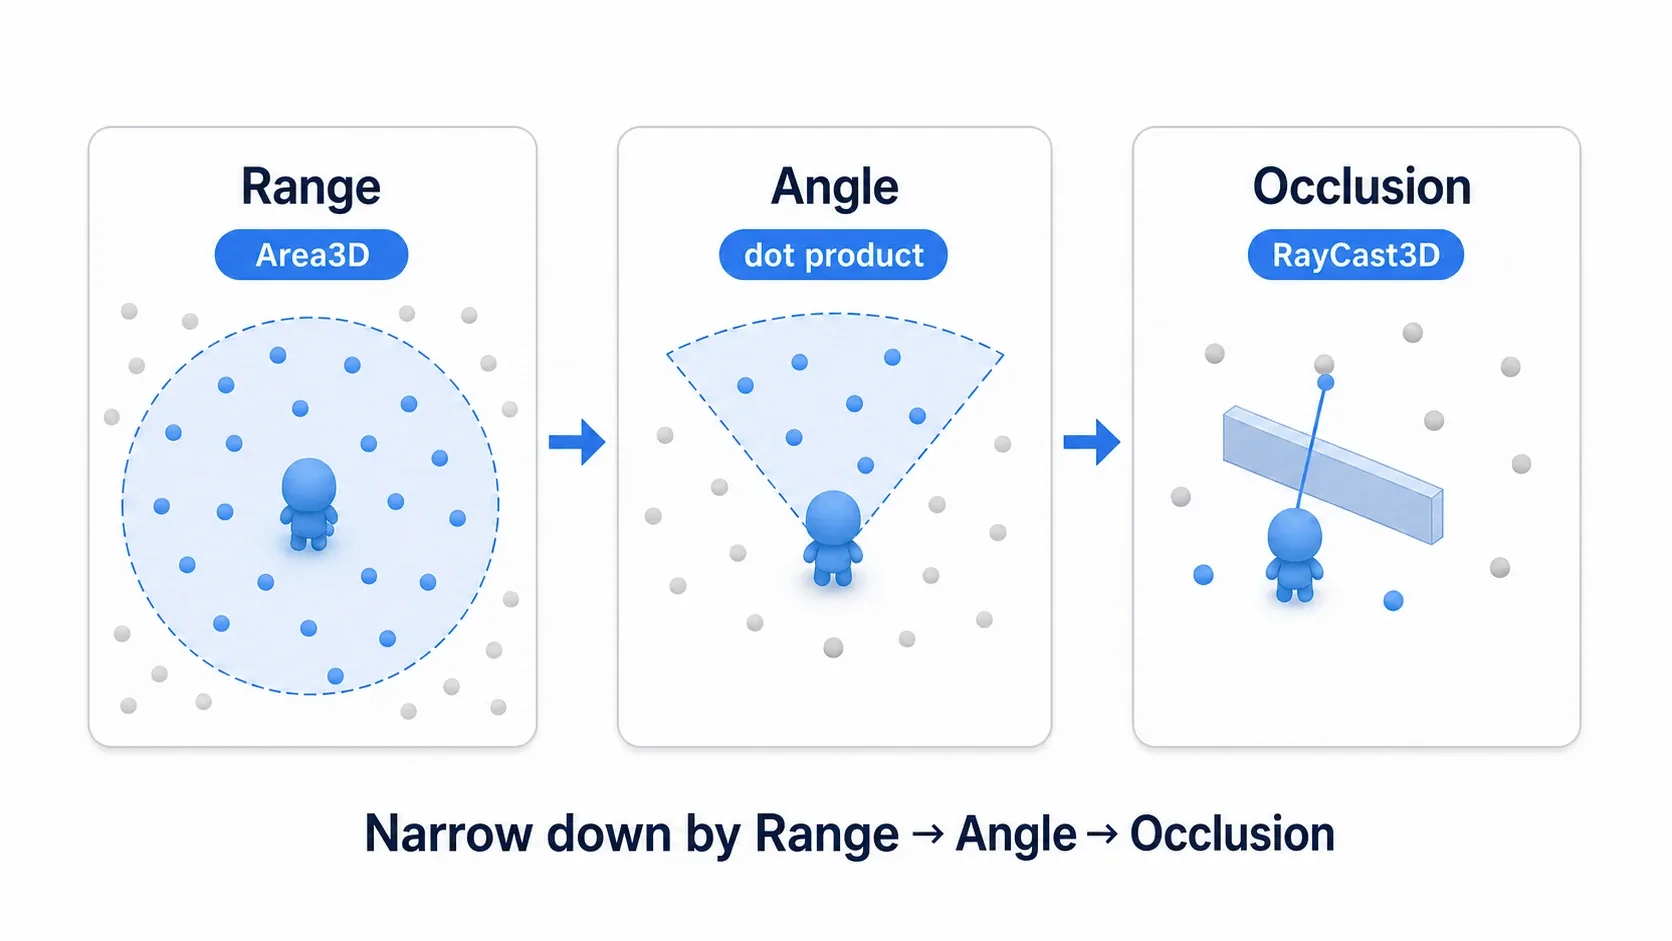
| Stage | Method | Purpose |
|---|---|---|
| 1. Range | Area3D (spherical detection area) | Is the target nearby? |
| 2. Angle | Dot product (dot) | Is the target in front (inside the view angle)? |
| 3. Occlusion | RayCast3D | Is the line of sight blocked by a wall? |
The reason for the cheapest-first order is to reduce how often the expensive RayCast3D runs. Even with 100 NPCs, if only 3 are inside the Area3D, you only cast 3 rays. Filtering out the bulk with cheap checks first is the standard approach.
Checking the View Angle with a Dot Product
The key to "only look forward" is the dot product. It expresses how closely two directions align as a single number, written like forward.dot(direction).
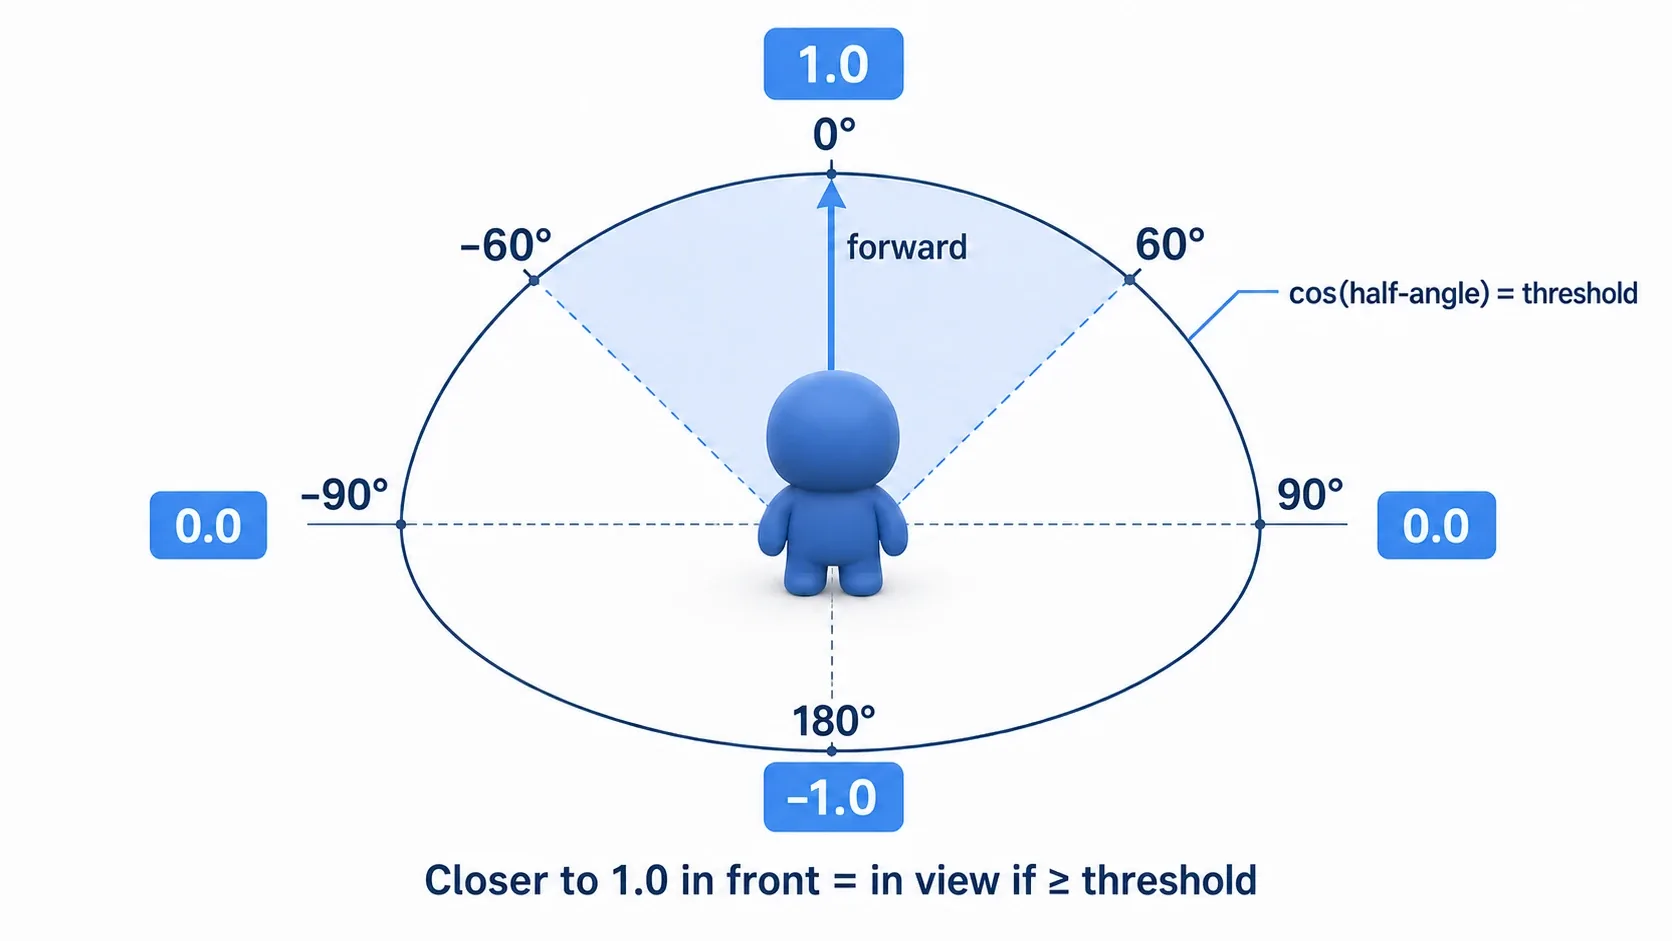
- 1.0: exactly the same direction (dead ahead, 0 degrees)
- 0.5: 60 degrees off
- 0.0: perpendicular (directly to the side, 90 degrees)
- -1.0: exactly opposite (directly behind, 180 degrees)
For an enemy with a 120 degree field of view, the half-angle is 60 degrees. Since cos(60°) = 0.5, you can decide that a dot product of 0.5 or more is inside the view, and below 0.5 is outside. It's faster than computing the actual angle because it's a single comparison against a cos threshold.
Implementing Basic FOV Detection
Let's put all three stages into one script. Add a detection node (FOVDetector) as a child of the enemy, holding an Area3D and a RayCast3D.
extends Node3D

@export var fov_angle: float = 120.0       # Field of view (degrees)
@export var detection_range: float = 15.0  # Detection range

@onready var ray: RayCast3D = $RayCast3D

signal target_detected(target: Node3D)
signal target_lost(target: Node3D)

func _can_see_target(target: Node3D) -> bool:
    var to_target := target.global_position - global_position
    # 1. Distance check (cheapest)
    if to_target.length() > detection_range:
        return false
    # 2. Angle check (dot product)
    var forward := -global_transform.basis.z.normalized()  # Forward in 3D is -Z
    var dot := forward.dot(to_target.normalized())
    if dot < cos(deg_to_rad(fov_angle / 2.0)):             # Below the threshold means outside the view
        return false
    # 3. Occlusion check (most expensive, only for what got this far)
    ray.target_position = to_target
    ray.force_raycast_update()                             # Cast the ray right now
    if ray.is_colliding():
        return ray.get_collider() == target               # Was the first hit the target itself?
    return true
The point is to order the three stages cheapest first and return false immediately as soon as one fails. forward is -global_transform.basis.z, because in Godot's 3D, negative Z is "forward." In the occlusion check, if the first thing the ray hits is the target itself, it's visible; if it's a wall or anything else, the view is blocked.
For the results, run this check on every target inside the Area3D and emit signals only at the moment the state changes (target_detected when it becomes visible, target_lost when it's lost). Receive these signals on the enemy AI side and use them to drive chasing and alerting.
Tip: Restrict the
RayCast3D'scollision_maskto just the wall and player layers. Including things like decorations will make occlusion checks misfire (see layers and masks).
Improving Accuracy with Multiple Raycasts
A single ray misses cases. Consider a player crouching behind a low wall: a ray aimed at their feet is blocked by the wall, but their head is in plain sight. One ray can't catch that.
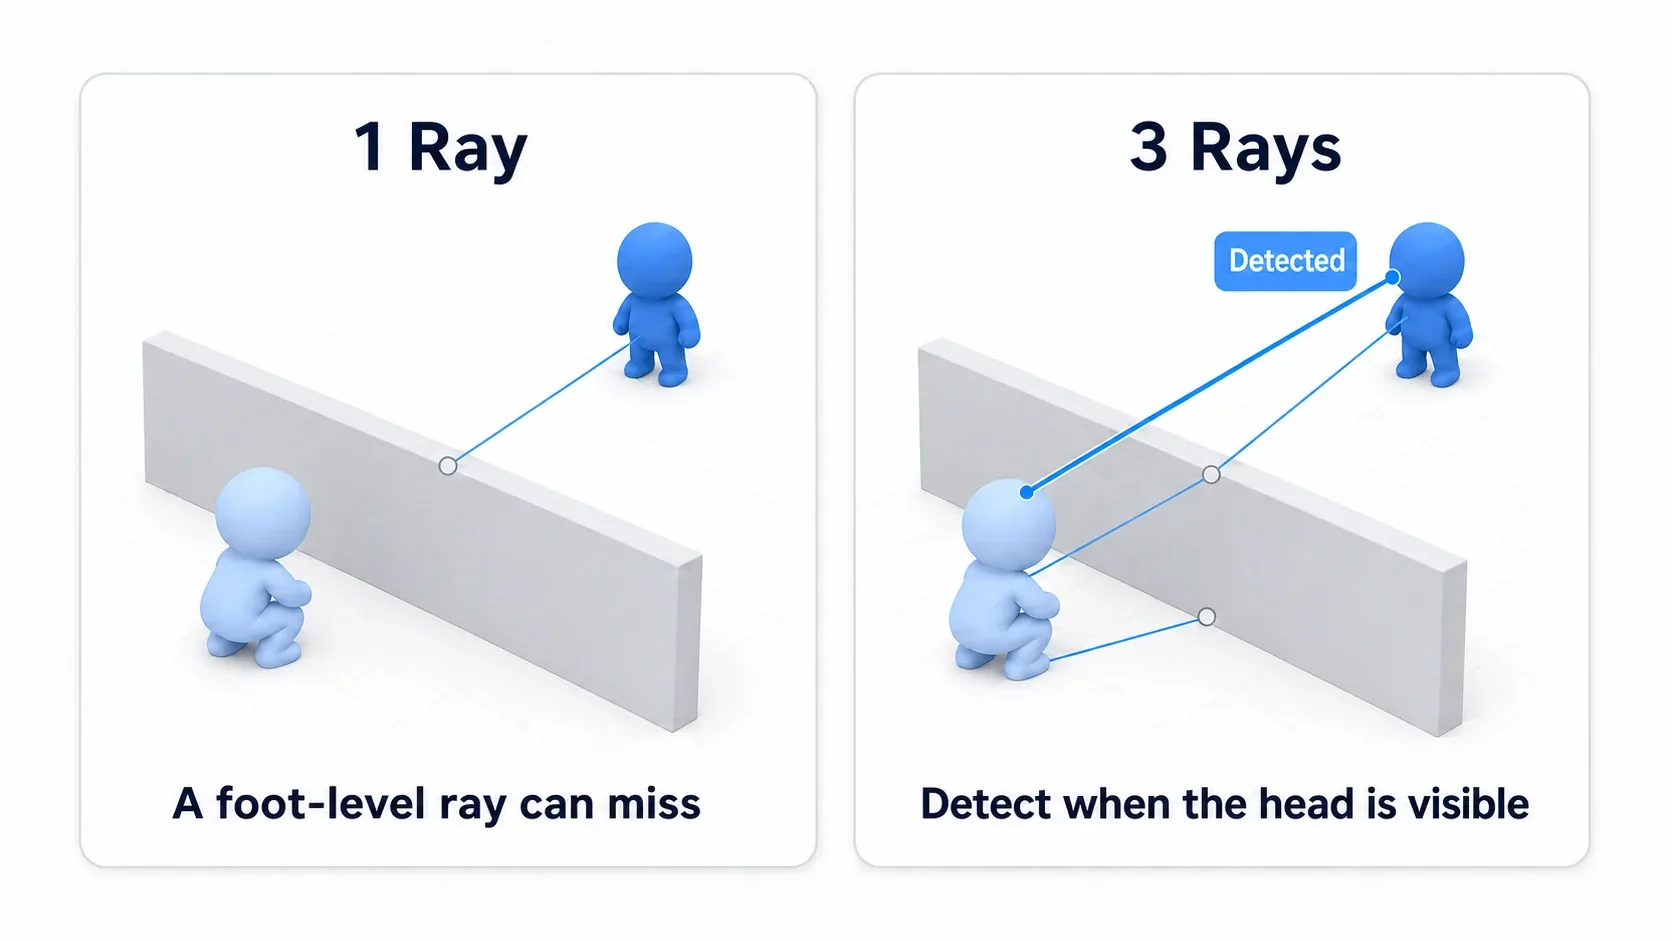
So cast rays at three points on the target, head, chest, and feet, and treat any one reaching the target as a detection. Everything up to the angle check stays the same; only the occlusion check is swapped out.
# Occlusion check across multiple points (everything up to the angle check matches the basic version)
var check_offsets := [
    Vector3(0, 1.7, 0),  # Head
    Vector3(0, 1.0, 0),  # Chest
    Vector3(0, 0.1, 0),  # Feet
]
for offset in check_offsets:
    ray.target_position = (target.global_position + offset) - global_position
    ray.force_raycast_update()
    if not ray.is_colliding() or ray.get_collider() == target:
        return true      # Visible at even one point is enough
return false             # Every point is blocked
The Y values in check_offsets are heights from the character's origin (usually the feet). Adjust them if your model's origin sits at its center. As for how many rays to cast, two or three is the sweet spot: too many gets expensive, too few loses accuracy.
Managing Alert Levels in Stages
Once vision checks work, the question is how to use them. Like the classic stealth games, instead of an instant game over the moment you're seen, having alertness escalate from "?" to "!" gives the player room to react and creates tension.
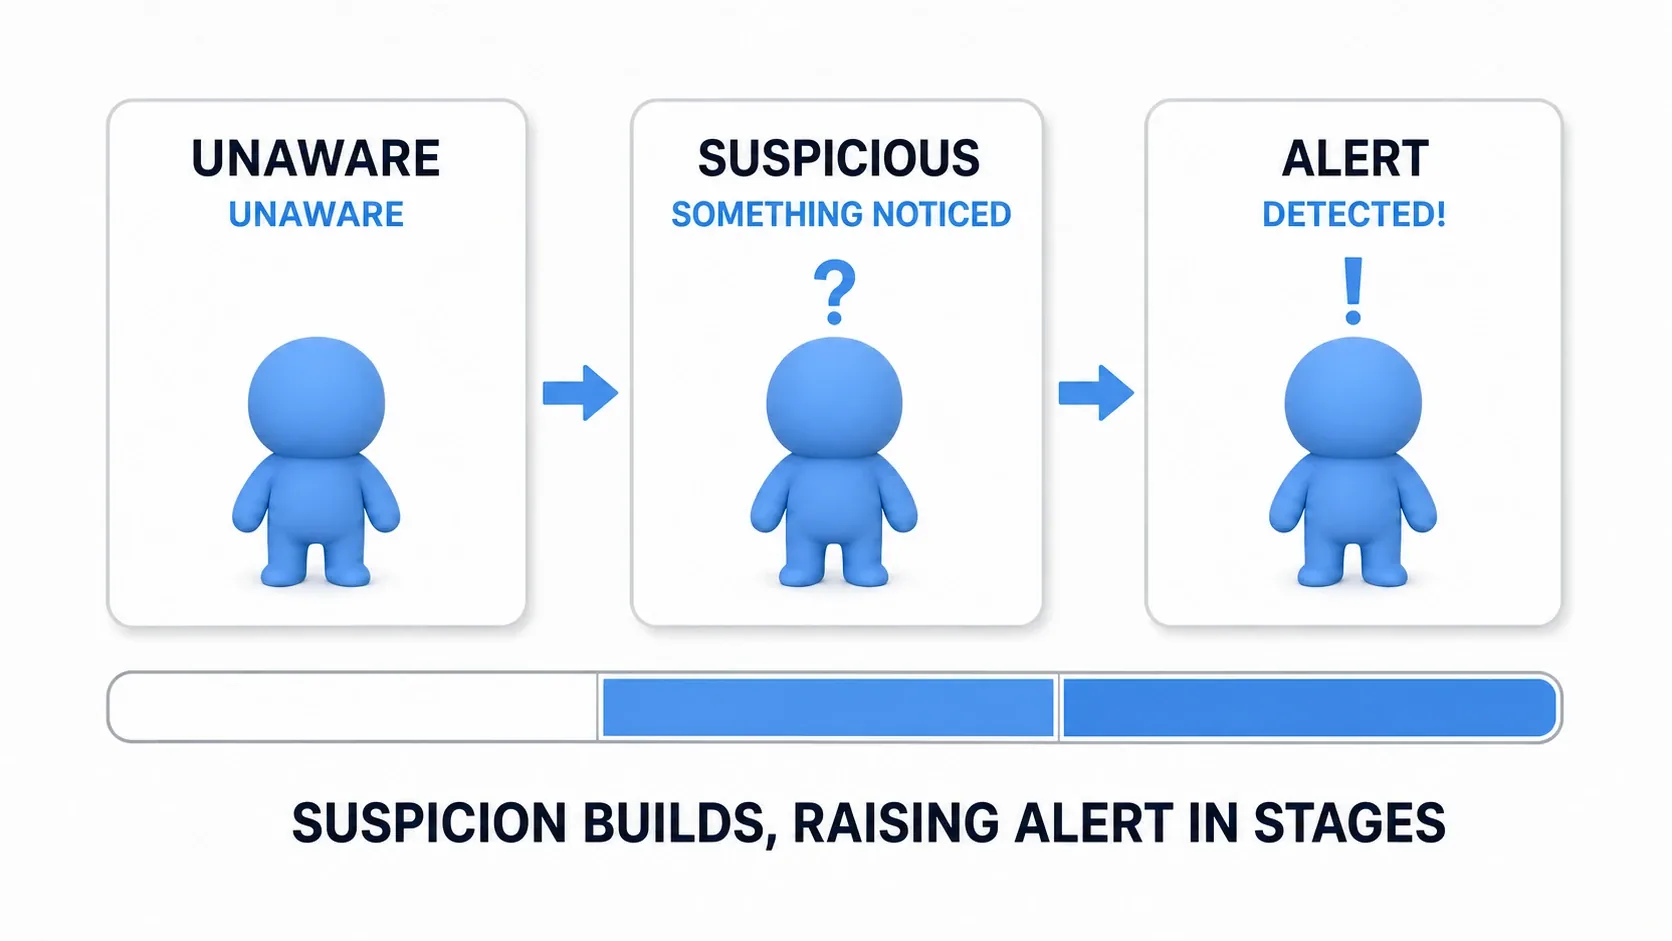
Manage three states with a suspicion level from 0 to 100. It rises while the target is visible and gradually decays once it's lost. Hitting the threshold means ALERT.
| State | Meaning | Gameplay |
|---|---|---|
UNAWARE | Hasn't noticed | Normal patrol |
SUSPICIOUS | Sensed something | Stops and looks around |
ALERT | Spotted you | Chases and attacks the player |
enum AlertState { UNAWARE, SUSPICIOUS, ALERT }

@export var suspicion_rate: float = 30.0    # Rise rate (%/sec)
@export var suspicion_decay: float = 15.0   # Decay rate (%/sec)
@export var alert_threshold: float = 100.0

var suspicion := 0.0
var state := AlertState.UNAWARE
signal state_changed(new_state: AlertState)

func update_detection(is_visible: bool, delta: float) -> void:
    # Rises while visible, decays once lost
    suspicion += (suspicion_rate if is_visible else -suspicion_decay) * delta
    suspicion = clampf(suspicion, 0.0, alert_threshold)

    var next := AlertState.UNAWARE
    if suspicion >= alert_threshold:
        next = AlertState.ALERT
    elif suspicion > 0.0:
        next = AlertState.SUSPICIOUS

    if next != state:              # Notify only at the moment the state changes
        state = next
        state_changed.emit(state)
Because state_changed only fires the moment it becomes SUSPICIOUS, it's easy to hook up effects like popping a "?" above the enemy's head. Combine this staging with a state machine or a behavior tree and you get enemy AI that moves naturally between patrolling, alerting, and chasing. The chase itself is handled by NavigationAgent2D/3D.
Performance and Debugging
Vision checks add up when you have a lot of enemies. To finish, here are the optimization and debugging essentials.
- Thin out detection with a
Timer: every 0.1 to 0.2 seconds is plenty instead of every frame. At 60 FPS that's about 7 checks per second instead of 60, and the perceived accuracy barely changes. - Keep it to two or three rays: the more you cast, the heavier it gets.
- Give
collision_maska dedicated layer: target only walls and the player, and exclude unrelated collisions. - Make
Area3Da bit larger than the FOV: rejecting targets by range first is the whole point of the three-stage structure. - Visualize the view cone while tuning: view angle and range get dramatically easier to adjust when you draw the cone and look at it. The usual approach is a
@toolscript withImmediateMeshthat draws the vision mesh in the editor, removed for release.
Bonus: Good to Know for Later
- Let sound raise alertness too: raising
suspicionfrom footsteps and noises, not just sight, adds a lot of tension. Merging "seeing" and "hearing" into the same suspicion meter feels natural. - Give losing sight some lag: a small
suspicion_decaykeeps enemies alert for a while after losing you, which creates the "hide and wait it out" mind game. - The same idea works in 2D: for 2D stealth,
Area2DplusRayCast2Dplus a dot product gives you the exact same three stages. - Connect it to AI behavior: chase on
ALERT, return to patrol onUNAWARE. Decisions belong to a state machine and movement to NavigationAgent2D.
Summary
- Three stages: narrow down with
Area3D(range), the dot product (angle), andRayCast3D(occlusion), cheapest first - The dot product compares
forward.dot(direction)againstcos(half-angle)for a fast view-angle test - Multiple raycasts (head, chest, feet) catch targets that are only partially visible
- Alert levels staged through a suspicion meter replace instant detection with real tension
- Optimization comes down to
Timerthinning and layer settings
Start by adding an Area3D and a RayCast3D to an enemy and detecting only a player standing in front of it. Once you've confirmed you stay hidden from behind and behind walls, the stealth foundation is done. Add alert levels and chasing on top, and the enemy AI gets a lot more tense.
Further Reading
- Managing AI and Player States with State Machines: state transitions between patrolling, alerting, and chasing
- Designing AI with Behavior Trees: building more complex AI decisions
- Pathfinding with NavigationAgent2D: chase the player once spotted
- Organizing Objects with Collision Layers and Masks: choosing the layers for line-of-sight checks
- Godot Official Docs: RayCast3D: the primary source for occlusion checks