You want your 3D character to walk, run, and attack. But animation switching stutters, feet sink into slopes and steps, and state management gets complicated. 3D animation comes with problems that 2D never had.
This article focuses on the parts specific to 3D: Skeleton3D and bones, playback with AnimationPlayer, directional blending with BlendSpace, and foot placement with SkeletonIK3D. The basic thinking behind AnimationTree and state machines is the same as in 2D, so reading this alongside AnimationTree and state machines will deepen your understanding.
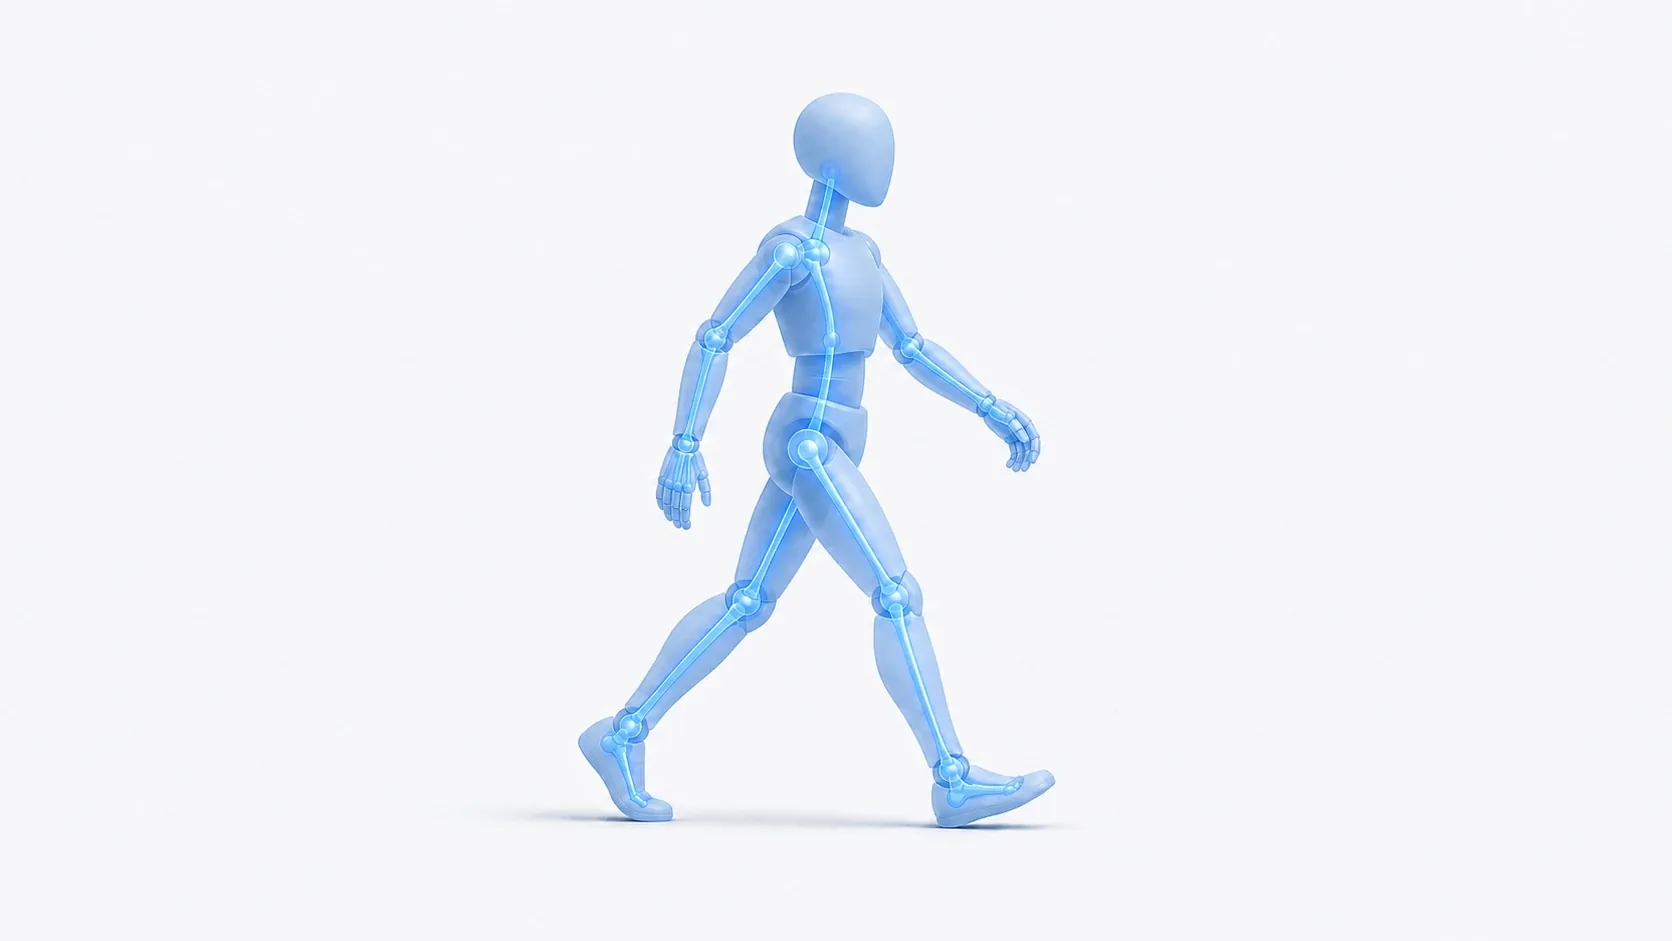
What You'll Learn
- The
Skeleton3Dbone hierarchy and how to access bones from script- Playback and blending with the
AnimationPlayerthat GLB import generates for you- How to mix animations by speed and direction with
BlendSpace1D/2D- Dynamic foot placement with
SkeletonIK3D(and a note on its deprecation)
Skeleton3D and the Bone Hierarchy
Before touching animation, let's cover how the skeleton works. Every skeletal animation is built on top of this bone hierarchy.
Skeleton3D is the node that represents a 3D character's skeletal structure. Animation emerges from moving bones, arranged hierarchically like a human skeleton, over time.
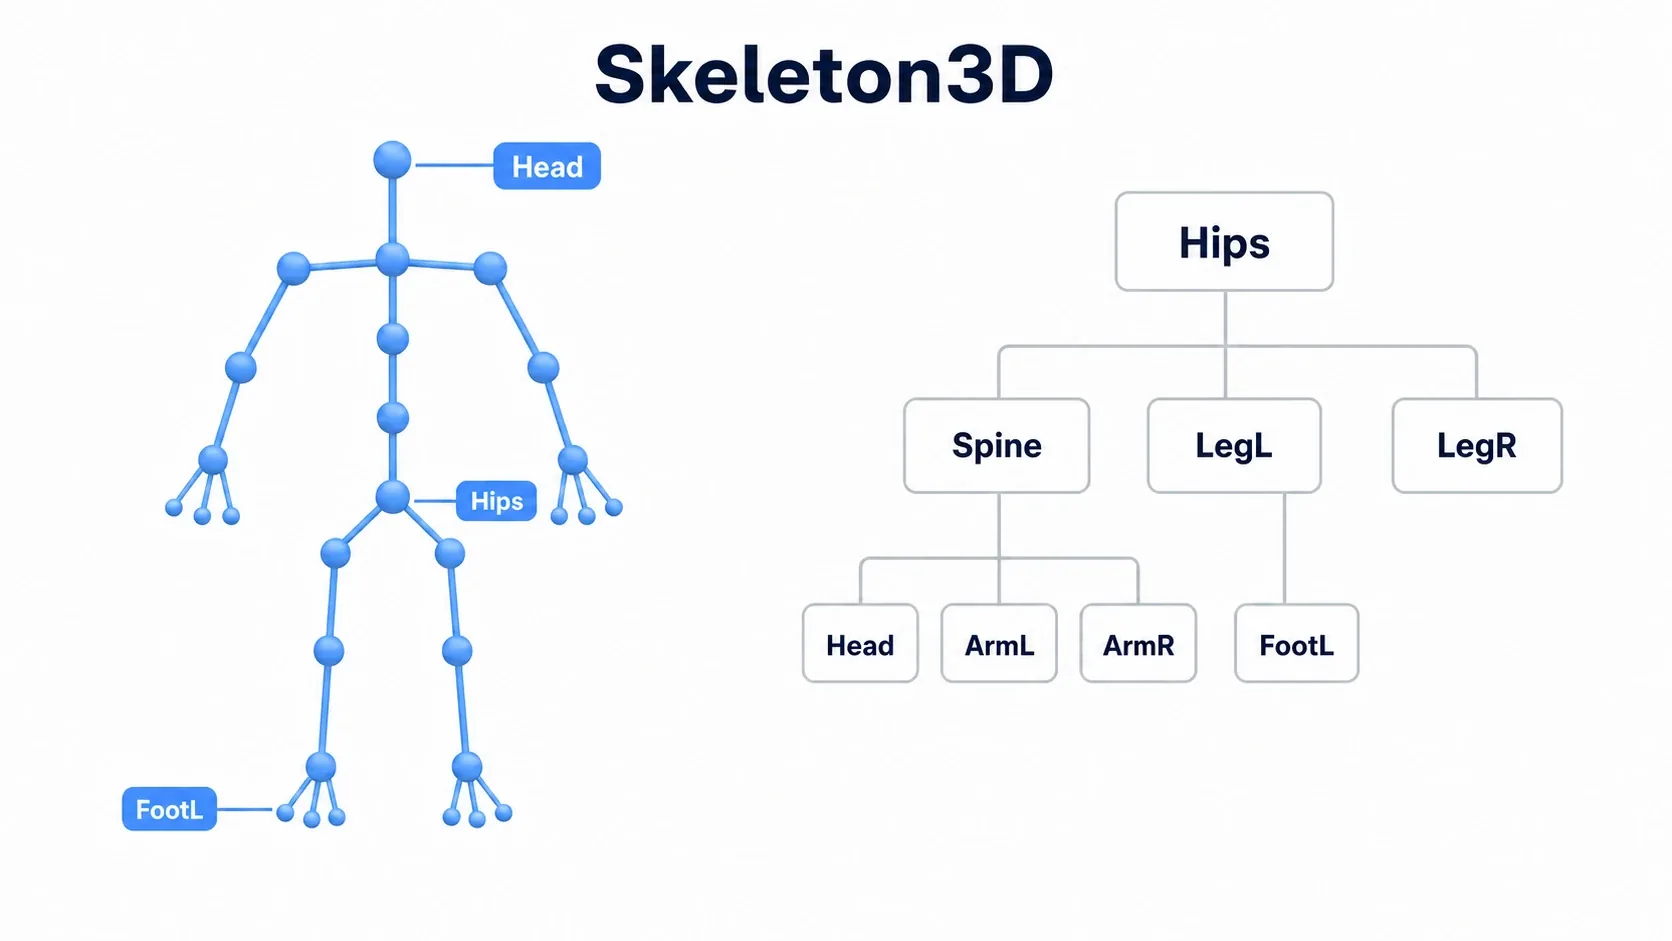
A root bone like the hips (Hips) is the parent, with the spine, head, arms, and legs hanging below as children. Move the parent and the children follow. That parent-child relationship is the foundation for moving the whole body together.
You can list the bones in an imported model from script.
var skeleton := $MeshInstance3D.find_child("Skeleton3D", true, false) as Skeleton3D
print("Bone count: ", skeleton.get_bone_count())
for i in skeleton.get_bone_count():
    print("  ", skeleton.get_bone_name(i))

# Get a specific bone's index and current pose
var head_idx := skeleton.find_bone("Head")
if head_idx != -1:
    var pose := skeleton.get_bone_pose(head_idx)  # Transform3D
    print("Head local position: ", pose.origin)
Playing 3D Animation with AnimationPlayer
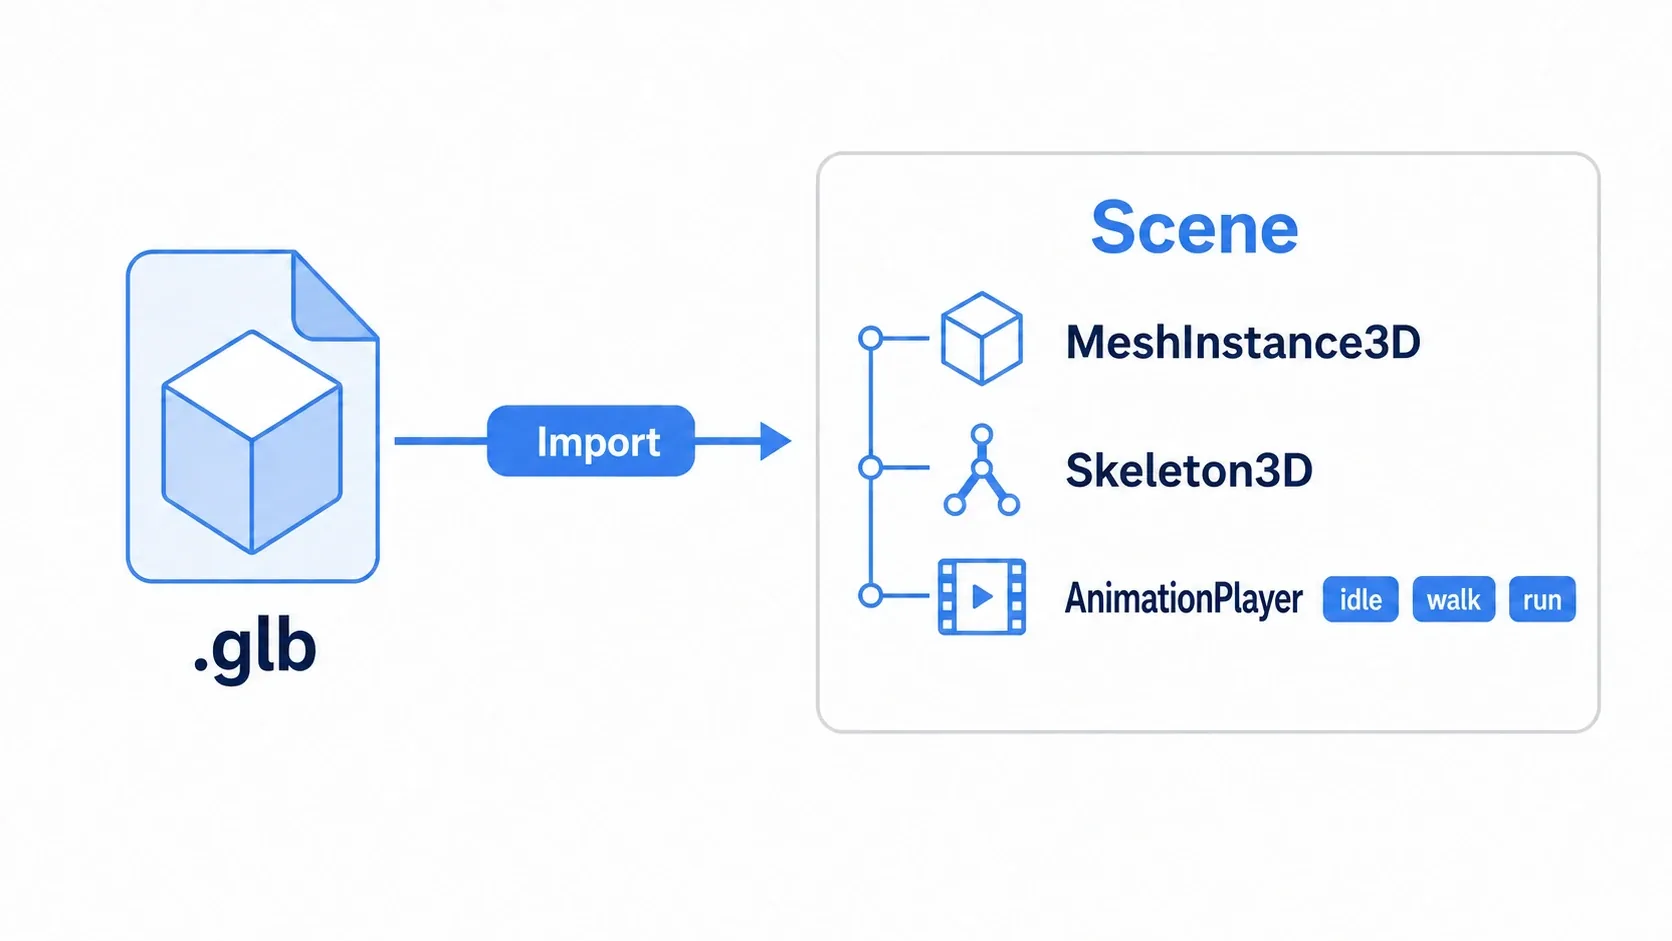
AnimationPlayer is the most basic animation playback node. When you import a 3D model (GLB), it is generated automatically alongside MeshInstance3D and Skeleton3D, ready to use.
Basic Playback
@onready var anim_player: AnimationPlayer = $AnimationPlayer

func _ready() -> void:
    for anim_name in anim_player.get_animation_list():
        print("  ", anim_name)
    if anim_player.has_animation("idle"):
        anim_player.play("idle")
Smoothing Switches with Blend Time
That jolt at the moment of a switch happens because the change is instant, with no blending. set_blend_time() gives you a smooth transition.
# Set the blend time (in seconds) between animations ahead of time
anim_player.set_blend_time("idle", "walk", 0.2)
anim_player.set_blend_time("walk", "run", 0.3)

func change_to_walk() -> void:
    anim_player.play("walk")  # Blends from idle to walk over 0.2 seconds
Playback Speed and Signals
anim_player.play("walk", -1, 2.0)   # Double speed
anim_player.play_backwards("walk")   # Reverse playback

func _ready() -> void:
    # Useful for things like returning to idle once an attack motion ends
    anim_player.animation_finished.connect(_on_animation_finished)

func _on_animation_finished(anim_name: String) -> void:
    if anim_name == "attack":
        anim_player.play("idle")
For building out AnimationPlayer itself (method call tracks, RESET, and so on), see Advanced AnimationPlayer Techniques.
Managing State with AnimationTree
Once states grow to walk, run, jump, and attack, bundle them into an AnimationTree state machine. The thinking is identical to 2D : AnimationTree (the conductor) pulls clips from AnimationPlayer (the animation warehouse), and your code just reports the current state with travel().
@onready var anim_tree: AnimationTree = $AnimationTree
@onready var state_machine: AnimationNodeStateMachinePlayback = anim_tree.get("parameters/playback")

func _ready() -> void:
    anim_tree.active = true

func _physics_process(delta: float) -> void:
    var speed := velocity.length()
    var target := "idle"
    if speed > 0.1:
        target = "run" if Input.is_action_pressed("sprint") else "walk"
    if state_machine.get_current_node() != target:  # Only when it changes
        state_machine.travel(target)
State machine design (adding nodes, transitions, Xfade Time) and the detailed split with your code are covered in AnimationTree and state machines. From here, we move on to BlendSpace and IK , which are especially useful in 3D.
Blending Speed and Direction with BlendSpace
Where a state machine switches between discrete states like "walk" and "run", BlendSpace suits continuously varying values such as speed and direction.
BlendSpace1D blends along a single value (movement speed, for example). It smoothly connects idle at 0, walk at 3, and run at 10.
# Create a BlendSpace1D in the editor and place 0.0=idle / 3.0=walk / 10.0=run
var speed := velocity.length()
anim_tree.set("parameters/movement/blend_position", speed)
BlendSpace2D blends along a 2D vector (movement direction, for example). It is ideal for eight-direction walk animation on a character who moves in all directions, like in an action RPG.
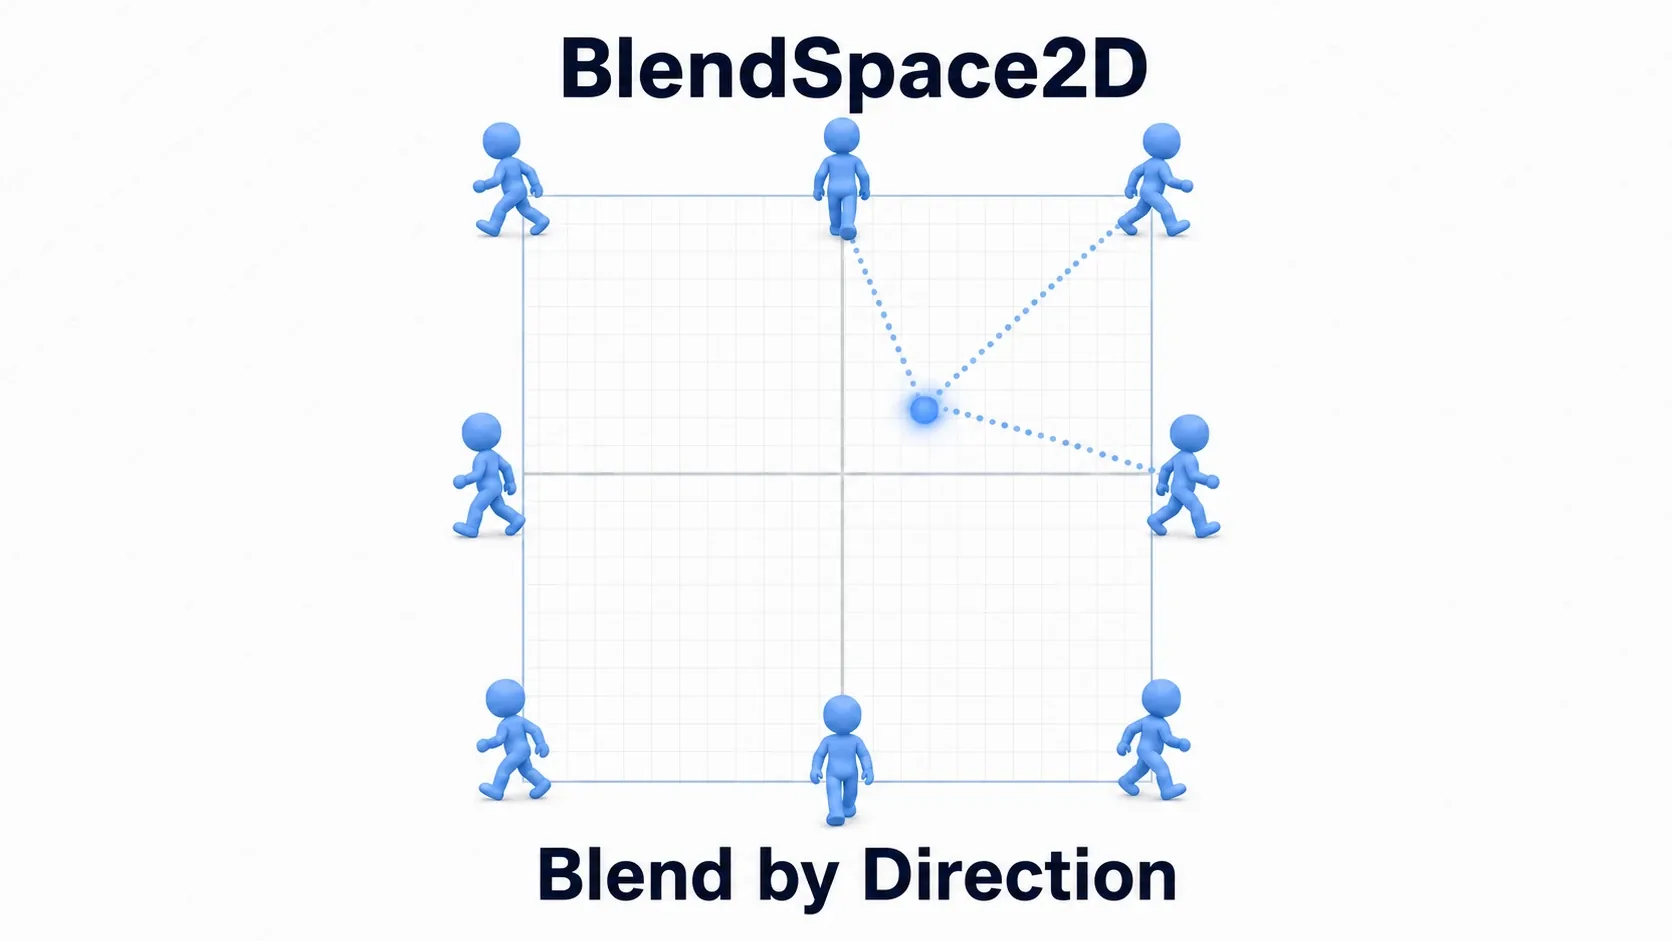
# Place walk_forward, walk_right, and so on at the corners and cardinal points
var dir := Vector2(
    Input.get_axis("move_left", "move_right"),
    Input.get_axis("move_back", "move_forward")
)
anim_tree.set("parameters/locomotion/blend_position", dir)
Placing Feet on the Ground with SkeletonIK3D
Animation data alone cannot make on-the-spot adjustments like matching feet to uneven terrain or reaching a hand toward a moving object. That is where IK (inverse kinematics) comes in.
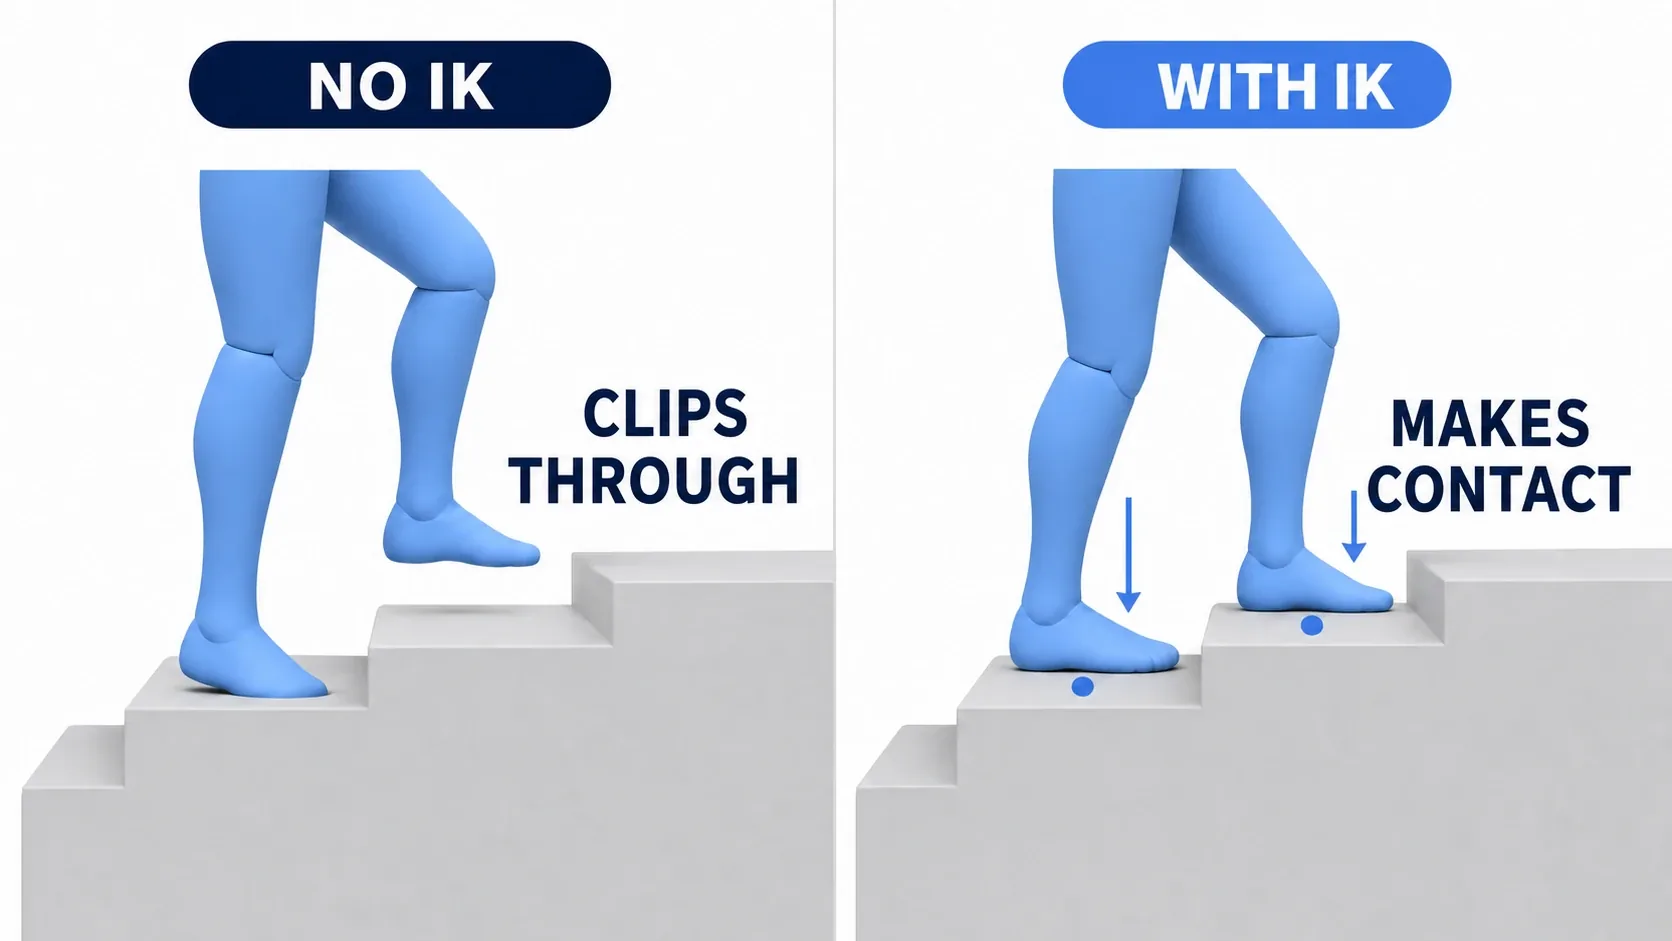
SkeletonIK3D works backward from a target position to solve the bones from the ankle down, giving you grounded feet and reaching hands. Even with a walk animation authored for flat ground, feet land properly on steps and slopes.
tips:
SkeletonIK3Dis on the deprecation path in Godot 4.x, with migration toward theSkeletonModifier3Dfamily. For new projects, consider usingSkeletonModifier3D. Existing projects will keep working withSkeletonIK3D, but it may be removed in a future version.
# Place a SkeletonIK3D (Root Bone: Hips / Tip Bone: FootL) under Skeleton3D,
# and assign a Node3D representing the ground position to Target
@onready var foot_ik: SkeletonIK3D = $Skeleton3D/FootIK_L
@onready var foot_target: Node3D = $FootTarget_L

func _ready() -> void:
    foot_ik.start()  # Start IK

func _process(delta: float) -> void:
    # Cast a ray below the foot and align the target to the ground height
    var space := get_world_3d().direct_space_state
    var from := foot_target.global_position + Vector3.UP
    var to := foot_target.global_position + Vector3.DOWN * 2.0
    var hit := space.intersect_ray(PhysicsRayQueryParameters3D.create(from, to))
    if hit:
        foot_target.global_position = hit.position
You can tune how strongly IK applies with interpolation (0.0 = off through 1.0 = fully applied), and turn it off temporarily with stop().
Hands-On: Combining Locomotion Blending and Foot IK
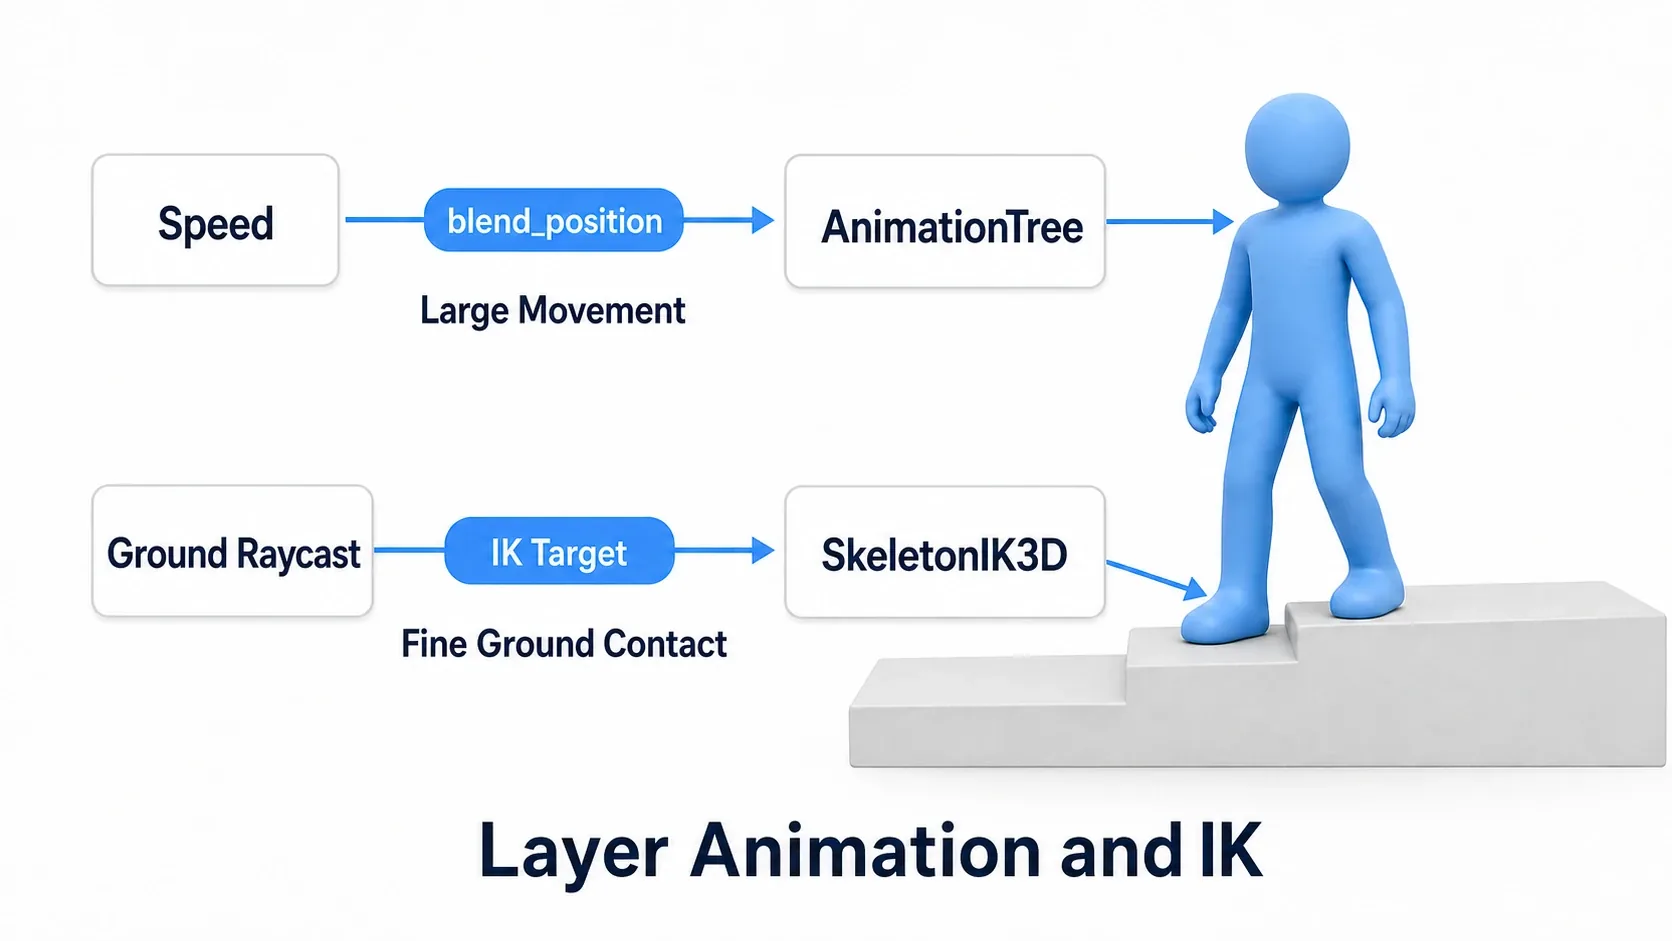
Let's build a character for a 3D action game, open world, or third-person shooter whose walk and run blend by movement speed and whose feet land properly on slopes and steps. The trick is to layer animation (the broad motion) and IK (fine-grained ground contact) as separate roles .
- Animation side :
BlendSpaceandAnimationTreeproduce walk/run poses from speed - IK side : a raycast below the foot finds the ground, and
SkeletonIK3Dplaces the ankle there
@onready var anim_tree: AnimationTree = $AnimationTree
@onready var foot_ik: SkeletonIK3D = $Skeleton3D/FootIK_L
@onready var foot_target: Node3D = $FootTarget_L

func _ready() -> void:
    anim_tree.active = true
    foot_ik.start()

func _physics_process(delta: float) -> void:
    # Animation: pass speed to the blend position (walk to run)
    anim_tree.set("parameters/locomotion/blend_position", velocity.length())

    # IK: align the target to the ground height below the foot
    var space := get_world_3d().direct_space_state
    var from := foot_target.global_position + Vector3.UP
    var to := foot_target.global_position + Vector3.DOWN * 2.0
    var hit := space.intersect_ray(PhysicsRayQueryParameters3D.create(from, to))
    if hit:
        foot_target.global_position = hit.position
There are two points to take away.
- Animation and IK have different jobs : animation handles the broad motion of "walking," while IK handles the fine adjustment of "put that foot at the ground height under it." Keeping them separate lets the same walk animation look natural on flat ground and slopes alike.
- IK is the expensive part : IK recalculates every frame. As shown below, turning IK off for distant or off-screen characters keeps the cost down.
Performance Optimization
Rich animation is appealing, but processing cost becomes a problem in scenes with many characters. Scale the work down in stages based on distance from the camera.
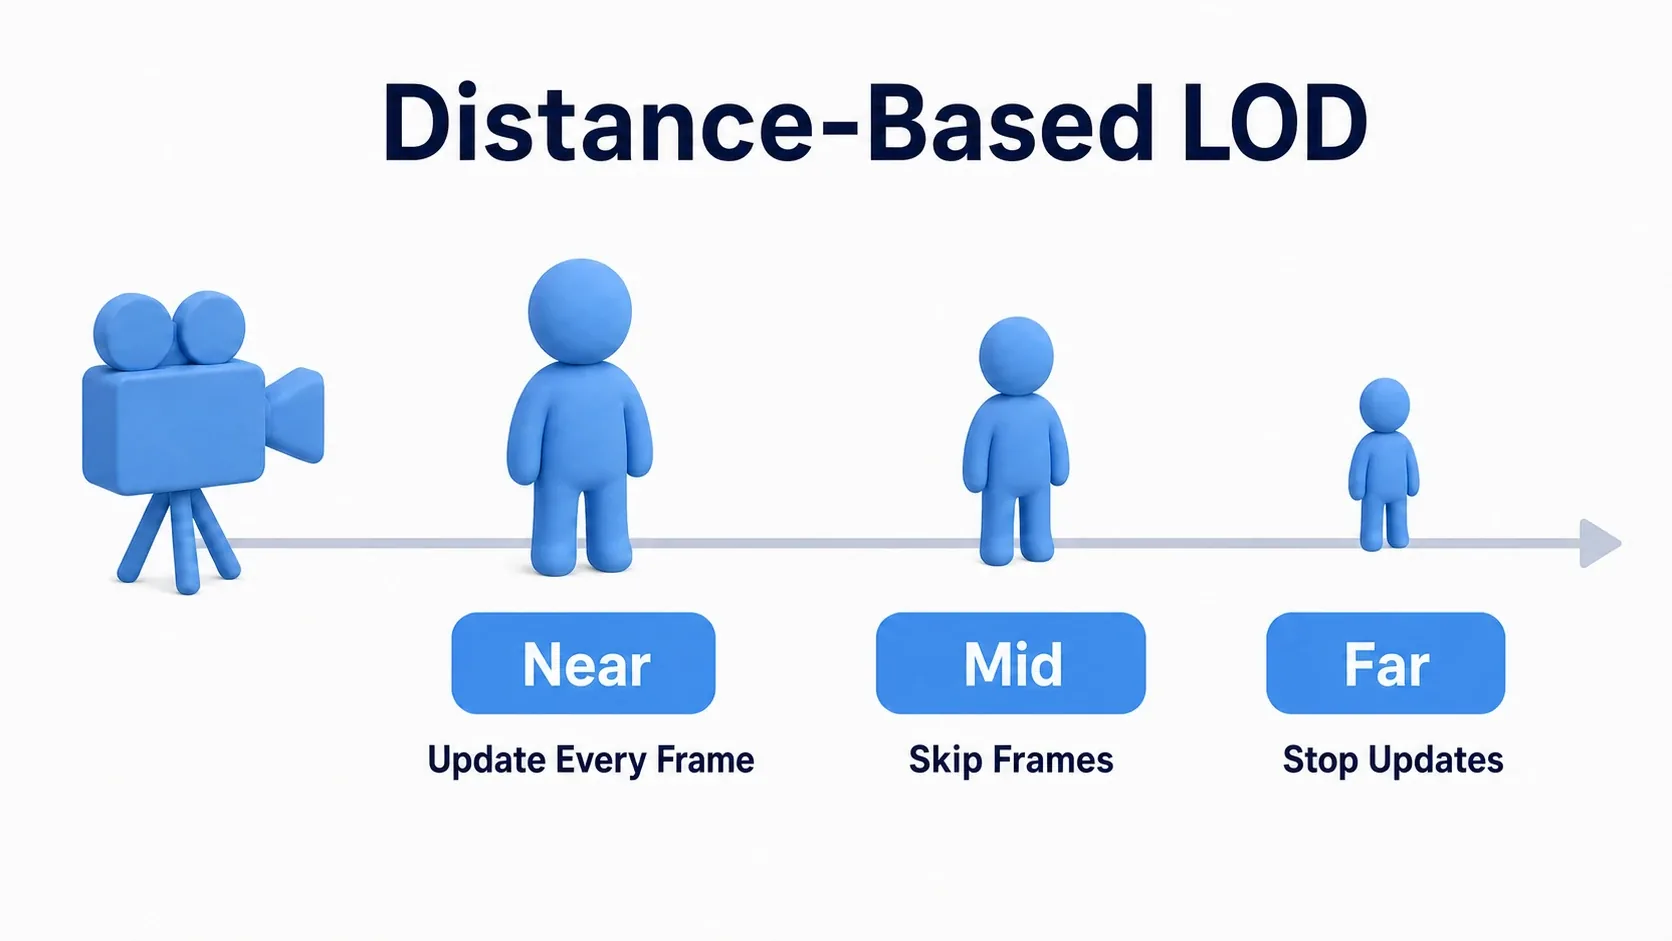
A character rendered tiny at the edge of the screen doesn't need the same update precision as the hero.
func _process(delta: float) -> void:
    var distance := global_position.distance_to(camera.global_position)

    if distance > 50.0:
        anim_tree.active = false                     # Far: stop processing
    else:
        anim_tree.active = true
        if distance > 20.0 and Engine.get_process_frames() % 2 != 0:
            return                                   # Mid: skip every other frame
        # Near: normal update
tips: Setting
anim_tree.active = falsestops animation processing entirely. The safe pattern is to setactiveto false at long distances and leaveactivetrue while skipping updates at mid distances. Turning off IK on non-player characters (foot_ik.stop()) and enabling animation compression at import time (Compression: Lossy / Optimize) also help.
Summary
Skeleton3D: the parent-child bone hierarchy. Moving a parent brings its children along, which is the foundationAnimationPlayer: generated automatically by GLB import. Play and blend withplay()andset_blend_time()AnimationTree: state management works the same as in 2D (AnimationTree and state machines). In 3D,BlendSpacedirectional blending is especially powerfulSkeletonIK3D: dynamic pose adjustment such as foot placement (deprecation in progress, migrating toSkeletonModifier3Dis recommended)- Optimization : distance-based LOD, disabling unneeded IK, animation compression
Start by loading a GLB and playing walk and run with AnimationPlayer, then layer on directional blending with BlendSpace and ground contact with SkeletonIK3D one step at a time. One-off effects like a damage flash are easier to add with Tween.