Overview
Tested on: Godot 4.3+
As a Godot project grows, you start hitting issues like "I keep building this same combination of nodes" or "I want to tidy up all these Inspector fields." Defining a custom node type with class_name and exposing properties with @export gives you reusable parts that are easy to work with in the editor.
This article covers custom nodes from the basics, techniques for organizing your @export properties, creating custom Resources, and extending the Inspector.

What You'll Learn
- How to use
class_nameto register your own parts as Godot nodes- Techniques with
@icon,@export, and@export_groupto make the editor nicer to use- Designing with custom Resources to split data into shareable files
- Extending the Inspector with
EditorInspectorPlugin(advanced)
- Defining Custom Node Types with class_name
- Setting a Custom Icon with @icon
- Exposing Properties to the Inspector with @export
- Organizing with @export_group / @export_subgroup
- Creating Custom Resources
- Extending Property Editors with EditorInspectorPlugin
- Custom Nodes vs. Composition
- Summary
- Further Reading
Defining Custom Node Types with class_name
Let's start where every custom node starts: the class_name declaration. Declaring class_name in a script registers that class as a global type in the Godot editor. You can then search for it in the Add Node dialog and reference it in type annotations, which improves both reusability and type safety.
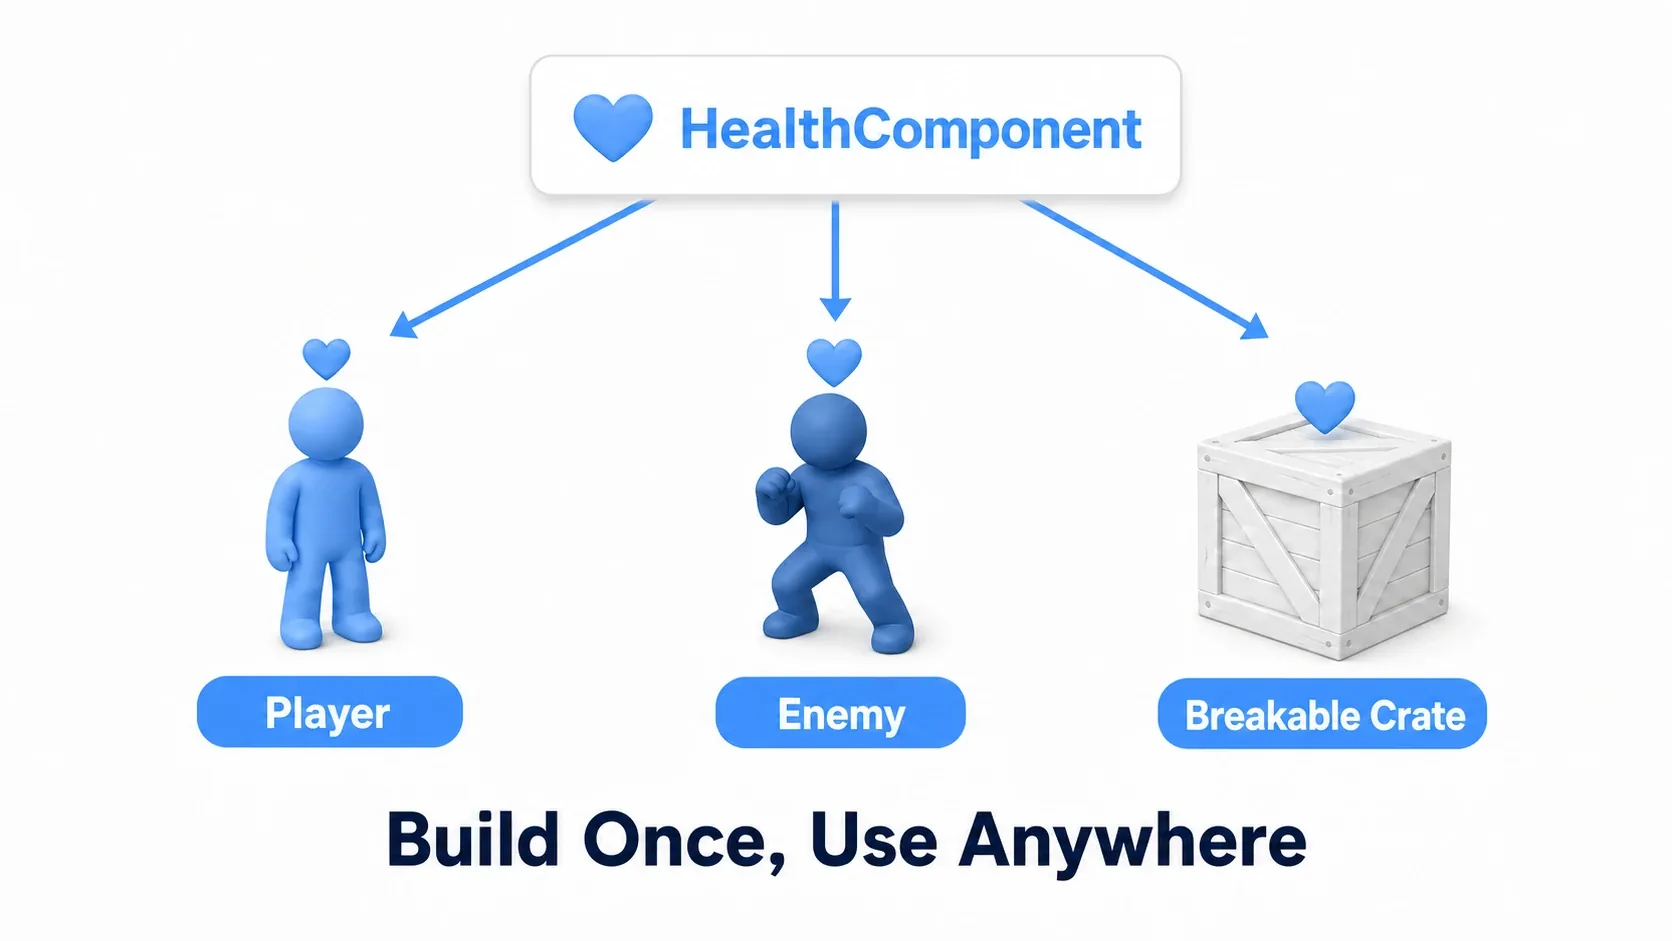
In an action game, for example, you can factor out the "health management" that enemies, players, and destructible objects all share into a HealthComponent. Here's the basic implementation.
# health_component.gd
class_name HealthComponent
extends Node

signal died
signal health_changed(new_health: int)

@export var max_health: int = 100
var current_health: int

func _ready():
    current_health = max_health

func take_damage(amount: int):
    current_health = max(current_health - amount, 0)
    health_changed.emit(current_health)
    if current_health <= 0:
        died.emit()

func heal(amount: int):
    current_health = min(current_health + amount, max_health)
    health_changed.emit(current_health)
What registration gets you:
- You can search for and add
HealthComponentin the Add Node dialog - You can write type annotations like
var health: HealthComponent - You can test types with the
isoperator:if node is HealthComponent:
tips:
class_nameregisters into the global namespace, so using the same name twice in a project causes an error. For large projects or addon development, consider prefixing your class names.
Setting a Custom Icon with @icon
Once you've defined a node type with class_name, the next step is to give it a proper look with an icon. @icon customizes the icon shown in the editor. As custom nodes pile up in the scene tree, the default icon makes them hard to tell apart. A dedicated icon lets you spot each node's role at a glance.
@icon("res://icons/health_heart.svg")
class_name HealthComponent
extends Node
- Applies to both the scene tree and the Add Node dialog
- SVG is recommended (no quality loss when scaled)
- Icons display at 16x16 px
@icon("res://icons/hitbox.svg")
class_name HitboxComponent
extends Area2D

@export var damage: int = 10
Exposing Properties to the Inspector with @export
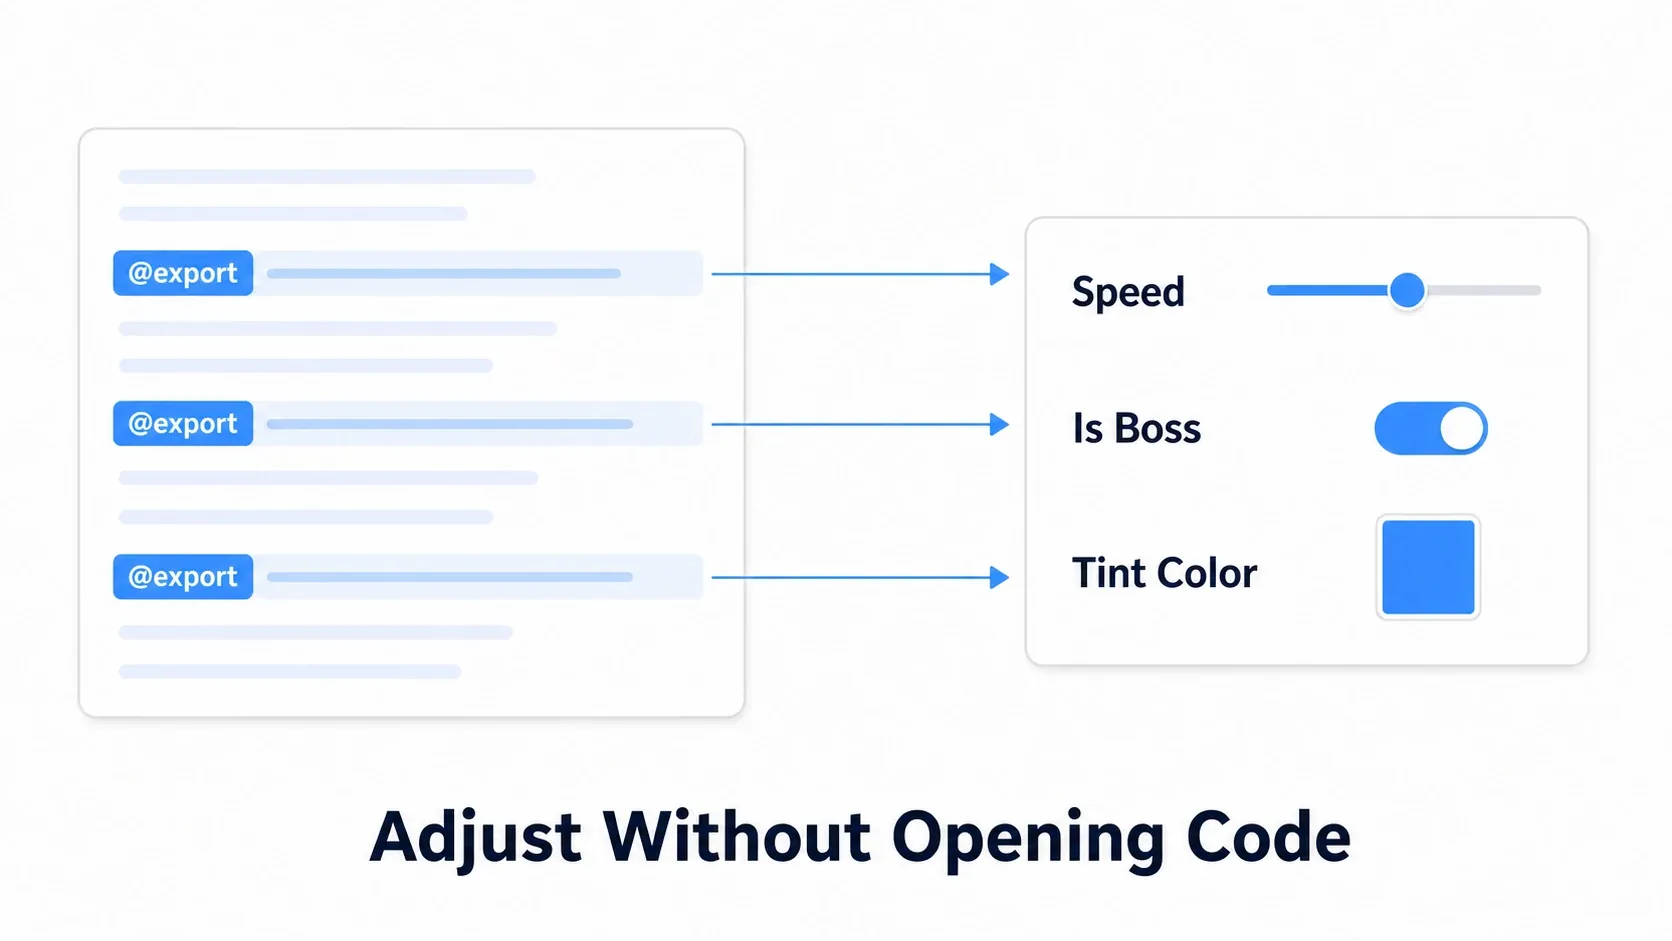
Now that your custom node looks the part, let's give it properties you can configure from the Inspector. Variables marked with @export appear in the Inspector and become editable in the editor. Since you can tune balance-related parameters like enemy movement speed or maximum health without opening a script, collaborating with designers gets much smoother.
Basic @export annotations
class_name EnemyConfig
extends CharacterBody2D

# Basic types
@export var speed: float = 100.0
@export var enemy_name: String = "Goblin"
@export var is_boss: bool = false

# With a range
@export_range(0, 100, 1) var health: int = 50
@export_range(0.0, 10.0, 0.1) var attack_interval: float = 2.0

# Resource references
@export var sprite_texture: Texture2D
@export var death_effect: PackedScene

# Enums
@export_enum("Patrol", "Chase", "Guard") var ai_type: String = "Patrol"

# Color
@export var tint_color: Color = Color.WHITE

# File path
@export_file("*.tscn") var next_scene: String
Arrays and Dictionaries
You can export array-typed properties too, such as a list of patrol waypoints or a list of drop items.
# Typed arrays
@export var patrol_points: Array[Vector2] = []
@export var drop_items: Array[PackedScene] = []

# Flag enums
@export_flags("Fire", "Water", "Earth", "Wind") var elements: int = 0
The result of @export_flags is an int holding bit flags. Use bitwise operations to check them.
# How to check flags
const FIRE = 1
const WATER = 2
const EARTH = 4
const WIND = 8

func has_element(flag: int) -> bool:
    return elements & flag != 0

# Usage
if has_element(FIRE):
    print("Has fire element")
Organizing with @export_group / @export_subgroup
Now that you know the kinds of @export, let's talk organization. Once you have 10 or 20 properties, the Inspector turns into one long list and finding the field you want becomes a chore. Group them into categories to keep things readable.
Here's how you'd group a player character's movement, combat, and visual properties.
class_name PlayerCharacter
extends CharacterBody2D

@export_group("Movement")
@export var move_speed: float = 200.0
@export var jump_force: float = 400.0
@export var gravity_scale: float = 1.0

@export_group("Combat")
@export var attack_power: int = 10
@export var defense: int = 5

@export_subgroup("Weapon")
@export var weapon_range: float = 50.0
@export var weapon_cooldown: float = 0.5

@export_subgroup("Special")
@export var special_attack_cost: int = 20
@export var special_damage_multiplier: float = 2.5

@export_group("Visual")
@export var trail_color: Color = Color.CYAN
@export var particle_effect: PackedScene
How this looks in the Inspector:
@export_groupbecomes a collapsible section header@export_subgroupappears as a subsection inside a group- The layout stays tidy, which helps prevent misconfiguration
Creating Custom Resources
So far we've looked at exposing properties on nodes, but sometimes you want to separate the data itself from your scripts. Weapon data in an RPG, for instance, bundles a name, attack power, range, and icon. Define that as a Resource and you can save it as a .tres file, share it across multiple nodes, and assign it by drag and drop in the editor.
# weapon_data.gd
class_name WeaponData
extends Resource

@export var weapon_name: String = ""
@export var damage: int = 10
@export var attack_speed: float = 1.0
@export var range: float = 50.0
@export var icon: Texture2D
@export_multiline var description: String = ""
How to create a resource file:
- Right-click in the FileSystem panel → "New Resource"
- Search for
WeaponDataand select it - Set the values in the Inspector and save it as a
.tresfile
# Usage: weapon_holder.gd
class_name WeaponHolder
extends Node

@export var equipped_weapon: WeaponData

func get_damage() -> int:
    if equipped_weapon:
        return equipped_weapon.damage
    return 0
Benefits:
- Separates data from logic
- Assignable via drag and drop in the editor
- The same resource can be shared by multiple nodes
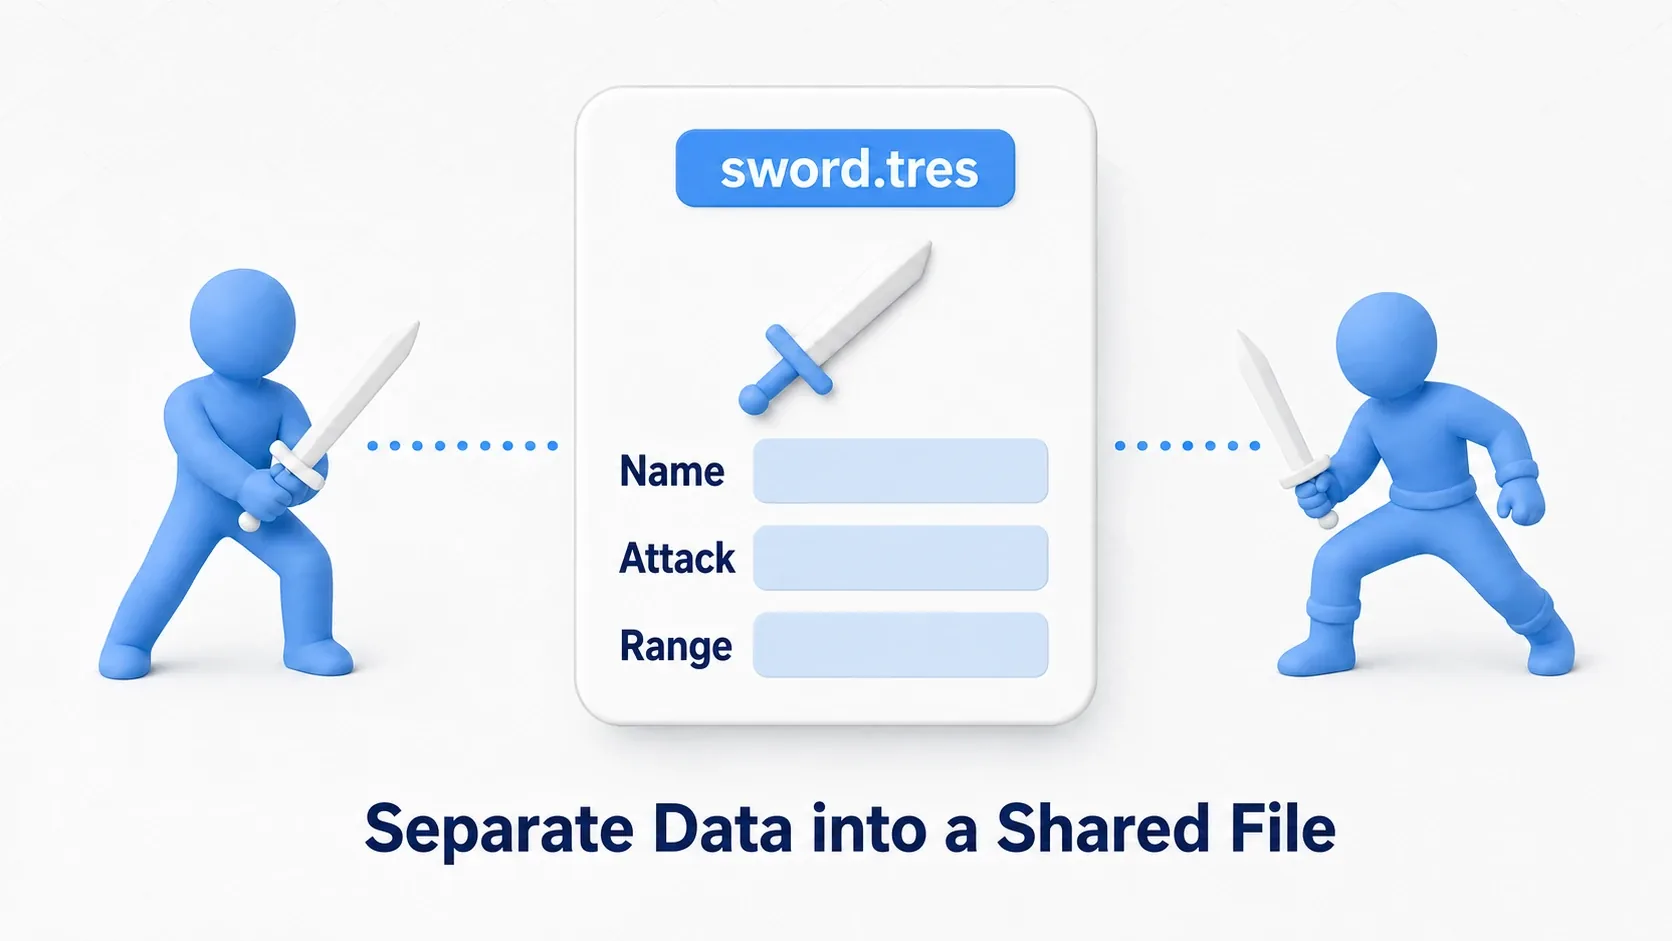
A caveat about shared resources: when several nodes reference the same .tres file, changing a property on one of them affects every reference. If you want per-node values, either call duplicate() or enable "Resource" → "Local to Scene" in the Inspector.
func _ready():
    # Duplicate the shared resource if you want to change it per node
    equipped_weapon = equipped_weapon.duplicate()
    equipped_weapon.damage = 20  # Only this node is affected
Extending Property Editors with EditorInspectorPlugin
This section gets a bit more advanced. You can add custom UI to the Inspector whenever a specific custom node is selected. It answers requests like "I want to preview this WeaponHolder's damage calculation," and it can substantially improve how the editor feels to work in.
The code below shows equipment info and a damage-calculation button at the top of the Inspector whenever a WeaponHolder is selected.
# addons/my_tools/custom_inspector.gd
@tool
class_name WeaponDataInspector
extends EditorInspectorPlugin

func _can_handle(object: Object) -> bool:
    return object is WeaponHolder

func _parse_begin(object: Object):
    var holder = object as WeaponHolder
    if holder.equipped_weapon:
        var info = Label.new()
        info.text = "Equipped: %s (ATK: %d)" % [
            holder.equipped_weapon.weapon_name,
            holder.equipped_weapon.damage
        ]
        add_custom_control(info)

        var preview_button = Button.new()
        preview_button.text = "Preview Damage Calculation"
        preview_button.pressed.connect(func():
            print("Estimated damage: %d" % holder.get_damage())
        )
        add_custom_control(preview_button)
# addons/my_tools/plugin.gd
@tool
extends EditorPlugin

var inspector_plugin: WeaponDataInspector

func _enter_tree():
    inspector_plugin = WeaponDataInspector.new()
    add_inspector_plugin(inspector_plugin)

func _exit_tree():
    if inspector_plugin:
        remove_inspector_plugin(inspector_plugin)
How to enable the plugin: to get an EditorInspectorPlugin running, you need a plugin.cfg file and you need to enable the plugin.
; addons/my_tools/plugin.cfg
[plugin]
name="My Tools"
description="Custom inspector for WeaponHolder"
author="Your Name"
version="1.0"
script="plugin.gd"
- Put the
plugin.cfg,plugin.gd, andcustom_inspector.gdabove into anaddons/my_tools/folder - Enable it under Project → Project Settings → Plugins
Custom Nodes vs. Composition
Have you ever been stuck on "should I build a custom node, or just combine existing nodes?" Each approach suits different situations, and the right choice depends on project size and how much reuse you need.
| Aspect | Custom node (class_name) | Composition (child node structure) |
|---|---|---|
| Reusability | Easy to reuse across the whole project | Tends to be tied to a specific scene |
| Discoverability | Appears in the Add Node dialog | You have to go hunting for the scene file |
| Type safety | Testable with the is operator and type annotations | Requires checking whether a script is attached |
| Complexity | Suits single-purpose functionality | Suits combinations of multiple nodes |
| Configuration | Set directly from the Inspector via @export | Configured per child node |
How to choose:
# Good fit for a custom node: reusing a single piece of functionality
@icon("res://icons/health.svg")
class_name HealthComponent
extends Node
# → shared by enemies, players, destructible objects, and so on

# Good fit for composition: a structure made of multiple nodes
# player.tscn
# ├── CharacterBody2D
# │   ├── HealthComponent
# │   ├── MovementComponent
# │   ├── Sprite2D
# │   └── CollisionShape2D
# → save it as a scene and instantiate it as needed
Summary
- class_name defines a custom node type, usable in the Add Node dialog and in type annotations
- @icon customizes the editor icon and improves visual clarity
- @export exposes properties to the Inspector so you can tune them without code changes
- @export_group / @export_subgroup keep large property lists organized
- Custom Resources separate data from logic and improve reusability
- EditorInspectorPlugin shows custom UI when a specific node is selected
- Reach for custom nodes to reuse single-purpose functionality, and composition for composite structures